Super Bowl Snacks

The Patriots and the Eagles are about to duke it out and all of America and much of the world will be watching and munching. And if we are munching we might as well munch on something really good--like cheese balls and crackers. Who doesn't like cheese? (When she was little, my youngest daughter loved cheese so much she said, "I want to marry it!" Fortunately, her idea of marriage has matured.) In preparation for Super Bowl Sunday, we are going to make two scrumptious cheese balls: A Pesto-Pine Nut Cheese Ball and a Pineapple-Apricot Cheese Ball. 

One of my favorite checkers at my neighborhood grocery store, Karen, told me about this cheese ball. I just had to try it!  Here's what you'll need:

cheese balls final final.JPG

2/3 cup of pine nuts

1/3 cup of pesto

 1/2 cup of shredded or parmesan 

1  8 oz. pkg. of cream cheese

Step 1. In a frying pan using a wooden spoon stir-fry the pine nuts with a teaspoon of butter or oil. Generously salt the pine nuts as you stir continuously. (Trust me: pine nuts burn in a second, so don't turn your back on them.)

Step 2. Mix the pesto, pine nuts and parmesan in a bowl and set aside. (Don't you love the alliteration.)

Step 3. Take a small bowl and line it with plastic wrap, then line the inside of the bowl with the cream cheese making sure to hold back a couple of Tablespoons.

Step 4. Next take half the mixture and using a spoon (or your fingers) press the mixture deep into the entire inside of the dome. You then seal in the mixture with the rest of the cream cheese.

Step 5. You then put a serving plate over the bowl and flip. Next you remove the bowl and carefully peel off the plastic wrap.

Step 6. Finally, you cover the outside of the dome with the other half of the mixture, making sure to press it gently into the surface. (Serve with crackers.)

Here's what you'll need for the Pineapple-Apricot  Cheese Ball:

cheese ball with orange plate 2.JPG

1 8 oz. pkg of cream cheese

1/2 cup of dried and sweetened pineapple chunks

1/2 cup of dried apricots

1/2 cup of chopped pecans

Using kitchen scissors cut the pineapple and apricots into very small pieces and mix them in a bowl with the pecans. You then follow steps 3-6 above.  

Try Them You'll Love Them!

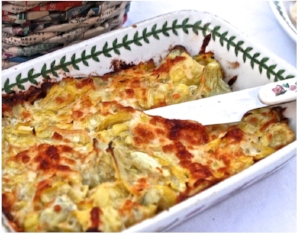
artichoke dip final.jpg

Looking Back:

While we are on the subject of appetizers, the most popular Pickett's Pearls appetizer has been Margy Coleman's artichoke dip from our very first post. The thing that makes it so unbelievable is that it has mozzarella and parmesan cheese! Check it out!


Fun Saying

I was on an airplane one time and I was talking to Jimmy from Austin. I can't remember what we were talking about, but at one point he said, "That must have gone the way of the Do Do." Of course he meant the extinct, funny looking Do Do bird. What a priceless saying! I've tried to work it into a conversation ever since, but it hasn't quite happened yet. But I'm not giving up!

Get Cozy

It's the time of year to wrap up in a blankie in front of a fire and eat soup. I've had this "Chicken and White Bean Soup" recipe for years, but I have no idea where I got it. It's a favorite in the Pickett household. Here's what you'll need:

finished soup 2.jpg

1 quart of chicken broth

2 cans of Great Northern White Beans

3 cups of shredded chicken. (We use roasted chicken from our grocery store.)

2 teaspoons of coriander

Opt. 1 small can of mild green chilis

*Top with a dollop of sour cream or plain greek yogurt and/or parmesan cheese

To make this soup I start with a roux. Go to the blog post "Ritzy Cream Corn" to learn how to make a roux. Once you have mixed half the broth and the roux together and smushed any lumps, transfer the liquid to a pot. Next stir in the rest of the broth, 2 cans of white beans (drained), 3 cups of shredded chicken and the coriander. Sometimes I also add a small can of green chilis, but that isn't necessary.

Looking Back

tortellini soip cropped.JPG

This tortellini soup has been one of the most popular of all the Pickett's Pearls recipes, and it is super, super easy to make. It is will be perfect to serve on Super Bowl Sunday or any other cold winter night. 

Stinky Sponge Update

icky sponge.JPG

Who isn't grossed out by the icky smell of a used sponge? Last year Pickett's Pearls discovered that the solution to the stink was washing our sponges with dishwashing liquid! Then tragically (at least around the Pickett household) our sponges started stinking again. I thought, "Oh no, I have misled Pickett's Pearls readers!" I went into action and did some more experiments and figured it out! The problem was I had switched to using Dawn instead of Lemon Ajax (even the name Dawn sounds wimpy compared to the tough sound of Ajax! Actually it turns out that the big factor is the lemon.) Anyway now that I have switched back to Lemon Ajax, all is well in the stinky sponge department. Whew!


Goat and Blue

The holidays are here so that means it's time for fattening everything including appetizers! We will call these tempting appetizers Puffed Pastry Pinwheels. Maybe it's called Puffed Pastry because it puffs you up, but these are worth every bite. We are making two kinds: One with goat cheese and one with blue. This idea was inspired by Leslie Quinton who lives in San Juan Capistrano, CA. Here's what you'll need:

pinwheels A.JPG

Puff Pastry in Sheets

A 4 oz. container of crumbled goat cheese

A bunch of green onion

A 4 oz. container of crumbled blue cheese

1/2 cup of dried cranberries

Pre-heat oven to 375. First, thaw the puffed pastry until it is very cold but not frozen. Then, cut the white and green parts of the onion into round, thin slices. Next, finely mince the cranberries. (You can use a knife or a food chopper.)

You then spread 1/2 of the dough onto a cutting board and put the other half in the frig. Next roll out the first half with a rolling pin joining any seams together using a little water. You then cover the top of pastry with the goat cheese and onion. Next roll up the dough and pinch the ends shut. Finally, (with a gentle sawing motion) slice 1  to 1 &1/4 inch pinwheels and place on a sprayed cookie sheet. (Repeat steps for the blue cheese and cranberry.)

Bake for approx. 15 min. to 18 min. at 375 or until light golden brown on top. Yum!

Try Them You'll Love Them!

Cooking Tidbit: What is the difference between Green Onion, Scallions and Spring Onions? Not much, so they can be used interchangeably. 

Looking Back

caprese.JPG

In addition to these scrumptious pinwheels, you may want to serve a lighter appetizer. Back in May, Pickett's Pearls did a post on the colorful and very fresh Italian Caprese. 


Soup's ON

A few years ago I was in Paris with some good friends. Believe it or not we still talk about the Butternut Squash Soup that we had at a restaurant called Les Papilles. You may not be talking about this recipe for years to come, but its memorable all the same, and it’s super simple to make! Here’s what you’ll need:

butternut final 2.jpg

3 cups of cubed butternut squash (Many grocery stores have butternut squash already cubed in their produce section.)

1/4 cup + 2 Tablespoons of chopped red onion

3 cups of low sodium vegetable broth

3/4 cup of half and half or light coconut milk. (The coconut milk will give the soup a sweeter taste and make it vegan.)

Step 1. Small cubes of squash cook faster, so you may want to re-slice your cubes into 1/2 inch pieces.

Step 2. Cover a large sauce pan with a thin film of oil and saute the onions on medium until they are translucent.

Step 3. Add vegetable broth, cubed squash, half & half (or coconut milk) along with approx. 1 & 1/2 teaspoons of garlic salt and 8 cranks (or so) of pepper.

Step 3. Bring to boil then simmer mixture until a fork goes through the squash easily.

Step 4. In a blender or food processor puree mixture entirely. (If it’s too thick, add a bit more vegetable broth.)

*Garnish however you like or not at all. It’s great served with French Bread but what isn’t. (We put croutons and bacon on top - delicious!)

Serves 6

**My daughter’s best friend, Krysia, tasted this recipe and promptly added curry powder to it. Curried Butternut Squash Soup is quite common. If you’re so inclined, just add curry to taste (about a Tablespoon).

Looking back

Pickett’s Pearls has featured lots of yummy soup recipes, and of course they are all only four ingredients! Tortellini Soup, Southwest Soup and Chicken and White Bean Soup.

Dress Up Your Pumpkins

CU2A1843.jpg
CU2A1835.jpg

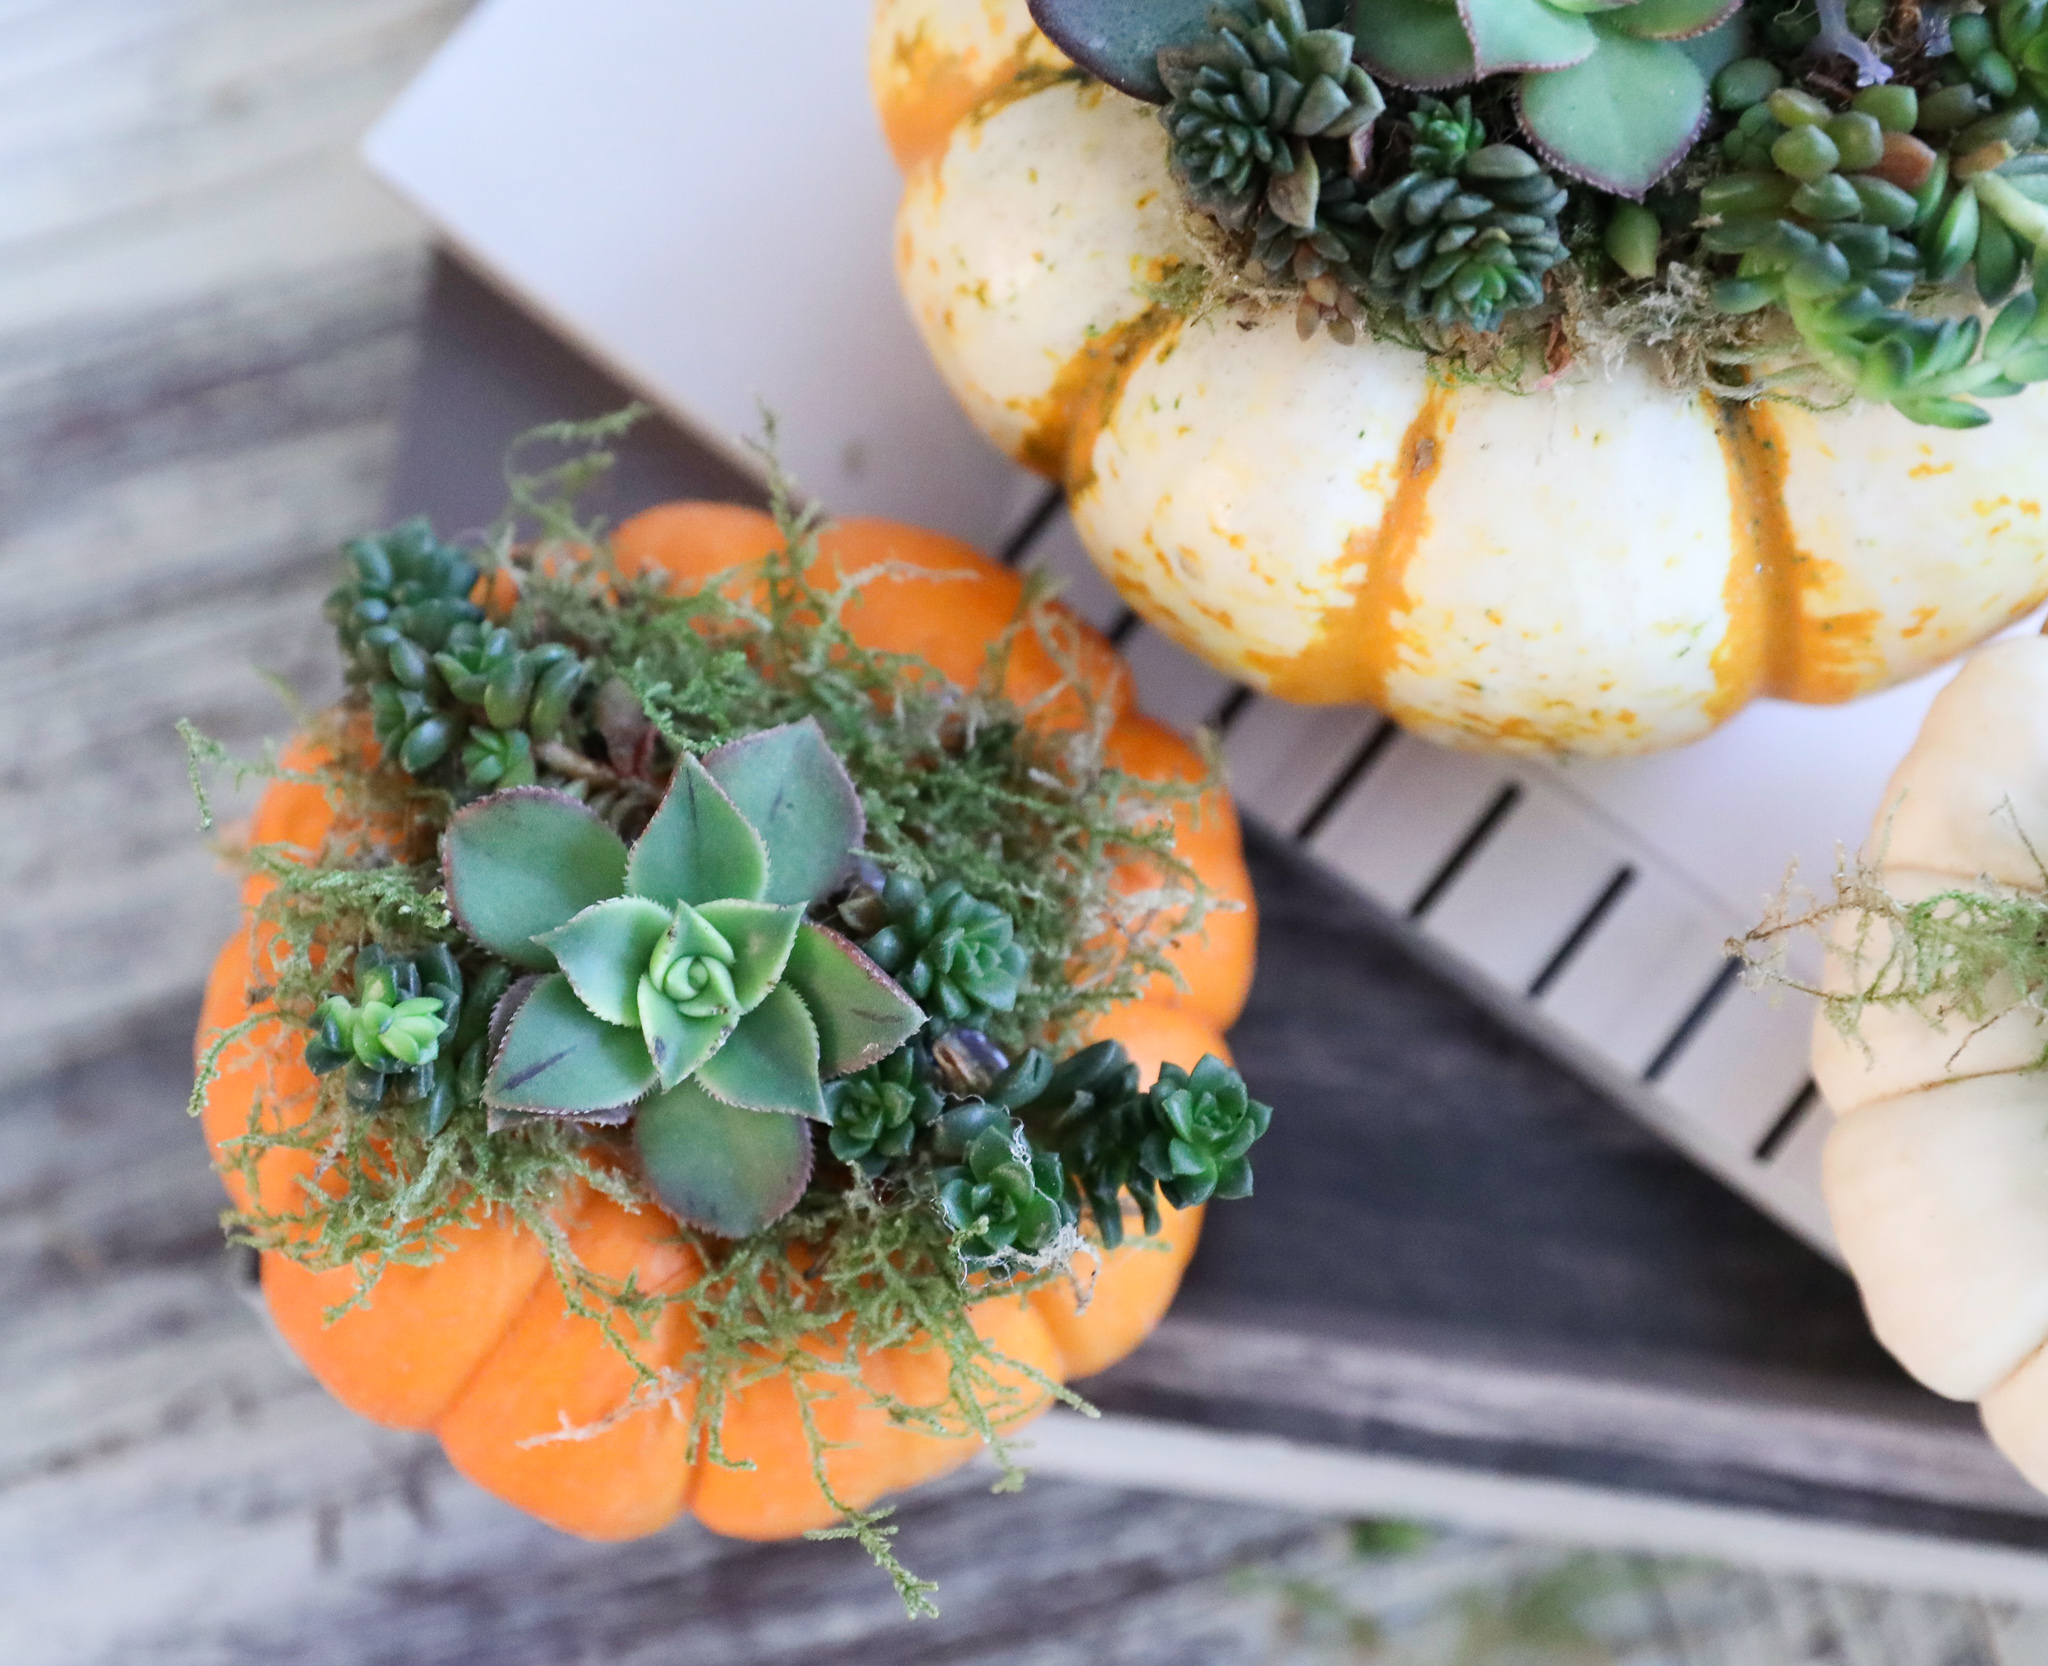
My good friends Jill and Lisa were the first ones to introduce me to these dressed up pumpkins. Not only are they precious, they are super easy to make. All you need is:

Any sized pumpkins (try to find  ones that have no holes.)

Dried moss from a craft store

Various kinds of succulents (the least expensive way is to get a pot filled with multiple kinds.)

Hot glue gun and sticks

Scissors 

Serrated  knife

Step 1. If the pumpkin has a long stem, carefully saw it off, but not so low that it cuts the pumpkin in any way.

Step 2. Arrange some of the moss so that it covers a large portion of the top and use the hot glue gun to glue it down.

Step 3. Decide which succulents you want to use and cut the stems so that there is only a bit left on each bud (approx., 1/4 in. for baby pumpkins, 1/2 in. medium sized etc.)

Step 4. Arrange the succulent buds on top of the moss and glue each bud down. (If you have leaves that have come off, you can glue those in as well.)

Step 5. Spritz them with water every week or so. Lisa’s  succulent pumpkins have lasted 2 years!! (She told me the other day that they must thrive in hot glue. Who would have thunk?)

orange succelent.jpg

** Did you know that you can take succulent clippings, just stick them in moist dirt and they will take root and grow? It’s like magic!

Fun Saying

I can always depend on my friend Lisa who was raised in Montreal to tell me funny French sayings. The latest one she shared was, “Revenons à nos moutons” which someone says when they want another to return to the subject at hand. The funny thing is that it literally means, “Let’s get back to our sheep.” Baaa!

Apples to Apples to Apples

It's apple season, so I thought it might be fun to make some apple things. Of course, I probably gained 10 lbs. testing out all these "apple things".  All three of these recipes are super easy to make but no less tasty. The first recipe I call "Iced-Spiced Muffins".  Here's what you'll need:

vertical apple spiced muffins.jpg

A box of Betty Crocker Spice Cake mix

1 & 1/3 cups of chunky apple sauce

1/2 cup of chopped pecans

3/4 stick of butter

Pre-heat oven to 350. Add 1 &1/3 cups of applesauce and all but 1/3 cup of the cake mix to mixing bowl and stir well. Next stir in the chopped pecans. You then spray a muffin tin with cooking spray or use paper muffin cups and fill them 3/4 of the way. If you would rather make Apple Bread, spray loaf pan and fill that up about 3/4 of the way up as well.  

Bake muffins for approx. 17 minutes, loaves for approx. 35 min. (Of course with both an inserted tooth pick should come out clean.)

While muffins are baking, combine butter and 1/3 cup of the cake mix on low heat in a sauce pan. When muffins come out of the oven and are still warm, poke small holes on top and pour mixture over the muffins. Totally delicious! 

Apple Dump Cake

Dump cake.JPG

Our next yummy apple dessert is called a Dump Cake. Even though the name is anything but appealing, the dessert is totally scrumptious and super easy. Last October I posted about an apple dump cake that is great for fall! (If you would like this recipe, choose desserts up above then hit the apple dessert. picture.)


apple layer 1.jpg

Apples and Cream

I got the idea for this delectable dessert from Sue Davis from Switzerland.  Here's what you'll need

2 pkgs. of almond cookies

6 tart apples such as Granny Smith

Whipped cream

Opt. Caramel sauce

Pre-heat the oven to 350. First peel the skin off the apples, chop them into very small pieces and bake them un-covered for 15 to 20 min. (You want the apples on the soft side but not at all mushy.)

While the apples are baking, put the cookies in a large plastic bag and crunch them up into very small pieces. You then layer them on the bottom of a dessert bowl or individual dessert bowls almost 1/2 an inch thick. Next add a layer of baked apples, then a layer of whipped cream. Repeat these steps. At the very top drizzle caramel sauce. (You can also sprinkle some of the cookies crumbs on top.) Heavenly! Serves 6 to 8

Try them you'll love them!

mini pumpkin.JPG

Precious Pumpkins

A fun thing to make for fall is mini pumpkin flower arrangements. Last autumn Pickett's Pearls featured these precious little things. They are great for table decorations, gifts or party favors! (If would like details on how to make these, choose Creative/Helpful Ideas above then hit the mini pumpkin picture.) 

Sweet and Savory

Lamb with Garlic-Mint Sauce

Growing up lamb was a special dish and we always had it with mint jelly. Have you tasted that jelly lately? You might as well pour sugar directly onto your lamb! Here is a grown-up recipe that I'm convinced you'll love, and of course it has 4 ingredients:

4 Tablespoons of olive oil

vertical lamb.jpg

3 finely minced cloves of garlic (I like the ease of using the frozen cubes of minced garlic from Trader Joes or the jarred minced garlic.)

4-6 lamb loin chops or lamb chops

2 Tablespoons of mint jelly

Turn the oven on to 200. You then heat the oil in the skillet on medium high. Next sprinkle each side of the lamb chops with garlic salt and once the skillet is super hot add the chops. Cook about 1&1/2 to 2 min. on both sides until each side is browned and has a nice crust. Turn off the pan, cover it, and remove from heat to allow the lamb to cook through. About 3 more min. for lamb loin chops and 2 min. for lamb chops.

BEFORE the chops have reached the desired color inside, remove from the pan, wrap tightly with foil and put in the oven. You then turn the eye on low and return the pan to the heat. Next with a wooden spoon stir in one more tablespoon of olive oil and the garlic into the leftover liquid. Don't forget to scrape the bottom of the pan, so you can get all the yummy stuff. You then stir in the mint jelly long enough for it the liquify. Remove chops from the oven, place on plates, pour sauce over chops and serve immediately.

If you are making 2 batches, cook each batch in the oil before you do the sauce. After your chops are warming in the oven, add 2 more Tablespoons of oil, 6 finely minced garlic cloves,  4 Tablespoons of jam and stir.  Pour sauce over lamb and serve immediately.

TRY THEM YOU'LL LOVE THEM!

Made to Order

This is a super easy way to make earrings just how you want them! Here's what you'll need:

Beads (1 to 4 different kinds) Your own jewelry is a great resource. In this case, I cut off a strand of a 3 strand bracelet that I got at TJMaxx.

Head pins

2 earring hooks

2 Jump rings

Step 1. Gather your materials: beads, head pins, earring hook and jump rings.

Step 2. First you design your earrings, then you put half the beads on a head pin. Next you snap off the head pin 1/2 inch above the top bead.

Step 3. You then take your rounded needle nose pliers and make a loop. 

Step 4. After that you close the loop using your regular needle nose pliers.

earring parts.jpg

Step 1.

e1a.jpg

Step 2.

e2.jpg

Step 3.

e3.jpg

Step 4.

Step 5. You then attach your earring hook to the beaded head pin using a jump ring. (See a couple posts ago on working with jump rings.) Now you have a darling pair of earrings that you can wear yourself or give as a gift!

E4a.jpg

Step 5.

e5.jpg
abbey earring
earrings and bracelet.JPG

* We will pick back up with simple jewelry making tips after Christmas. The holiday season is upon us!

Fun Saying:

The other day one of my friends said, "That's no skin off my nose." OW Another variation of this quote is also "That's no skin off my back." (OW) And a totally weird variation that makes zero sense is: "That's no skin off my teeth." The only thing I can think of is back when this saying originated people didn't brush their teeth, so they had a layer of scum on their teeth like skin. GROSS!!!

Brussels Sprouts: a main event

As I've admitted before, I'm not a big fan of vegetables. Brussels sprouts especially. Unfortunately, my husband's family has always had them on Turkey Day. (Thank goodness I was raised in the south where they didn't serve anything that healthy for Thanksgiving!) Of course brussels sprouts are Todd's favorite vegetable. Recently he made a brussels sprouts dish that I liked. I actually loved it (Shhh!). Of course, the dish also has potatoes and bacon. Who can't love that? Here's what you'll need:

2 lbs. of brussels sprouts

brussels 3.jpg

1 & a 1/2 lbs. of potatoes (We use multicolored fingerling or new potatoes for color.) The purple ones are beautiful inside!

6 strips of bacon

Balsamic reduction or glaze (Rachel Ray makes a great one!)

Pre-Heat oven to 425.

Step 1. Fry the bacon till it is cooked half way. Then cut into bite-sized pieces.

Step 2. Wash the sprouts and cut into large chunks. Next do the same for the potatoes.

Step 3. You then put all 3 ingredients in a large iron skillet or casserole dish and toss with a bit of the bacon drippings, garlic salt and cracked pepper. Cover dish loosely with foil. Roast the dish for 45 to 55 minutes or until you can easily put a fork through the brussels sprouts and potatoes.

Step 4. After you remove the dish from the oven, generously drizzle the top with balsamic reduction.

***At our house we make a sauce with a mayonnaise substitute called Lemonaise from Ojai Kitchen mixed with some crushed garlic and lemon. (You could also use regular mayo with garlic and lemon or a chipotle mayo.) Serves 6 to 8

Cooking Tidbit:

What is the correct spelling Brussels Sprouts or Brussel Sprouts? The answer is both, so you can spell it any way your little heart desires!

spinach salad.JPG

Sweet and Blue

This brussels sprouts dish would go perfectly with the spinach salad in Pickett's Pearls blog post called "Sweet and Blue" especially if you add chicken to the salad. (We use the roast chicken from our grocery store. That way things are easy-peasy.)


elastic 5.JPG

Elegant, DIY Bracelets

The simpliest way to make a bracelet is by using elastic. Here's what you'll need:

A tape measure

Lots of beads (1 to 3 different kinds). Your own old jewelry is a great resource!

Elastic - size 5 mm  ( The thinner elastic stays knotted better.)

GS jewelry glue.

Step 1. Come up with a design you like.

Step 2. Measure your wrist and add an inch. (Elastic bracelets for small wrists are about 7 inches and bracelets for regular wrists are usually 7 and 1/2 inches.

Step 3. Next with the free end of the elastic, start beading. (You'll want the other end of the elastic to be wound around the spool itself.)

Step 4. After you have reached the desired length, cut the elastic with at least 4 extra inches on each side. You then stretch out the elastic and stretch some more.

Step 5. Next you tie a very tight triple knot and put a couple of dots of the glue on the knot. After the glue has dried, cut the elastic and enjoy your bracelet! You may want to do 3 or more bracelets for a more dramatic effect.

stringing braccelet.jpg
bracelet glue.jpg
bracelets 3b.jpg

Fun Saying

Just the other day I heard my husband say: "If you don't have a seat at the table, you are probably on the menu." I had never heard this one before. I definitely don't want to be on the menu. Do you? We better stay involved!

brussels 2a.jpg

Yet Another Taste Test

I can't help it. I have to do another taste test. I'm addicted. The first taste test I hosted was in my 20s when I worked at Diedrich Coffee. I invited a bunch of my friends over and did a blind coffee taste test. Sumatra won, by the way.

Well this time it's hummus. Who doesn't like hummus? I decided to do a hummus taste test featuring the classic Trader Joe's hummus, the classic Costco/Ralph's grocery store hummus and my 4-ingredient Pickett's Pearls hummus. My goal was to try to see which store brand was better and then make a "better than the store" hummus using just 4 ingredients. The first four batches didn't amount to much (except a lot of dirty dishes).

hummus 3.jpg

However, I was NOT giving up. Finally on my last try it all came together. In a blind taste test, my family picked my hummus first before (2nd) Costco's/Ralphs brand (Sabra) and (3rd) Trader Joe's!!!!! 

My efforts had paid off and it was time to take things on the road. Even with a larger group the results were the same. So, you wanna make really good 4-ingredient hummus? Here's what you'll need:

1 can of garbanzo beans well drained - liquid set aside

1/3 cup of tahini unstirred so you can get some of the oil. (My family boycotts any humus I make unless it is Trader Joe's. Other tahinis, even Joyva, have a bitter aftertaste.) 

1/4 cup of fresh lemon juice + 1 Tablespoon 

3 garlic cloves crushed (the easiest form of garlic are those little frozen cubes from Trader Joe's or crushed garlic in a jar.)

Using a food processor, add the tahini, lemon juice, garlic, a level 1/2 teaspoon of salt and 5 cranks of cracked pepper, then blend well (30 secs. or so). Then add 1/2 the garbanzo beans and again blend well. Next add the second 1/2 half of the beans and 3 tablespoons of the garbanzo liquid and again blend well. Finally, add 3 tablespoons of water then blend until ultra smooth (two minutes or more.) Use this time to clean-up because you have just made a bit of a mess. 

*Check out my friend Nanette's blog post on Mediterranean Nachos. Her blog is called "At Home with the Loverbees": The sweet, real, and fun life of a family enjoying food, faith, homeschooling, crafting, and country living.

meatballs.JPG

**This homemade humus would go marvelously with Middle Eastern Turkey/Zucchini Meatballs! See the Pickett's Pearls blog post "A Taste of Jerusalem" from last February.

Jewels Beautiful Jewels

I've been making jewelry so long that I can't even remember where I learned how. Right off the bat I got a small pair of round needle nose pliers, a small wire cutter and a small pair of regular needle nose pliers and those are all the tools I've ever needed.  Jewelry making has been an awesome creative outlet for me. Everyone in my family drew and painted like Leonardo DaVinci, so for me to be  good at something creative felt awesome. Not surprisingly, I would love to share some jewelry making skills with you.

jewelry tools.JPG

The first skill we will be focusing on is shortening or lengthening pieces that we already have.  (The jewelry we already have is one of our best resources when it comes to jewelry making.)

For instance, below is a pair of earrings that I have never worn because they are too long for me. So I’m going to take my two pairs of pliers and open the jump ring or connector ring at it’s natural break, and twist the pliers in opposite directions. Once I remove the bottom diamonds and connector rings I will have a pair of earrings I’ll actually wear!

long earring squared.jpg
earring fix squared.jpg
short earring squared.jpg

Next I’m going to take a long necklace, which I’ve never worn and turn it into a bracelet. First I wrap it around my wrist and then measure (count) how many beads I need to remove. Then I remove the section of beads I don't need by using my two pliers to open the connector rings on each end of the section.

 Next I take one part of a clasp and add it to one end again using my pliers. Then I add the second part on the clasp to the other end. Finally, I wrap it back around my wrist, clasp it and voila! I have a fun dangly bracelet.

extra beads 2.JPG
Final clasp.jpg
bracellet better.jpg

Finally I’m going to take a beautiful long necklace that I don’t wear much anymore and shorten it. After I have figured out how much chain to remove, I use my two pairs of pliers to shorten the necklace by opening one of the jump rings.

After I have removed the extra chain, I close the jump ring. (You will probably have to work with it a little to close it tight.) This necklace already has a clasp, so there is no need to add one.  Now I have a beautiful short necklace. (I always keep any left over parts of jewelry that I remove, so if I want to add them back or make something else out of them I can.)

long necklace final.jpg
chain fix squared.jpg
necklace alexia.jpg

In the following weeks we will focus on : making elastic bracelets, making earrings and using crush beads and wire to make bracelets and necklaces.

*New Pickett's Pearls posts are now every other Wednesday. Subscribe below so you will know when a new post is out!

Iron On

Did you grow up with your mother or grandmother using a cast iron skillet? I know I did, but when the new fangled non-stick teflon pans came out, all iron skillets got the shaft. Now they are back in style and all the rage.

I was curious so I asked my nephew, Chris Nunzita, to explain the big craze. (His creations are below.) He said: 1. They cook the food evenly, so the food in the center doesn't cook faster than the food around the edges.   2. They hold the heat in ; thereby, keeping the food warm even after you turn off the stove. 3. They don't emit harmful chemicals like teflon pans do. They are in fact a healthy source of iron. Hence the "iron" in iron skillet. 4. They are very affordable and they last forever. You could actually will them to your children and grandchildren. 

There are also iron grills. My good friend Lara Lanfried uses hers everyday to cook anything from Pancakes in the morning to steaks at night. She never even puts her's away! One of her favorite things to make on her iron grill is what she calls "Skillet Steak".  Here's what you'll need:

1 Lb of Tri Tip

1/3 cup of olive oil

 2 Tablespoons of red wine

Cut the tri tip into 2 inch pieces then place in a large baggie with olive oil, red wine, sea salt& pepper. Marinate meat anywhere from a few hours to overnight. When ready to cook, melt some butter over high heat and add the meat. (High heat will sear or brown the outsides.) Cook on each side on high for 2&1/2 to 4 minutes or until just before inside of steak reaches your desired degree of pink. Simply mouth-watering!

Beer?

Linda who is my favorite checker at Ralph’s gave me this tri tip marinade recipe:

2 lbs. of tri tip

1/2 cup of your favorite beer

1/4 cup of soy sauce

2 teaspoons of fresh garlic

(Opt. 1 teaspoon of fresh ginger)

She mixes all the ingredients and adds the mixture to the tri tip pieces in a large plastic bag. She then lets the meat marinade for 2 to 3 days. (I guess it’s almost impossible to marinade meat for too long.) Finally she barbecues it or cooks it in an iron skillet. Linda says that it’s the alcohol in the beer that tenderizes the meat. I have since talked to others who marinate their steak in beer. Go figure.

Try it You'll Love It!

Fun Saying

My  childhood friend, Bradley, (She was the first girl in history that had a boy's name, and believe it or not my other good friend was named Gregg.) I've gotten way off track. Anyway Bradley recently reminded me of the saying, "I put a bug in his ear." Gross!!!!!! I can just envision a cock roach climbing into someone's ear. The saying means to plant a thought into someone's head. Now isn't there a better way to put that?

The Perfect Veggie-Packed Pesto Pizza

My husband, Todd, came up with this veggie pizza recipe years ago and we have had it over and over and it doesn't get old. The good news is it's super, super easy. This pizza is another way that makes veggies attractive for those who are a little less than enthusiastic about 'em. Here's what you'll need:

2 small gluten-free pizza crusts or 1 large pizza crust. (We use Udi's)

A container of fresh pesto (If you want the pizza to be vegan, you can buy or make dairy-free pesto)

A can of artichoke hearts

1/2 package of grape tomatoes

Optional: Greek olives and/ or roasted zucchini, yellow squash, eggplant, red onion

Cover the top of the pizza crusts with about 2 tablespoons of pesto. (Trader Jo's is the favorite around the Pickett household.) Then drain the artichokes hearts and cut them into small pieces. Next cut the baby tomatoes (and any other veggies you are going to use) into small pieces. You then cover the the top of the pizzas with the veggies and cook as directed on the pizza crust package.  You may be thinking "Cheese-less! what's the point?" Try it and you'll see surprisingly that it's better sans cheese.

Cooking Tidbit: The main difference between roasting and baking is that with roasting the temperature is 400 or over; therefore, roasting has more of a browning and dehydrating effect.

Organize Organically

Every year the EWG (Environmental Working Group) comes out with a list of produce that we should buy organic and produce we don't have to. I wrote about fruits in my recent blog, titled "All American Trifle". With fruits there seems to be a rule of thumb that those with hard skins (or inedible skins) have much less pesticides than those that don't. With vegetables there isn't as much rhyme or reason. For instance: white potatoes have been found with lots of pesticides while sweet potatoes haven't. Regular corn has more pesticides than sweet corn. Go figure.

Some of the Foods You Should Buy Organic:

Celery, tomatoes, leafy greens such as spinach and lettuce, potatoes, peppers of all kinds and cucumbers

Some of The Foods You Don't Need To Buy Organic:

Onions, asparagus, sweet corn, eggplant, sweet potatoes and cauliflower

Enjoy Your Veggies!

Party Time

Parties aren't complete without appetizers, and a total crowd pleaser is anything wrapped in bacon! The wildest one I've had is banana wrapped in bacon and, believe or not, it was quite good. But in my book,  bacon wrapped dates filled with goat cheese are the ones to die for. Here's what you'll need:

  • Regular bacon
  • Dates
  • Goat Cheese
  • Toothpicks

First preheat oven to 350. Then cut each piece of bacon into thirds. (Most recipes call for 1/2 a piece which I think makes them too greasy.) Next take a date and set it up straight then cut it lengthwise. Fill one half with goat cheese and put the two halves together.

Next wrap the dates in the bacon and keep them together with toothpicks. Place them on a cookie sheet that has a lip and cook them on each side for 8 minutes. (Longer if needed.) Remove from oven, dab with a paper towel and serve warm. 

Parties On A Budget

I love parties and have thrown lots and lots. Many of them have been for my daughters' birthdays. (If I wasn't a therapist, I would probably be a party planner.) Here's some simple ideas and money saving tips that I've learned along the way when giving a more formal or semi-formal party. (Looking at Pinterest is intimating for most of us. These ideas are super doable.)

The first thing is picking a color scheme. (I like to use two different colors, at least.) I suggest buying white tablecloths because it costs just as much to rent them as it does to buy them. Purchasing tables versus renting them is also something to think about because renting a table is about $15 and buying one is about $30.

If you want to bring color into your set up, you can lay cloth napkins under the centerpieces. Renting cloth napkins are only about $1 each and they really add a lot. TJ Maxx and World Market also have very inexpensive cloth napkins. 

Table runners are of course an option and they are only about $4 to rent. Another thing to consider is buying white plates which again you can use over and over. You can get them a TJ Maxx or World Market for around $2 each.

Flowers are a must, of course, (See Put A Little Drama in Your Life for a simple yet elegant way to make centerpieces). Hydrangeas are the easiest and you don't even need oasis. Finally make sure that your arrangement is low enough for your guests to see each other. 

Another thing to think about regarding flowers is purchasing square glass flower containers. You will use them again and again and they are only about $10 each. I tie a ribbon around each base to make the table look more elegant. 

Special napkin folds are a great way to make a table more attractive. (See Creative/Helpful Ideas for 3 super easy ones.) To rent cloth napkins it is about $1 each and they really add a lot. Also TJ Maxx and World Market have very inexpensive cloth napkins. Finally one thing that really adds to a table set up is to use chair bows. (I love chair bows!)

Fun Saying:

"You've got a bee in your bonnet." That's kinda scary cause if there's a bee in your bonnet, it's gonna sting the heck out of you. Funny enough the original saying was, "There are bees in your head". That's a funny way of saying that someone is in a tizzy. Now isn't it?

Sweet and Blue

My very close friend Debbie Trammel, Newport Beach, taught me how to make this easy and delicious salad. All you need Is:

A bag of spinach or any other lettuce

1/3 cup of gorgonzola cheese (Goat cheese can be used instead.)

1/3 cup of dried cranberries

1/3 cup of chopped pecans or sliced almonds

Opt. Chicken and/or Avocados

Cooking Tidbit: Have you ever wondered what the difference is between Gorgonzola and blue Cheese? I looked it up and found that Gorgonzola is a type of Blue Cheese!

Here's how you make the salad: Place the nuts in a small frying pan along with 1/2 teaspoon of butter and 1/2 teaspoon of sugar. Stir over medium heat until golden brown and set aside to cool. (You can also buy already candied nuts at Trader Joe's or just use un-cooked nuts.) You then toss all ingredients along with a sweet balsamic dressing. (This can be found just about anywhere, but I like throwing one together on my own.)

Classic Balsamic Dressing

Debbie also taught me how to make this Balsamic dressing. Using a container with a lid, put in 1/2 cup of olive oil, 1/3 cup of balsamic vinegar1 teaspoon of dijon mustard and 1/2 teaspoon of sugar. Season it with garlic salt and pepper, then shake vigorously. (With the lid on of course.)

Fun Saying

The random saying for this week is: "Cat got your tongue?"Ow! Ow! Ow! What an image. Whoever came up with that one had a bit of a masochistic mind. Wouldn't you say?

Dress It Up With A Bow!

The bow napkin fold is one of the easier folds, but it looks no less special. It's perfect for every kind of party from baby showers to dinner parties. You will need a cloth napkin and a 12 inch ribbon. Here are the steps: 

Step 1. Take a pressed napkin and turn it so that it looks like a diamond with the bottom pointing towards you.

Step 2. Bring the bottom point up to the top point, so that it makes a triangle.

Step 3. Fold the top points down almost to the bottom edge.

Step 4. Then fold the top down again to meet the bottom edge.

Step 5. Fold the right side in a third of the way.

Step 6. Then fold the left side in a third of the way.

Step 7. Slide a ribbon under the napkin.

Step 8. Tie the ribbon tightly

Step 9. Turn it over and you've got your bow!

Just A Trifle

This dessert is also perfect for showers and parties, and it's seriously yummy. (A couple of weeks ago my husband, Todd, and I almost ate the whole thing.) It's not only delicious, but it's easy to make.  Here's what you'll need:

2 large cartons of strawberries

20 oz of heavy whipping cream

1 large box of vanilla pudding mix (not French vanilla)

2 Sara Lee pound cakes (or regular pound cakes)

Here's how you make it:

-Cut the pound cake into cubes and line the bottom of glass bowl with them.

-Wash strawberries, remove stems, and separate into two groups. With a "Bullet" or food processor, puree half the strawberries. Then spoon half of the puree over the pound cake pieces that are in the bowl.

-With an electric mixer blend together pudding mix (minus 1 heaping tablespoon), 1/2 cup of whipping cream and 1 & 1/2 cups of water on high for 2 min. Next spoon a layer of the pudding over the soaked pound cake.

-Cut the other half of strawberries into bite sized junks and spoon a layer of strawberries on top of pudding.

-Again with an electric mixer blend together 2 cups of whipping cream and the heaping tablespoon of pudding mix for  2 min. Then spoon a layer of the whipped cream over the strawberry layer.

-Repeat steps making sure you end with the whipped cream on top. Garnish the top however you want.

Opt. You can make the trifle with blueberries, raspberries, or blackberries. (The great thing about these berries is that you don't have to remove stems or slice them!)

*You can mix a couple of tablespoons of Grand Marnier or Triple Sec into the berry puree.

**You can also make baby trifles in individual glass bowls.

Cooking tidbit: The difference between regular vanilla ice cream/pudding and "French" vanilla ice cream/pudding is the added egg yolks. 

Abraquadabra

I was over at my friend's Michael and Marcy's  in Laguna Beach, and I remarked at how beautiful their garden was. Right there and then Michael cut me some stems way down at the base and told me to just stick them in the ground at my house and watch them grow. The one that took was the Chocolate Geranium. I was amazed! It was like magic!

Recently, I talked to another friend, Dale, also from Laguna Beach. He said the thing that would help the process would be to plant the stems in pots, then water them daily for a while. He also said that he does the same with succulents, and once the succulents take he only waters them when he feels like it.

You Can't Go Wrong

One last suggestion for Easter Eats. This is an appetizer idea that I got from my friend, Gina Carpenter, Newport Beach. It has gone over like gangbusters with family and friends and it is super easy! Of course, you can never go wrong with anything on a baguette. Here's what you'll need:

A French Baguette

 A 4 oz. can of chopped olives

1/3 cup of crumbled feta

2 tablespoons of pesto (Trader Joe's has great fresh pesto.)  

Combine the chopped black olive, crumbled feta, and pesto in a small mixing bowl. (My favorite mixing tool is a single beater from my electric hand mixer.) Just before serving, bake slices (about 1/2 inch thick) of baguette at 350 for a few mins. until they are golden brown around the edges. Once slices are toasted, spread them on top with a thin layer of olive mixture and serve. Super yummy!

Cooking Tidbit:

Have you ever wondered what the difference is between feta and goat cheese? Feta is made in a specific region of Greece. It is mostly made from goat's milk with a little sheep's milk thrown in. Goat cheese is just as it sounds. (Both animals make one of my favorite sounds: Baaaa) My daughter, Carly, was in New Zealand last year and she actually hugged a sheep. I wish I had been there to see that!

Great Guac.

I got the idea for this guacamole from my sisters's chef. We call her Chef Jen. The recipe is really simple, but that's the beauty of it: the taste of the avocado isn't smothered.

Here's what you'll need:

3 medium sized, ripe avocados (or the equivalent)

1 Tablespoon of lime

1/2 teaspoon of garlic salt 

(Opt. ) My secret ingredient:  1/2 teaspoon of homemade Hidden Valley Ranch Dressing

Scoop the avocados into a mixing bowl. Using a fork mash the avocado, making sure that you leave lots of chunks. Next lightly mix in lime, garlic salt (and ranch.) Sample the guacamole with chips, so you know how it will really taste. Serve with tortilla chips. (Serves 4 -6 depending how hungry people are.)

Fun fact: We celebrate Cinco de Mayo in the States on May 5th (the day that  Mexico won a battle against France). The real independence day for Mexico is September 16th which is the day they won their independence from Spain 50 years earlier.) People from Mexico actually laugh that we make such a big deal about "Cinco de Mayo",  but hey it's a good excuse to have fun!

cl guac.JPG

Easter Eats

Easter dinner isn't the most important part of Easter by a long shot; however, it is a yummy part. Here is a  menu that might give you some ideas for your own Easter dinner. 

Lemon-Dill Salmon

Salmon seems to be a crowd pleaser even among people who don't really like fish in general. (The guilty will remain nameless.) Here's my husband's favorite, quick and easy way to make salmon, and he's quite a good cook!

Salmon filets (okay if skin on one side)

2 tsp olive oil (or olive oil spray)

Fresh dill, chopped

A lemon

Preheat grill, medium high. With foil, create a rectangular "tray" (or 2), folding up the foil to create sides that will prevent liquid from seeping out.  Spread (or spray) olive oil on the foil. Lay filets in foil, spreading the remaining oil on top.  Sprinkle chopped dill and garlic salt (to taste) on top of filets.  Finally, squeeze half a lemon over each filet. Place the foil trays on the grill, and cook for about 10-12 minutes (depending on thickness) until it flakes with a fork.  (No need to turn it.) You can serve salmon with its skin, which will be nicely charred.  Otherwise, filets lift easily off the skin with a spatula.

This salmon dish is great with Lemonaise Light by Ojai (a mayonnaise substitute that you can get at your local health food store and, interestingly enough, Walmart.) The Lemonaise is great with a little extra lemon, garlic salt and pepper.

Garlic-Almond Green Beans

2 packages of fresh green beans. (Prepared for cooking). About 1 1/2 lbs.

2 teaspoons of minced or crushed garlic

2 Tablespoons of salted butter

2/3 cup of sliced almonds

Preheat the oven to 400.  Melt the butter and garlic then toss  everything together in a mixing bowl. Spread mixture out on a cookie sheet, and bake at 400 for about 12 min. Next broil them for about 7 minutes or until they are a bit shriveled up and lightly browned on the top. (Serves 6 to 8)

Heirloom Carrots with Thyme and Maple syrup

Every Easter dinner has to include carrots for obvious reasons. Here is a great recipe:

A big bunch of Heirloom Carrots or 2 Small Bags (regular carrots are fine.)

1 Tablespoon of fresh thyme (or teaspoon of dried.)

1 Tablespoon of salted butter

1 Tablespoon of maple syrup

1/4 teaspoon of sea salt and a grind or 2 of cracked pepper.

Preheat oven to 400. Chop thyme very fine. (I use a manual food chopper.) Mix thyme, butter, maple syrup and salt & pepper in a medium sized bowl. Cut carrots into bite-sized pieces and toss in mixture. Spread on a sprayed cookie sheet and bake for 15 min. or until a fork goes in them with a little effort. Next you broil them for about 7 min. until they they are brown on top and a bit shriveled. (Serves 6)

Try It You'll Love It!


Limes Glorious Limes

What do really good salsa and guacamole have in common?  You guessed it: fresh lime.  Both of the recipes below have lots of it.  That's what makes them so tasty-- of course, I'm a lime fiend.  These recipes will be great for Cinco de Mayo!

Salsa Is A Staple

It seems that everyone in California was raised on salsa.  I had to learn to like it or I probably would have starved. Recently I made my first Pico de Gallo which is simply chunky form of salsa also called Salsa Fresca.  Of course I corralled a bunch of my husband's family to do a taste test of three different recipes of Pico de Gallo.  The one below was the favorite, and no one will be surprised to hear it has 4 ingredients. (Garlic salt doesn't count. If you're following my recipes you, already have lots on hand.)  Here's what you'll need: 

3 cups of chopped tomatoes  (About 1 &1/2 lbs) Roma tomatoes are good for Pico de Gallo, but not a must.

1  cup of chopped white onion  (approx. 1 medium onion)

1/4 cup of lime juice ( Approx. 2 limes)

2/3 cup of chopped cilantro  (approx. 1 large bunch)

Opt. 1 Serrano or Jalapeno peppers

Cut any stems or bottoms off tomatoes, then cut them in quarters.  With a food processor and the regular blade, chop the tomatoes very carefully using the pulse  (manual) button only until they are in small chunks. After the tomatoes are chopped, put them in a colander to drain the juice.

While tomatoes are draining, chop onion using the food processor and pulse button as well. Then, set onion aside in the lime, so that onions will soak up the lime flavor.

Next, twist the top off the cilantro bunch and use the processor to chop it (keep using the pulse button).  You then add all 4 ingredients together. Finally mix in 1 & 1/2 to 2 teaspoons of garlic salt and a few cranks of cracked pepper and  let it sit for about 20 min. to mix all the flavors. 

*If you want to use peppers chop very finely with veins and seeds (which are super hot) removed. (A hand chopper is great for this.) Add one teaspoon at a time to give your salsa the exact amount of kick you want. 

** Cooking is an art; therefore, we need to taste dishes along the way to see if they need more of something (just like the classic French chefs we see in the movies. With a wooden spoon of course:)