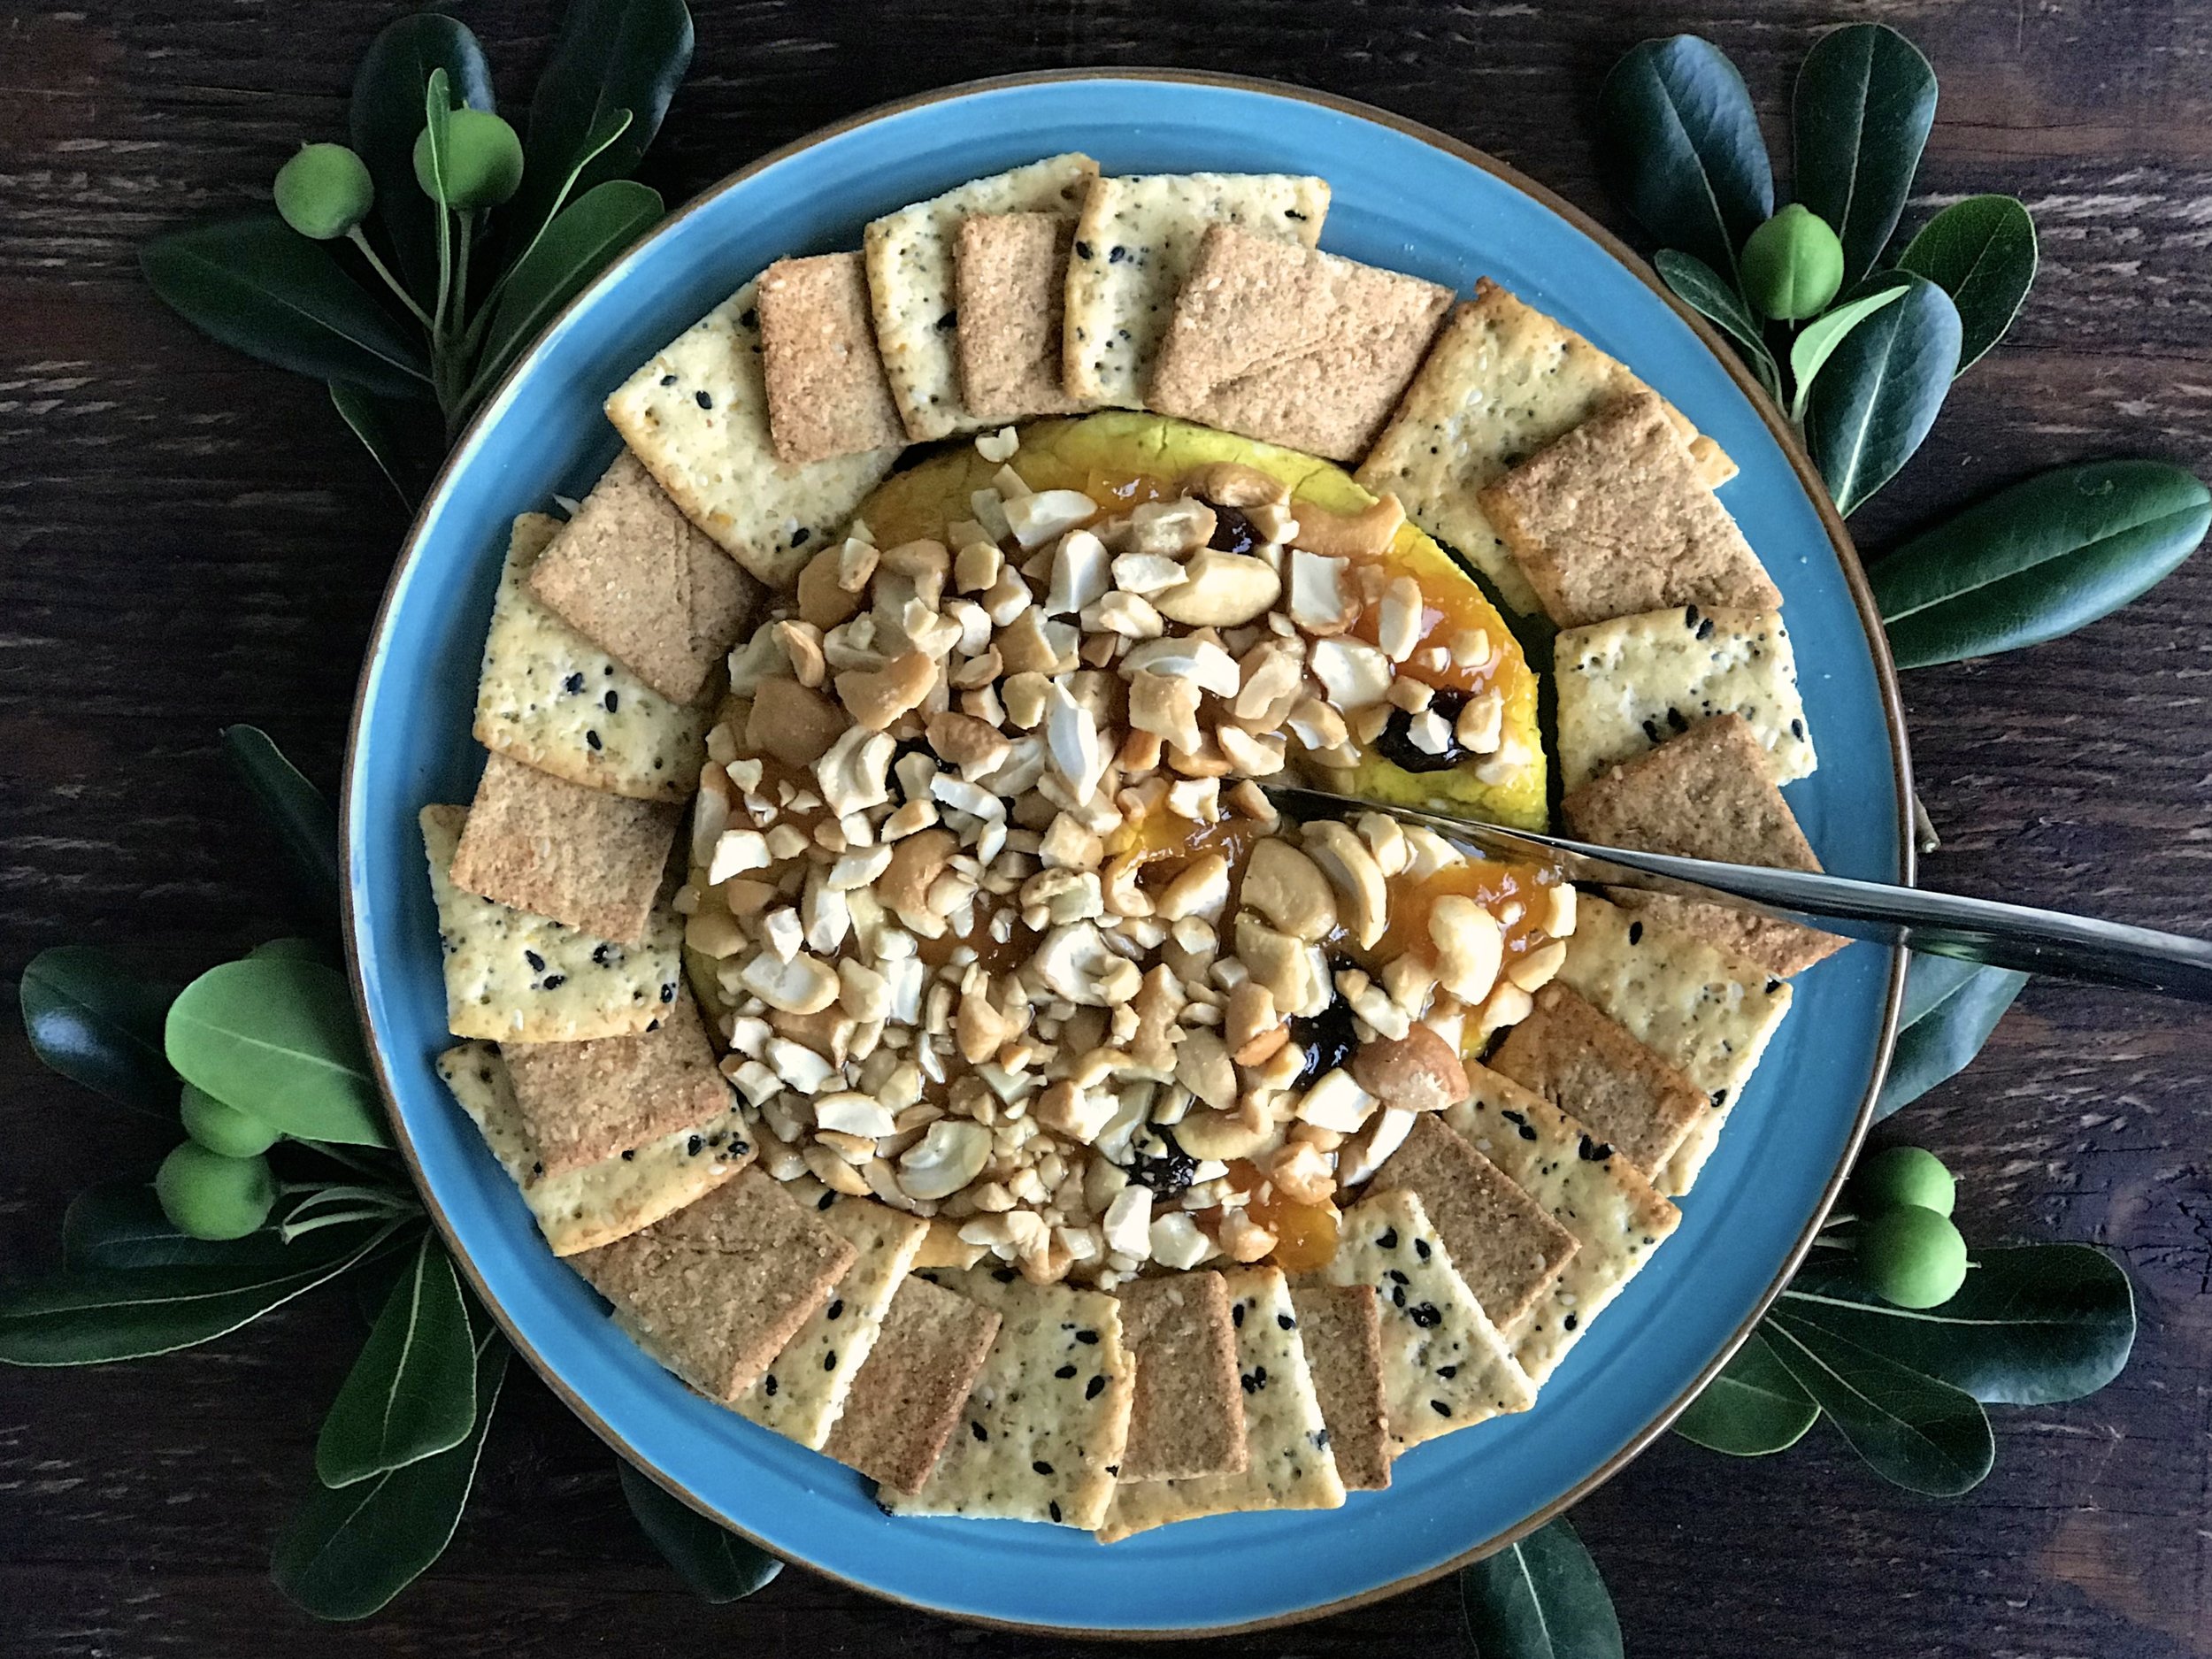
The recipe that I’m most excited about lately is our 4-ingredient Cashew Dip. I was introduced to a delicious Cashew Dip by Jenni and Brian Rouanzoin who are great cooks! Of course, I tweaked their recipe and made it 4 ingredients. Now we can’t stop making and eating this super easy to prepare dip and have come up with a couple of fun variations!
Read moreIt’s All About The Cheese
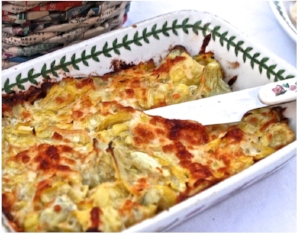
This four-ingredient artichoke dip is hands down the best one you'll ever serve. If you can come up with a better one, you're a magician! This dip is so good that I'm asked to bring it to almost every gathering I go to. One friend even said, "if you don't bring your artichoke dip, then don't even bother coming." She was kidding...I think.
Read moreMango Tango
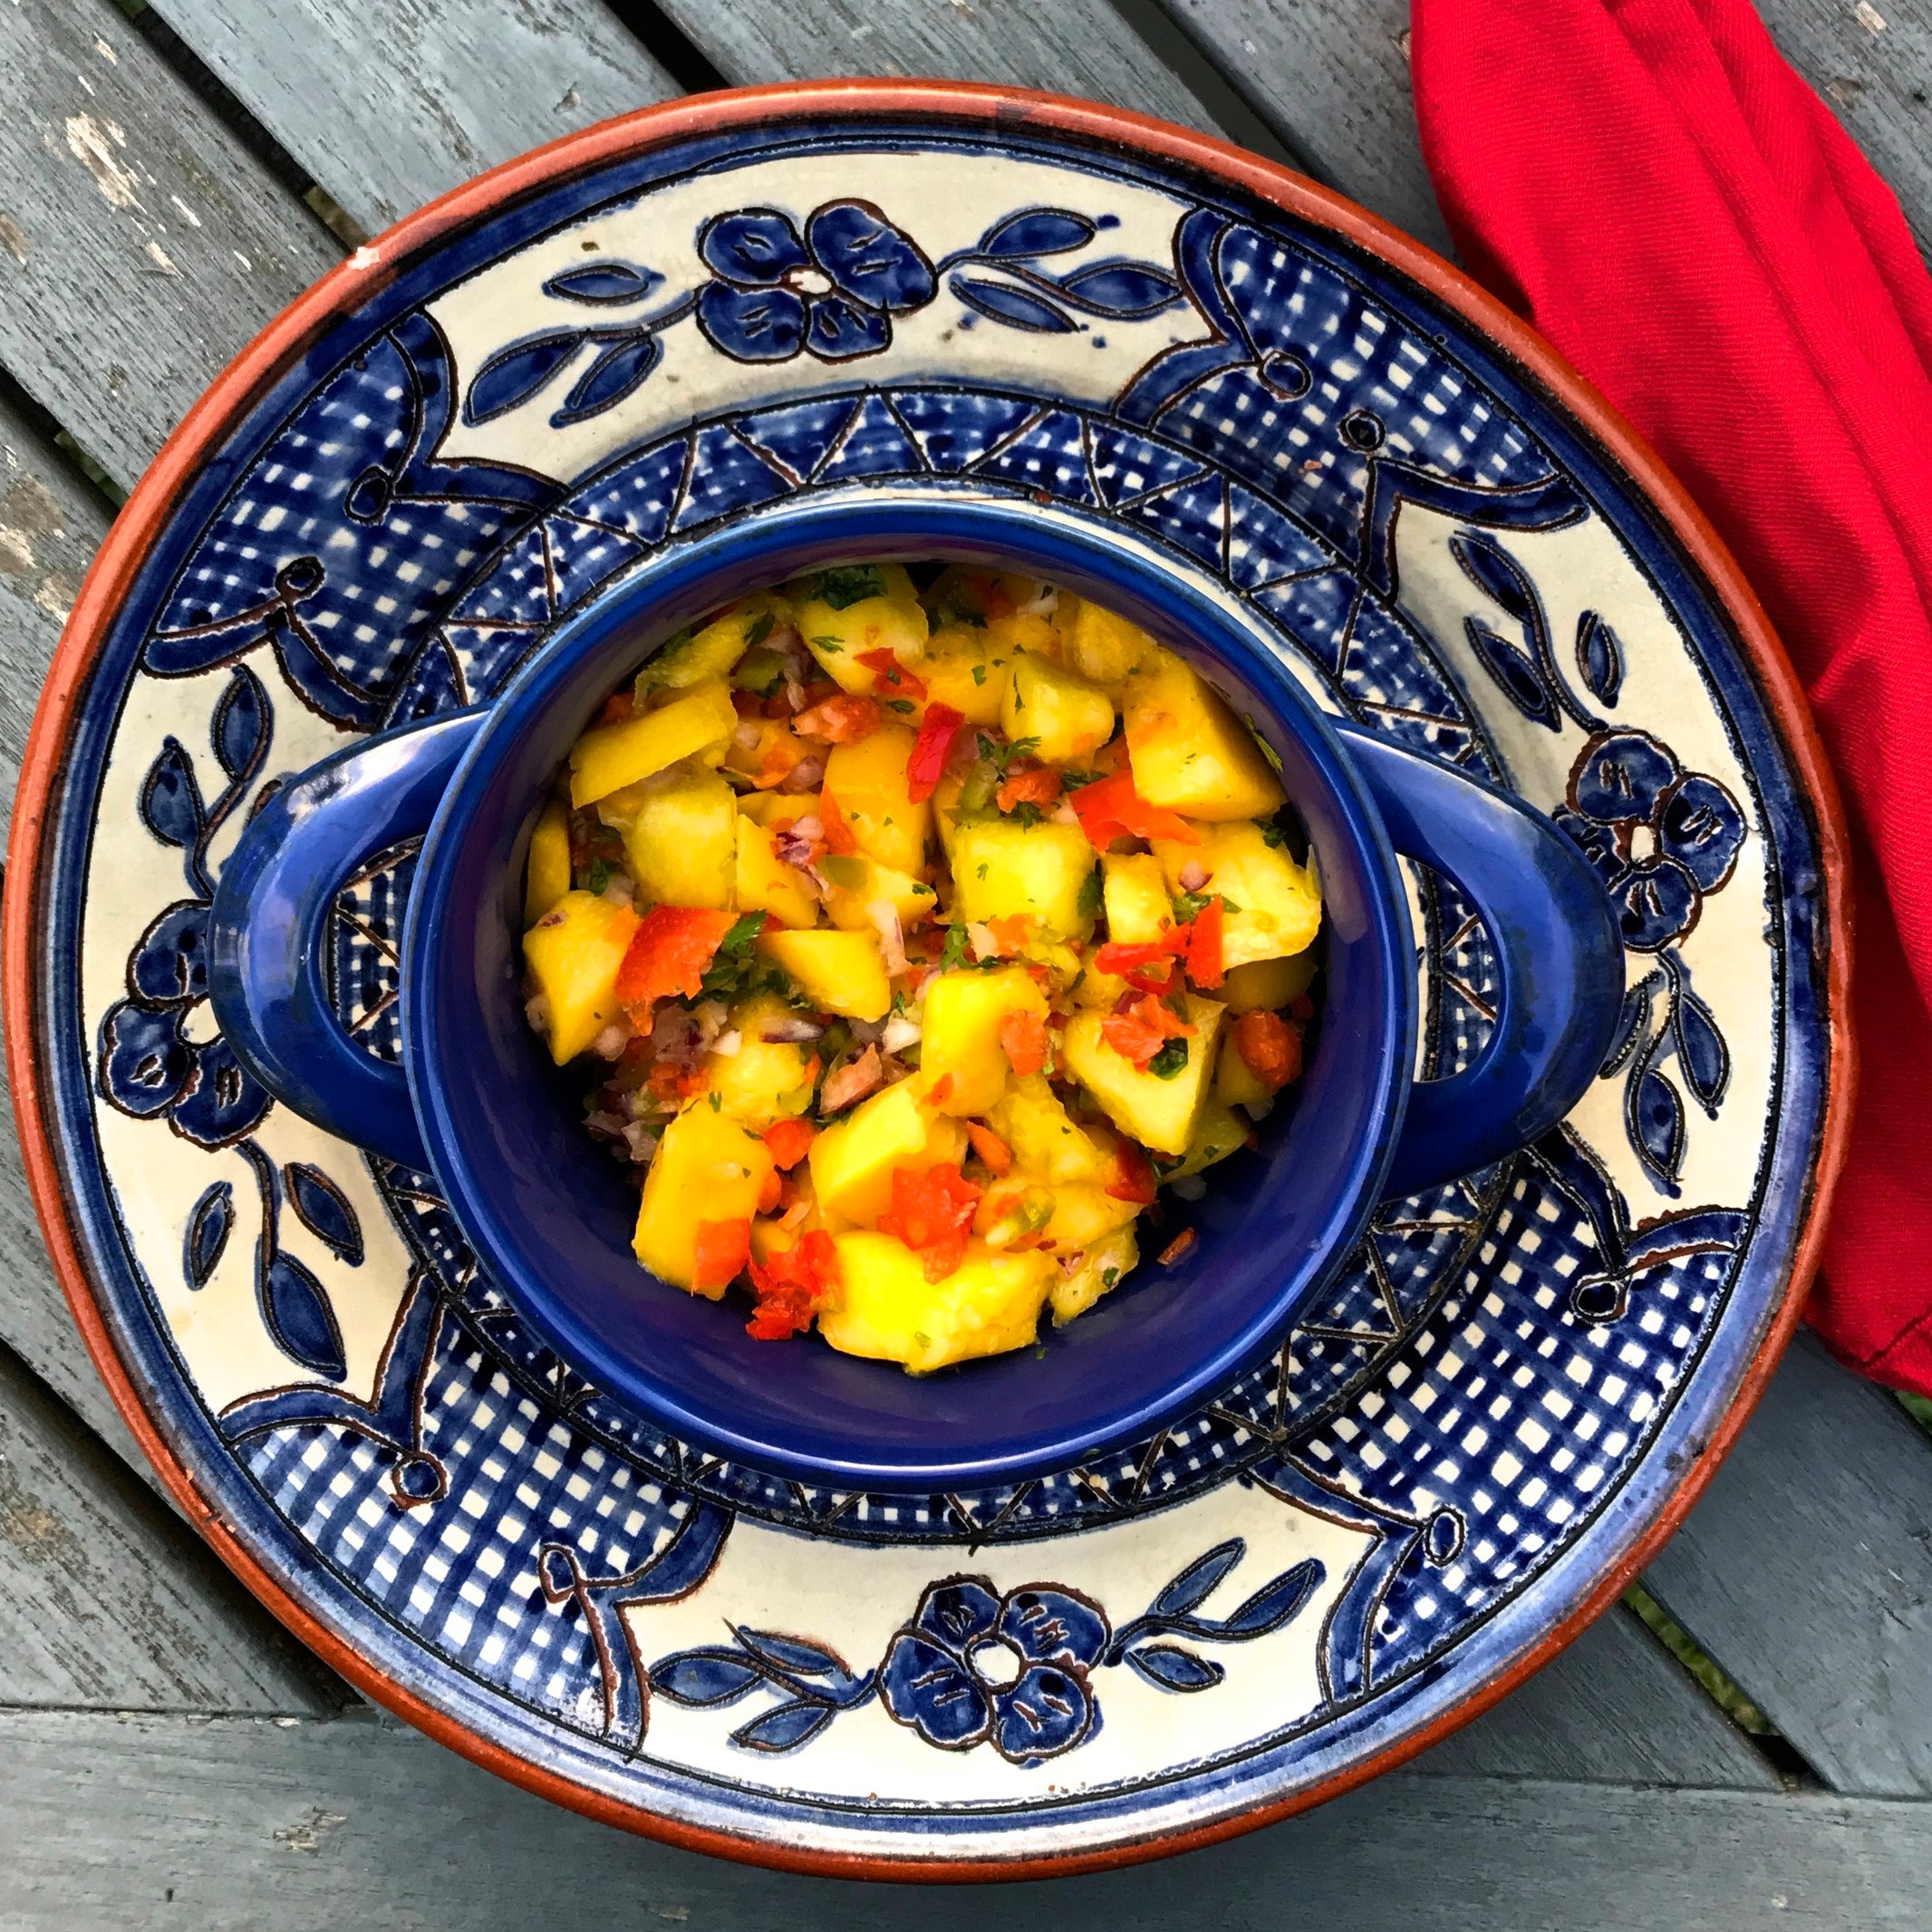
Who doesn't love mango? Besides avocado it's the favorite food around the Pickett household. My adult kids can literally be caught warring over the last mango. (I guess they could be fighting over worse.) There are many delightful things you can do with mango, and mangoes salsa is one of them. Perfect for Cinco de Mayo or really anytime:)
Read moreA Must “C” Appetizer: Cream Cheese, Curry, Chutney and Cashews
It’s been so fun this summer whipping up yummy recipes for our extended family and friends and I love doing them because I only make things with 4 INGREDIENTS! So easy!
It’s almost Labor Day weekend, so I thought I would share a great appetizer for end of the summer gatherings! I got the idea for this recipe when our close friend, Debbie Hogan, brought it to one of our Balboa Island gatherings. This recipe has mango chutney and there is barely anything better than that! (BTW, If you have never had mango chutney with vegetable samosas, you have to try them together at your local Indian restaurant. But you’ll have to ask for the mango chutney!) Here’s what you’ll need for this sweet and savory appetizer:
1 (8 oz) pkg. Cream Cheese
1 & 1/2 tsp. of Curry Powder
1/4 cup of Mango Chutney (Sharwood’s or Major Grey’s are unbelievably delicious!)
1/2 cup of Salted Cashews
Step 1. Combine room temperature cream cheese, curry powder and a level 1/4 teaspoon of garlic salt until mixed well, and put in fridge to harden.
Step 2. Once firm, shape and flatten the mixture on a plate so that it is just a little over an inch thick. You then spoon a thin layer of Mango Chutney on top. (You may want to chop up any chunks of mango.)
Step 3. Put cashews in a plastic bag and crush them with a mallet, rolling pin etc., until they are in tiny pieces. You then spoon them onto the chutney. Serve with small crackers.
Looking Back
Speaking of appetizers and mango, another end of the summer appetizer that is totally refreshing and of course delicious is our Mango Salsa! (This post even includes a quick tutorial on how to cut a mango:)
Candles For All Occasions
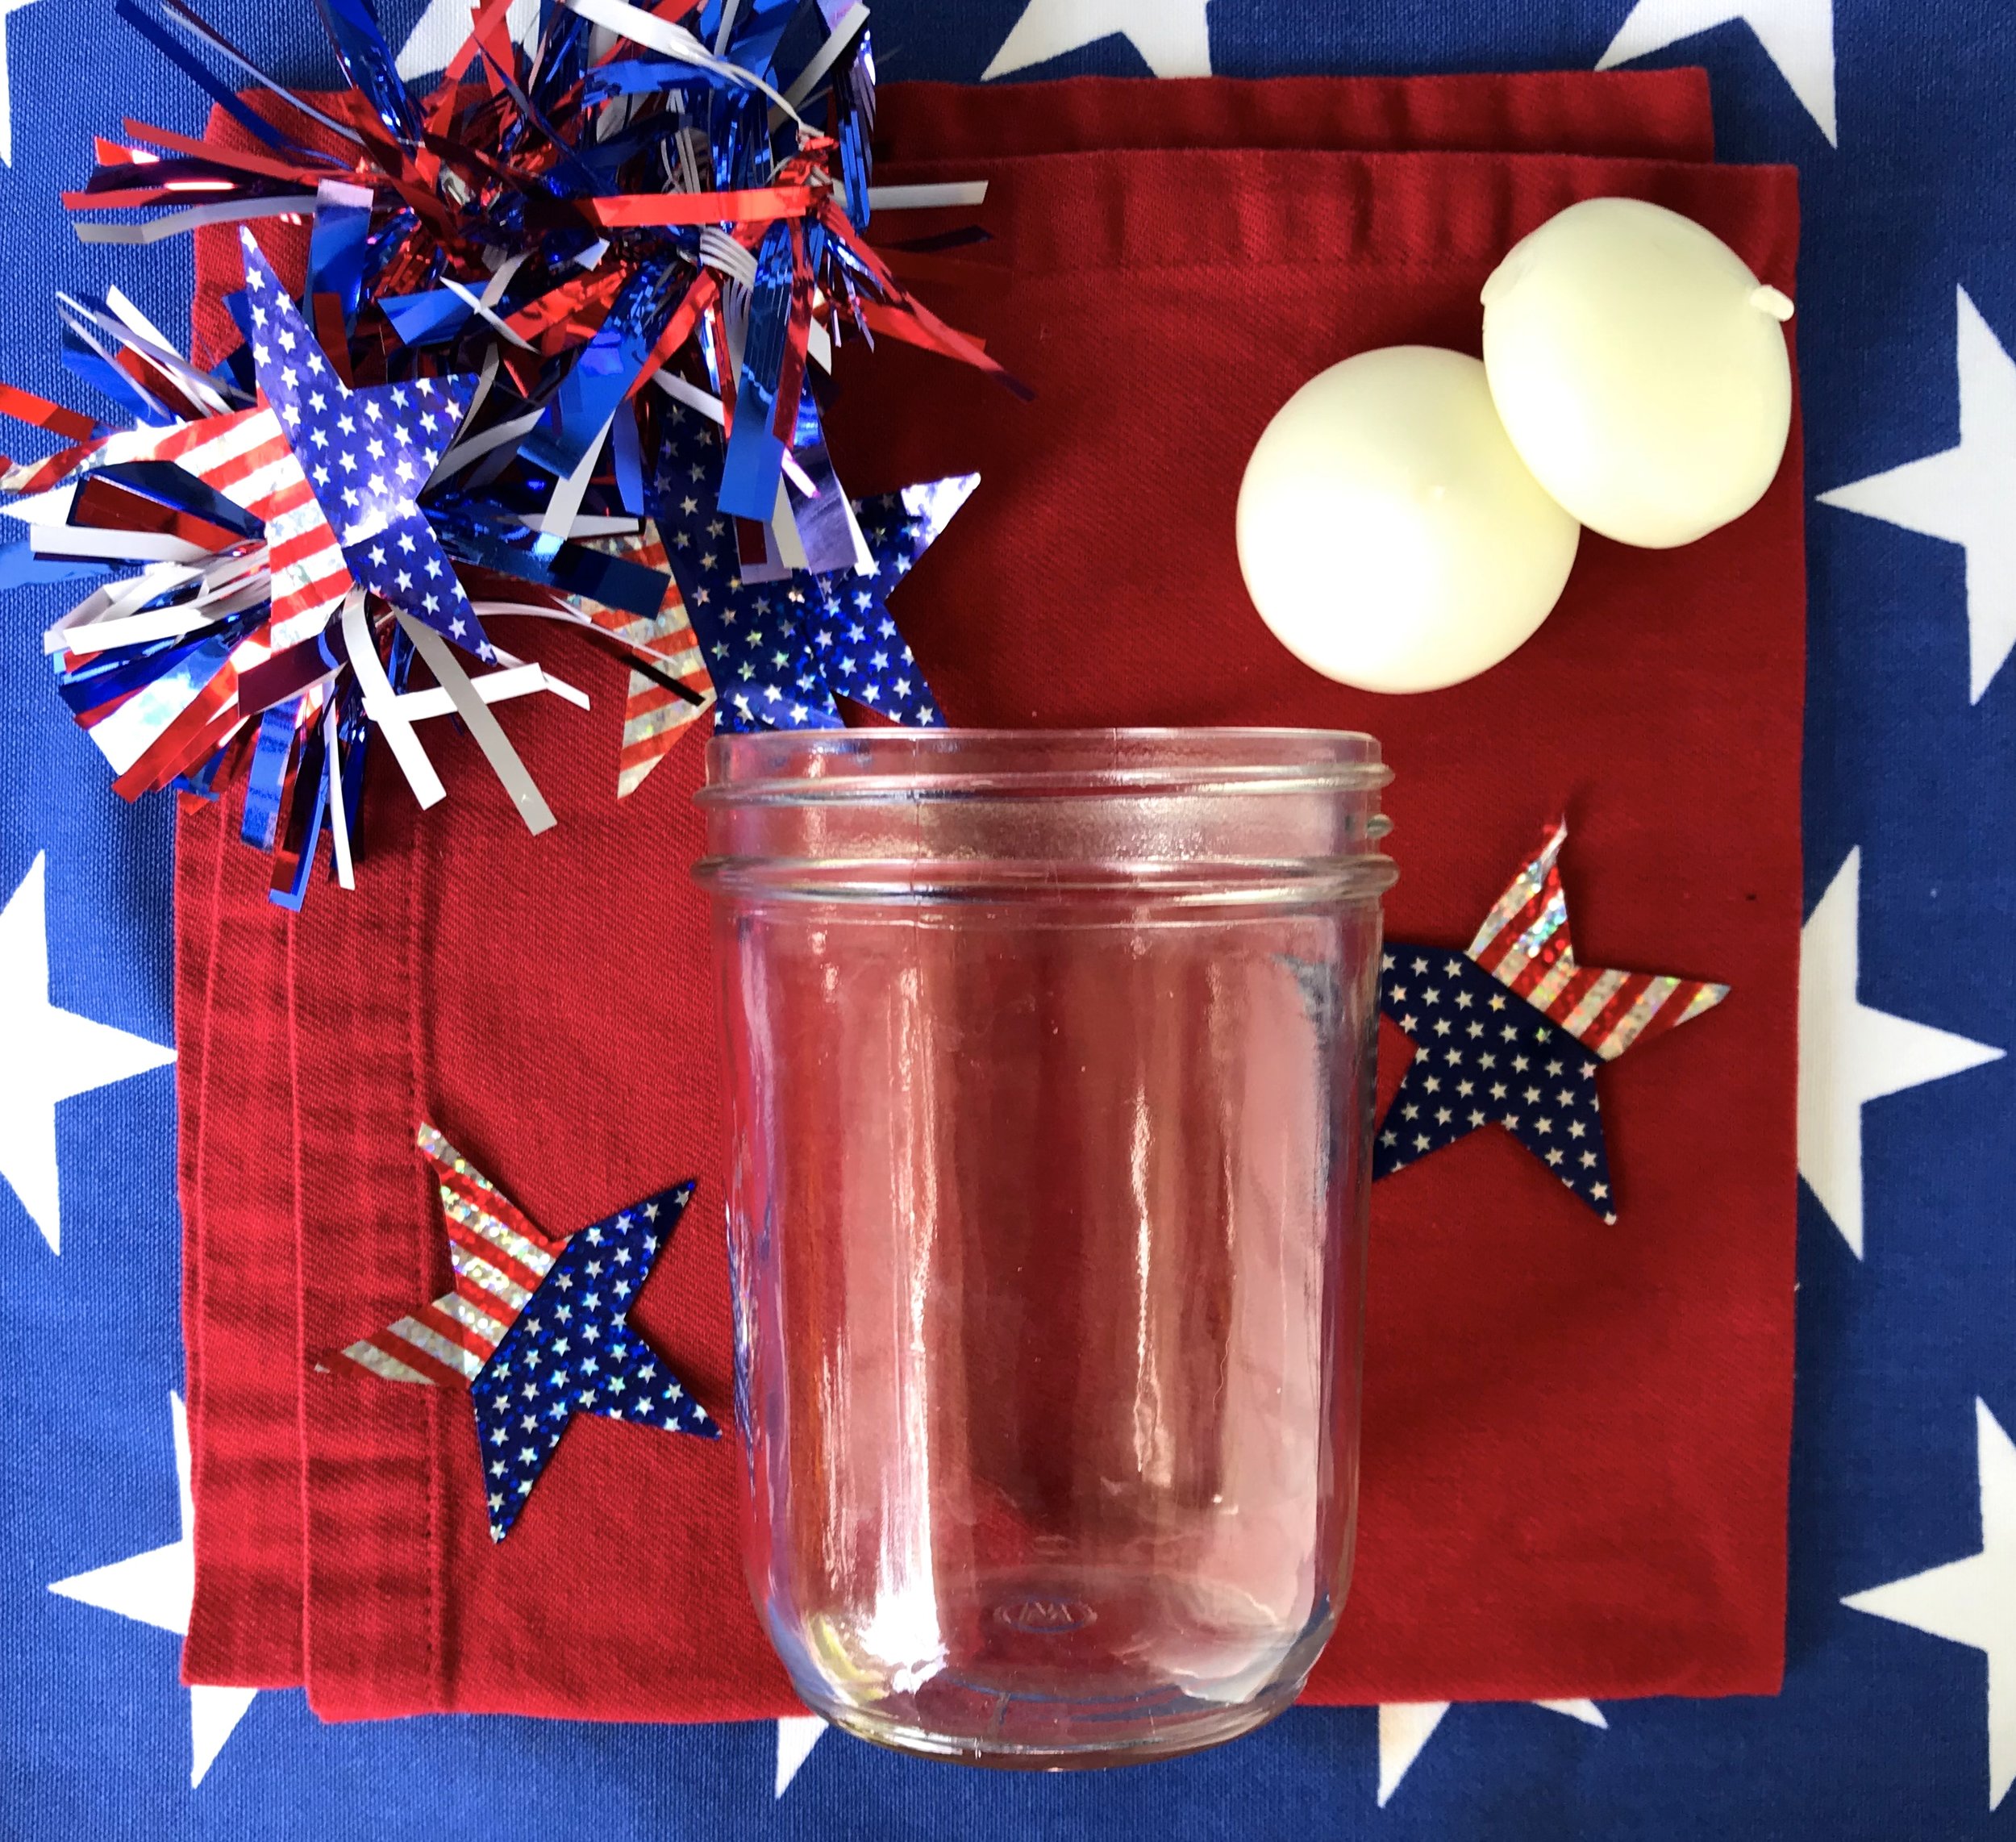
I don’t know about you, but I always wondered if I should put out Red, White and Blue decorations for Labor Day, so I googled it. Yes, put out your flags, and use your left over 4th of July plates and napkins! I made the red, white and blue floating candles below earlier this summer, and I’m bringing them out again this weekend! As you can see, you can make them for any occasion as in the picture below when we made them for a friend’s wedding or as in the final picture when we layered sand and tiny shells just because it was summer. Here’s what you’ll need:
Mason jars
Items for the inside: foil confetti, tiny flower petals, shells, etc
Floating candles (Michael’s or Amazon has these)
Water
Step 1. Simply fill a mason jar half way with whatever festive item you want. (Fresh items like sand/shells or tiny flower petals look best if they are made just before an occasion.)
Step 2. Fill water up to just below the bottom line where the lid screws on.
Step 3. Carefully drop floating candle in the water, light and enjoy!
Hail Caesar!
The four of us are in Italy for a family vacation and we have had some delicious dishes! Of course we are all vowing to not eat bread and pasta again for a year! Believe it or not, my favorite thing so far (besides the Prosecco:) has been the Caesar salad that we had our first night in Rome.
Caesar salad was created in 1924 in Mexico by an Italian immigrant named Caesar Cardini. One evening when a huge and unexpected crowd showed up at his restaurant, Cardini had to get creative with his ingredients and made the first “Caesar Salad” creating it at tableside for extra flare. It was made with romaine lettuce, croutons, parmesan cheese and a dressing which included olive oil, egg, garlic, worcestershire sauce, salt and pepper but interestingly enough no anchovies.
The typical salads in Italy are very simple and come with no dressing! Olive oil and balsamic are the only option. But as I said, on our first night I had the best Caesar that I had ever had. Here’s what you’ll need:
A large bag of (chilled) Romaine lettuce
A small block of hard Parmesan cheese
Half a loaf of Italian or French bread
Caesar dressing of your choice - the creamy ones in your store’s refrigerated section taste best. (We like Marie’s but I’ve heard that Ken’s Steakhouse Creamy Caesar is excellent! If you want an anchovy taste, try Marzetti’s Caesar Supreme.)
Opt. 6 strips of thick cut bacon
Preheat oven to 350
Step 1. Cut the bread into large 1 &1/2 inch chunks, (Opt. Brush them with a bit of olive oil and garlic salt) and toast them in the oven for about 5 minutes (until they begin to turn a very light golden brown.)
Step 2. Take a very sharp knife or a cheese slicer and carefully cut paper thin slices of the parmesan.
Step 3. Cook the 6 strips of bacon and tear into large bite sized chunks. - We have been making lots of uncured (nitrate free) bacon with a device for the microwave called the “Bacon Wave”—super easy to use with hardly any cleanup involved.
Step 4. Chop the lettuce and toss with dressing, some coarse sea salt and a few cranks of cracked pepper. Arrange the croutons, slices of parmesan and bacon in whatever design you choose. Finally top with about 5 more cranks of black pepper.
* Serve on chilled plates. Nice restaurants often serve their salads on chilled plates and it makes all the difference!)
Looking Back
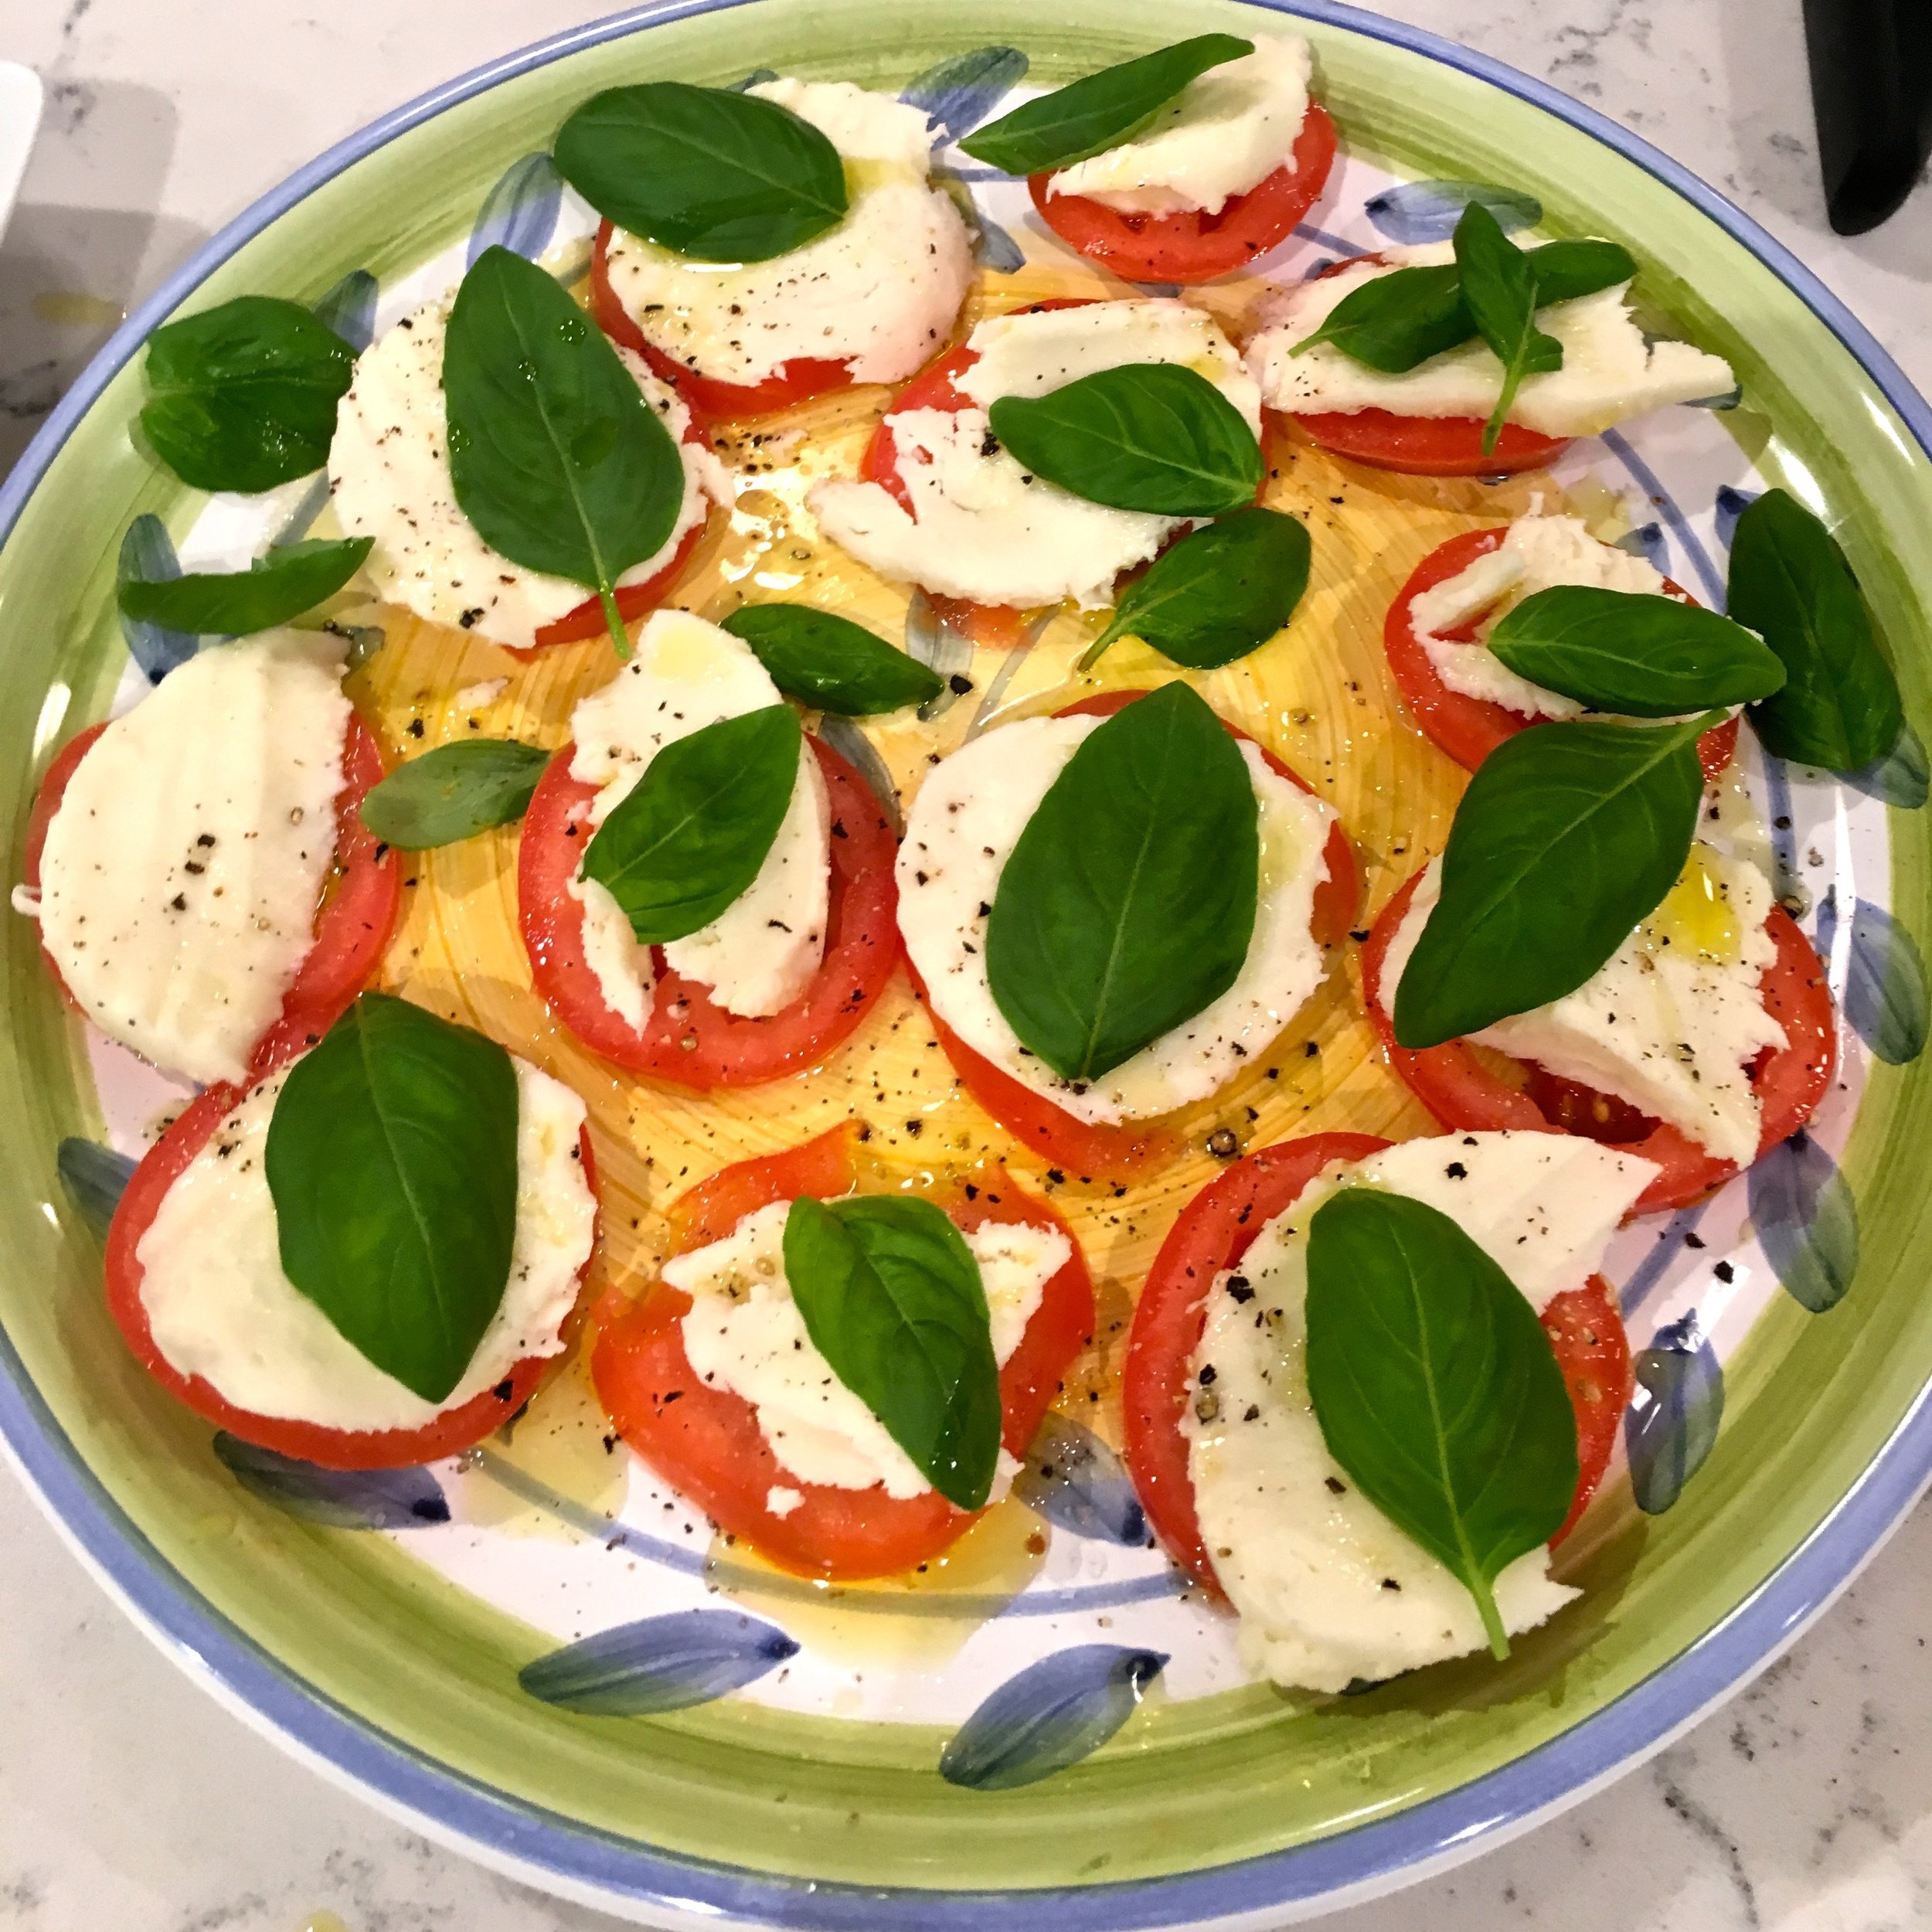
Two other wonderful and super fresh Italian appetizers that we have featured are: Burrata Cheese and Caprese. Both of these “Antipasti” are made with forms of Fresh Mozzarella (either cow or buffalo milk.) “Buffalo” doesn’t refer to the American bison. Instead, it is a water buffalo, a cow-like creature which won’t crush you to death when you try to milk it! Burrata Cheese is a mixture of fresh mozzarella and cream! Beyond yum!
Fun Saying
The Italians of course have lots of colorful sayings. I love the one: “Porca miseria!” which literally means, “Pig’s misery” or DAMNIT! (What more can I say:)
May Days
Don’t you just love May! Everything is green and blooming and it’s not too hot! I’m so excited to get the call any day now from my friend Toni telling me it’s time to gather wild sweet peas from a special hill in South Orange County. (Don’t worry we aren’t breaking the law. At least I think we aren’t:) May also has Cinco de Mayo which is fun especially if you love Mexican food and drink! Below is a simple, very colorful (4 ingredient) salad that will be perfect to serve on May 5th (or any fun occasion really)! Here’s what you’ll need for this CINCO DE MAYO SALAD:
2 bags of Spring Mix lettuce
Mini tri-color peppers (about 9)
2 medium avocados
2/3 cup of pepitas (Mexican name for pumpkin seeds)
opt. Tortilla strips
Step 1. Preheat the oven to 350. Toss the pepitas in a teaspoon of olive oil and 1/2 teaspoon of garlic salt, then roast the pepitas for about 13 min. (or until golden) on a lined baking sheet, stirring the pepitas half way through.
Step 2. Chop the avocado and tri-colored peppers into bite sized pieces then create whatever fun design you want.
Step 3. Serve with a cilantro dressing. I had my designated taste testers try three different ones. Brianna’s, El Torito’s and Trader Joe’s. Brianna’s was by far the favorite probably because of it’s creaminess. If you want an even yummier creamy effect, mix equal parts of cilantro dressing with homemade Hidden Valley Ranch!
Looking Back
In California we love Mangos! A couple of summers ago Pickett’s Pearls posted about this delicious (4 ingredient) Mango Salsa which included a video on how to slice mangos! Check it out!
Not More Succulents!
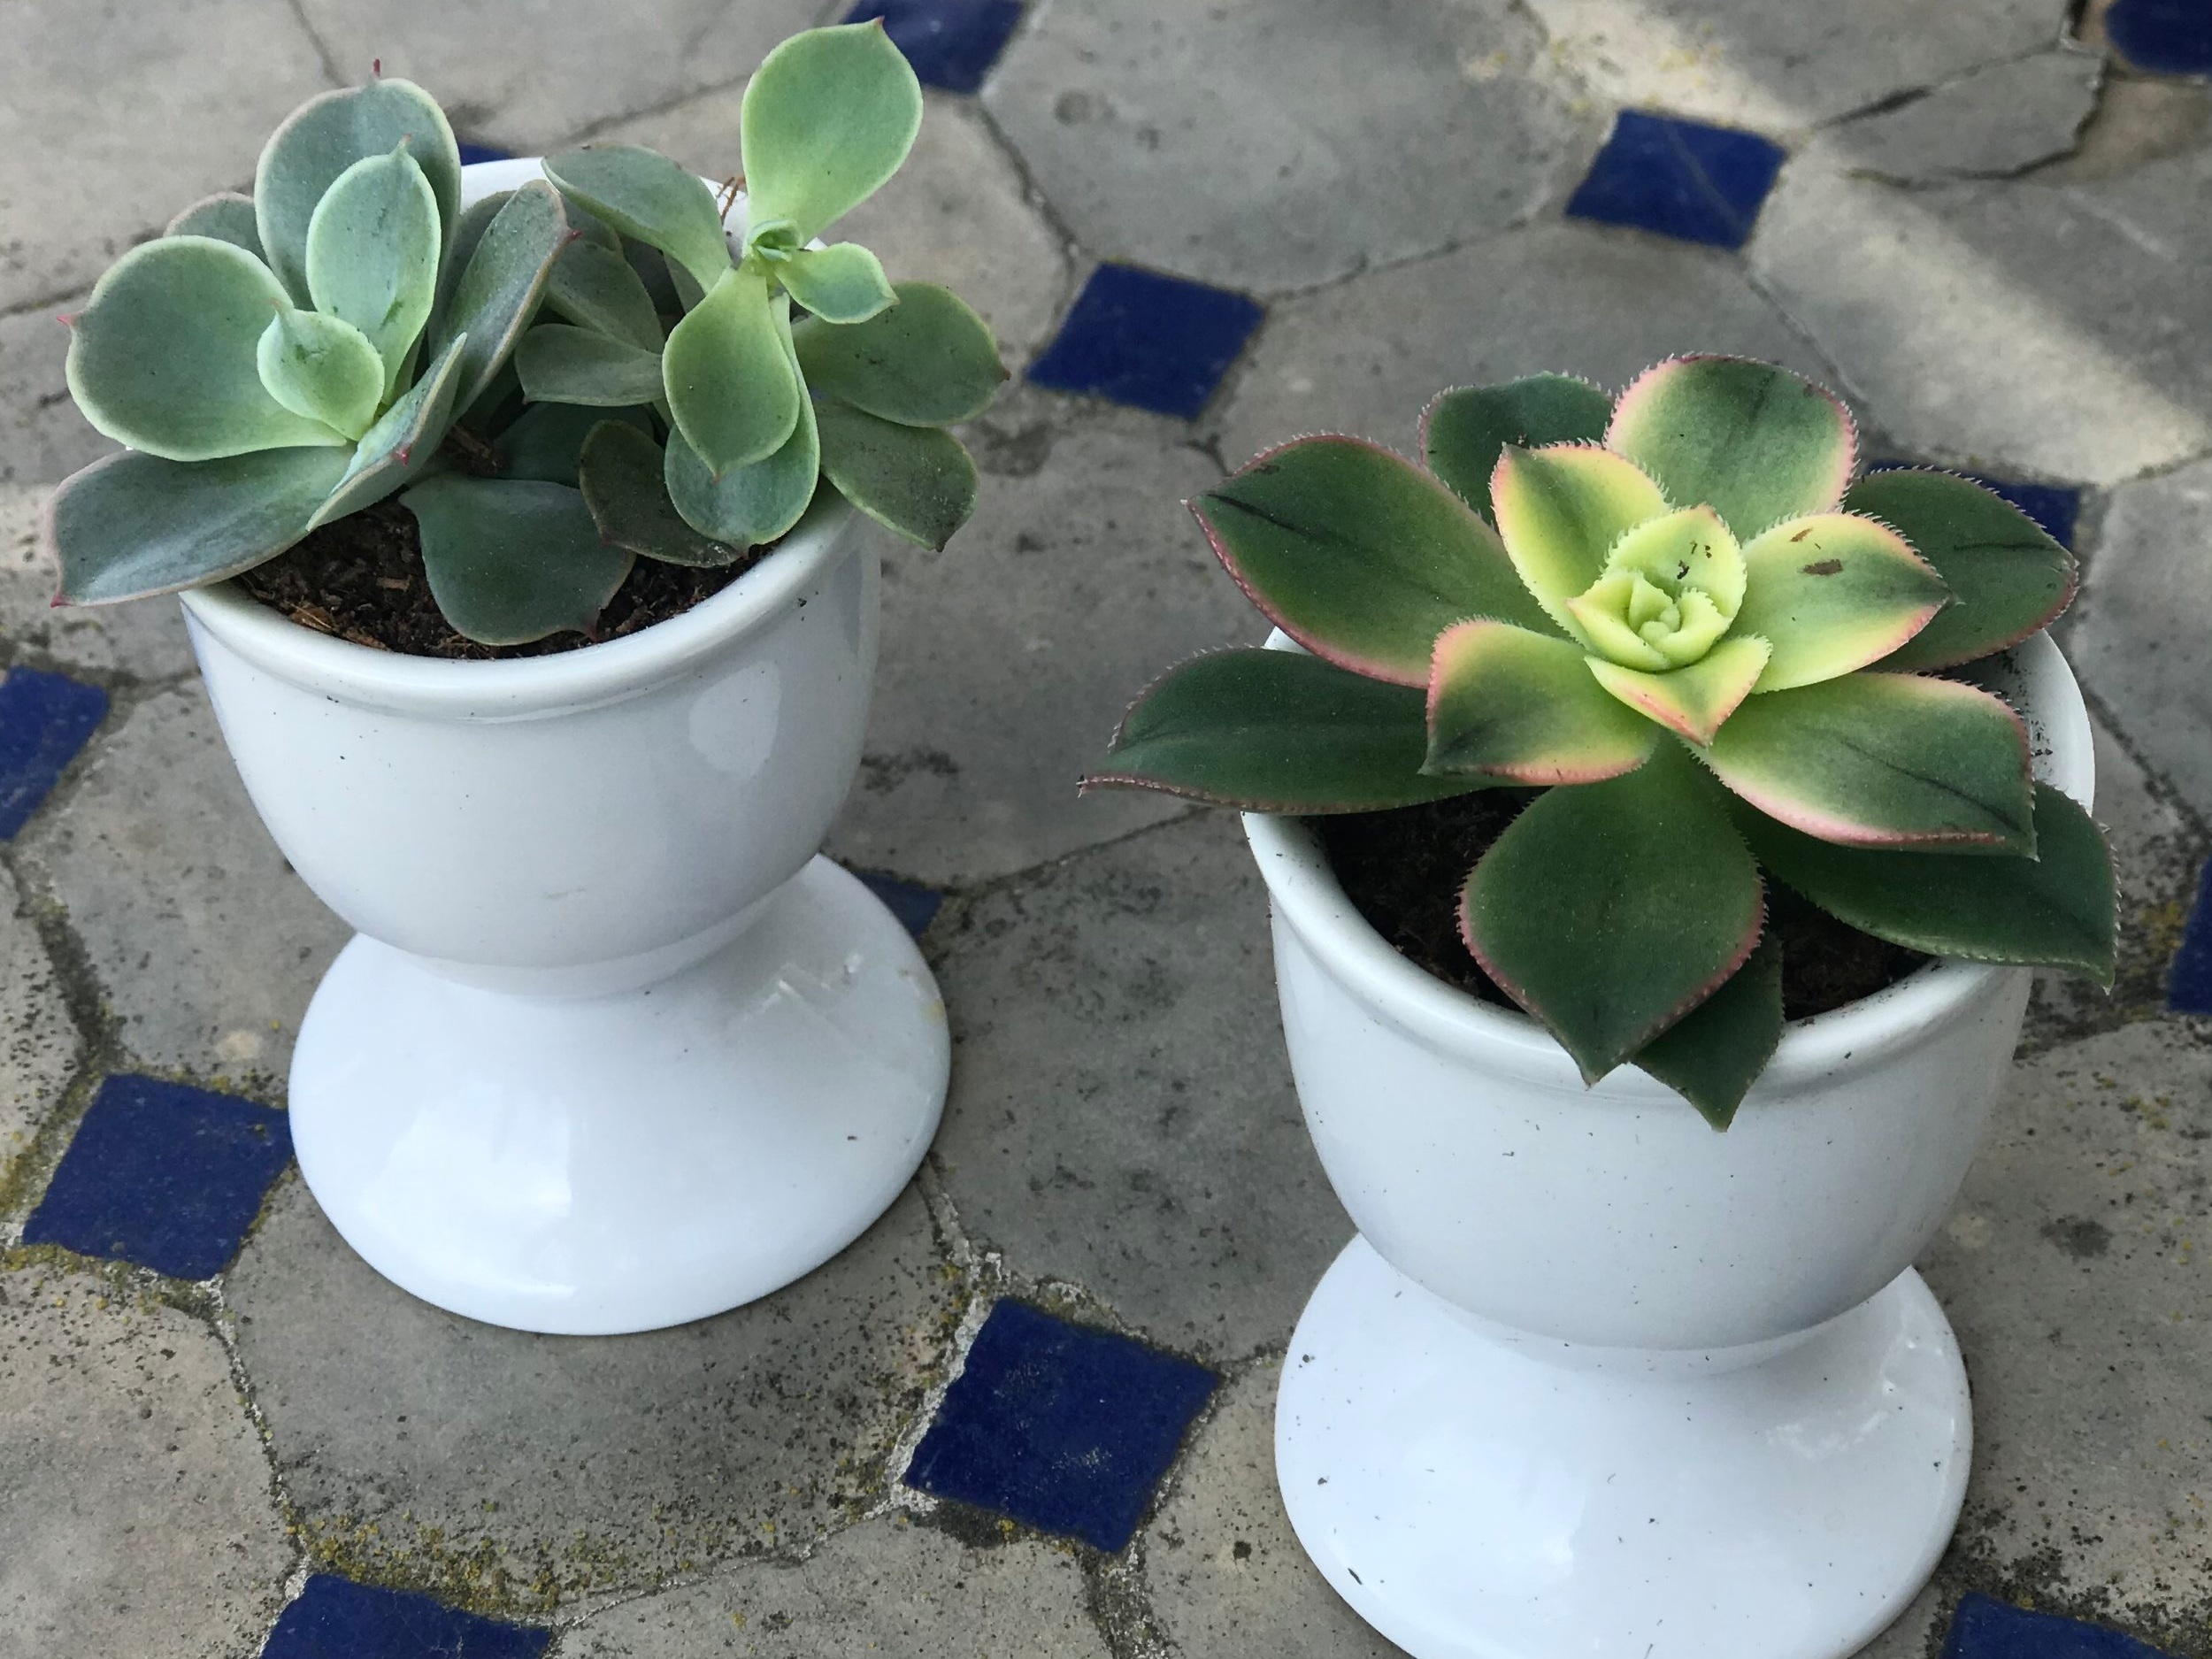
I can’t help it! Succulents are so fun to work with and so hard to kill! These little treasures would be perfect for Spring and Summer gifts (like Mother’s Day:) or party favors! All you need are small containers like these tiny soft boiled egg cups or petite demitasse cups with tea cup stands (Amazon), miniature succulents (plants or clippings) and cactus soil mix. (Cactus soil is very grainy, so it provides good drainage. The word on the street is that succulents don’t care for wet roots:)
*The cool thing about succulents is that you can simply stick a clipping in the cactus soil, water it, and it will take root in a couple of weeks.
**Surprisingly succulents seem to love water (especially if they have good drainage). Our outside potted succulents got a lot of rain this season and flourished more than ever. Water them any time they seem dry.
Fun Saying
I love the saying “ I will be there in two shakes of a lamb’s tail”! That, my friend, means pretty damn quickly. If you don’t believe it, watch this darling video of little lambkins shaking their booties like mad!
HAPPY MAY DAYS!
It's Greek to You
It’s time for another awesome (4 ingredient) appetizer! Whenever I need a great recipe, I have a few “Go To People” and Debbie Hogan is one of those. Everyone knows Debbie is an excellent cook, and she is always trying new recipes! Here’s what you’ll need for this gorgeous Greek dip!
4 Layer Greek Dip
1 (8 oz.) container of cream cheese with chives and onions
1 (8 oz.) container of hummus (I use red pepper hummus for color)
1/2 cup of greek olive tapenade
1/2 cup crumbled feta cheese (plain or Mediterranean style)
Fill the bottom of a glass dish with a layer of the cream cheese. Next carefully spoon on a layer of the hummus then the olive tapenade. Finally add a layer of the crumbled feta. Serve with pita chips and fresh veggies.
Homemade Pita Chips
Store bought pita chips are really good, but it’s hard to beat homemade! The problem is trying to stop from eating the whole batch right out of the oven!
2 rounds of pita bread (pocket style vs. flat)
1/3 cup of olive oil
1 frozen cube or teaspoon of crushed garlic
1/2 teaspoon Italian herbs
Preheat oven to 275
Step 1. Combine oil, garlic and herbs in a small bowl.
Step 1. Using kitchen scissors cut each round in half then cut along the outer edges so that you end up with 4 semicircular pieces. You then cut each piece in half then half again until you have 32 wedges.
Step 3. Using a pastry brush cover both sides of each wedge with the oil mixture and lay them rough side down on a cookie sheet.
Step 4. Salt and pepper the top sides and bake for 4 min. Then turn each wedge over, salt and pepper again and bake for 4 more min.
Looking Back
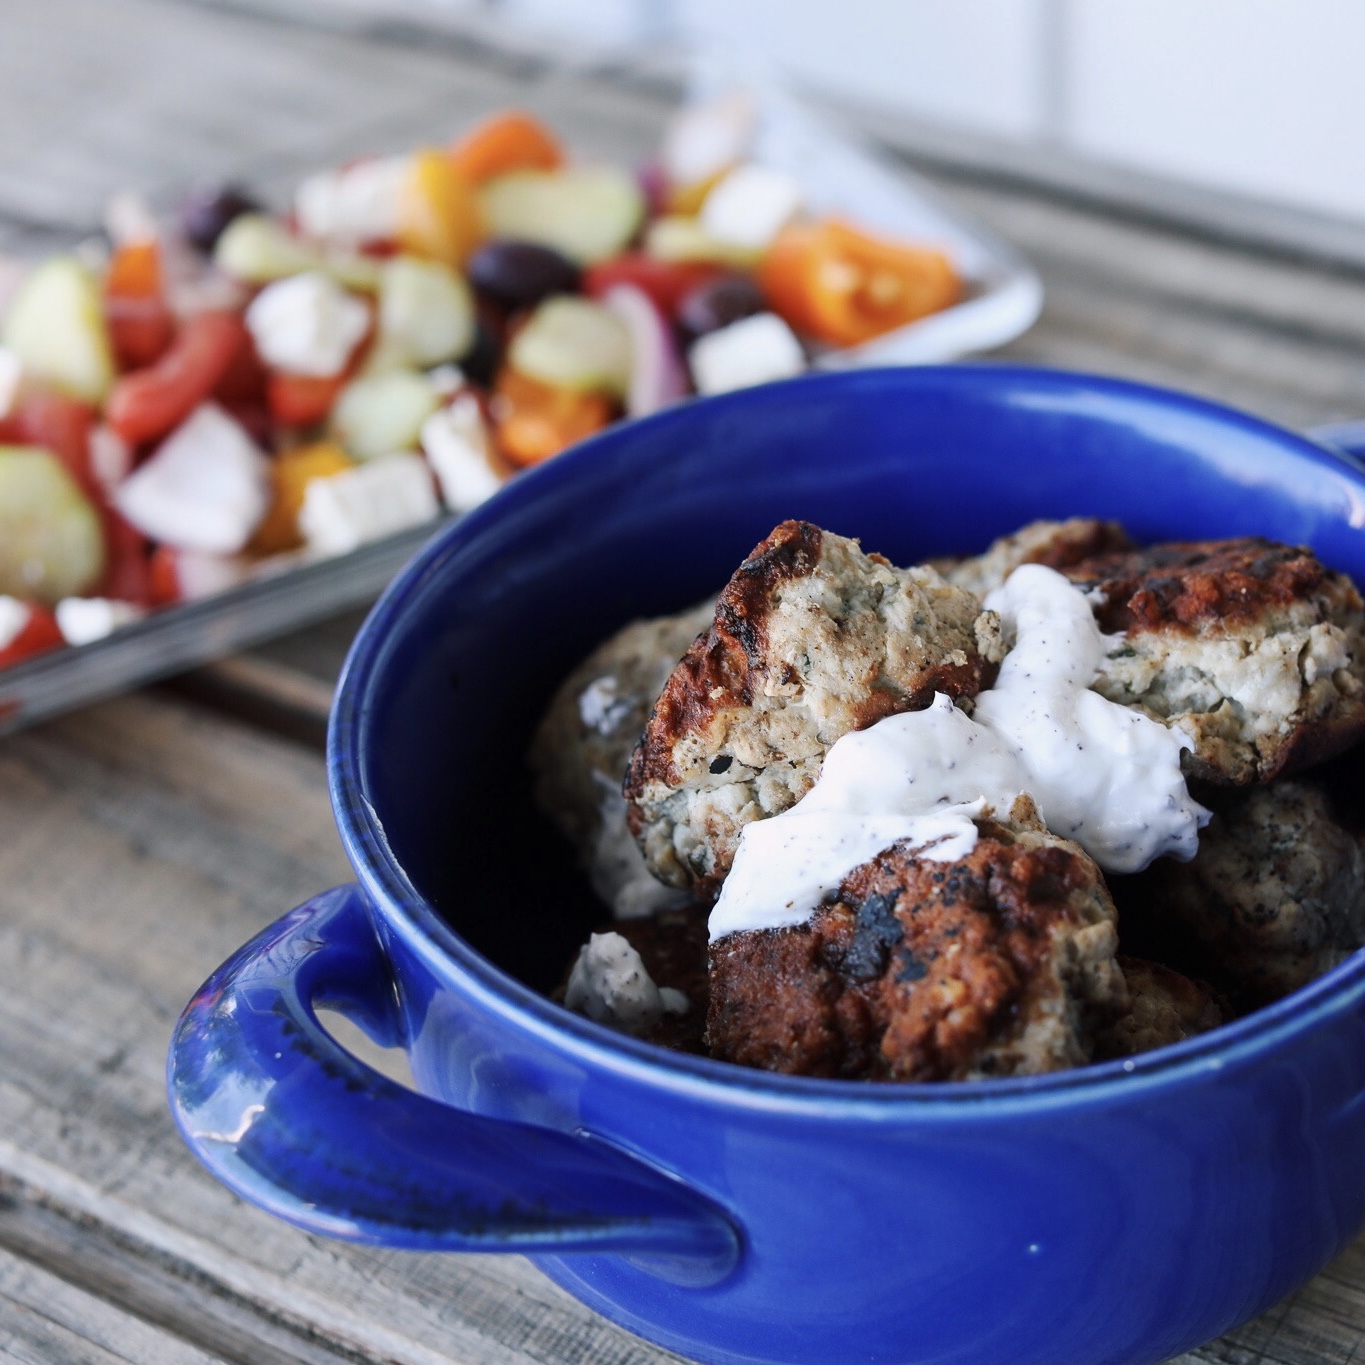
Of all the Pickett’s Pearls (4 ingredient) recipes these Mediterranean Meatballs are definitely among the favorites! Made with zucchini, cumin and mint they have a very distinctive and delicious flavor!
Funny Saying
This saying has nothing to do with Greece or the Mediterranean, by the way. The other day Todd said “Roger that” then he immediately said who decided on the name Roger? Why not “Fred that” or “Jimmy that”? I love that I’m not the only one in our house now that notices the random things that “spill” out of our mouths.
CHOCOLATE CITY
Being a chocolate lover (who isn’t?) I really perked up when some family friends, Jack and Karen, told me about Chocolate Martinis! With New Year’s coming up I had to get their recipe! Here’s what you’ll need:
1 to 1 & 1/2 oz of vanilla vodka (Regular works too)
1 & 1/2 to 2 oz . of Chocolate Liqueur (Godiva makes 1/2 bottles as well.)
1 & 1/2 oz. of half and half (you can also use vanilla almond milk.)
Chocolate syrup in a squeeze bottle (Smucker’s is nice and thick.)
Step 1. Chill the martini glasses and chocolate syrup bottle in the freezer for 10 or so mins.
Step 2. Pour the first three ingredients into a martini shaker, filled half way with ice, and shake vigorously.
Step 3. Swirl the Martini glass with a generous amount of chocolate syrup, pour in the drink and serve immediately.
As If That’s Not Enough Chocolate….
The Pickett’s love chocolate fountains! As a matter of fact we own two! They are totally fun to have at kid and adult parties! The good news is that you can get a decent one for around $40 and the large packages of chocolate are pretty easy to find. We love to dip strawberries, banana slices, Famous Amos cookies, Nutter Butters and even cheesecake bites!
One word of advice though: make sure you screw the tower on correctly. One New Year’s Eve at the house of our friends, Jay and Lisa, I DID NOT! When I turned the switch on the thing went spinning out of control and the chocolate hit all four walls. Thankfully Lisa just laughed. (She is my kind of gal!)
Funny Snowmen Story
Years ago at my birthday party, I got all snowman gifts: cute little snowmen hand towels, candles and even salt and pepper shakers! I said to my friends, “Why all the snowmen gifts?” My close friend Jill said, “You collect snowmen, right?!” I said “not that I know of.” We had a good laugh and to this day, I have random snowmen everywhere in my house come wintertime. I have even added a few to “my collection”!
Speaking of snowmen my good friend and fellow therapist, Peggy, shared this hilarious cartoon with me!
Happy New Year!
Easy Peasy Pub Cheesy
Do you know what puts the “Pub” in Pub Cheese? It’s beer (of course)! The Pickett family version was called “Tub Cheese”, and we purchased it regularly from Hershey’s Market on Balboa Island. We used to joke about the weird fact that it didn’t need to be refrigerated. We didn’t ask any questions, though; we just devoured it. You’ll be relieved to know that the four ingredient recipe below does need to be refrigerated. And here’s what you’ll need:
3 cups of sharp cheddar cheese
1/4 cup of beer (We used Corona Light so the beer taste wouldn’t be too strong.)
2 level teaspoons of worcestershire sauce (or as they say in the south, “wooster”)
2 level teaspoons of Rachel Ray’s Balsamic Reduction. (Traditionally Pub Cheese has mustard in it, but my taste testers weren’t feeling it, so what the heck, I threw in some balsamic reduction instead and they couldn’t have been happier!)
Put all ingredients in a food processor along with 1/4 to 1/2 level teaspoon of garlic salt and 5 cranks of ground pepper. Blend until cheese sauce is velvety smooth and creamy. (This will take quite a bit of time and some stopping and stirring.) Serve with crackers or toasted baguette slices. (We like thin toasted baguette slices better. Who wouldn’t?)
More Baguette Magic
Recently I was serving the “Pickett’s Pearls Curry Chicken Salad” to some friends and I thought parmesan crisps would go great with it! The problem was that I couldn’t find them. Thankfully I discovered that they were super easy to make and even better than store bought! Here’s what you you’ll need:
A Baguette
1/3 cup of Olive Oil
1/4 teaspoon of Garlic Salt
Shredded Parmesan Cheese
Preheat oven to 400
Step 1. Cut the baguette in very thin diagonal slices (with a sawing motion) using a serrated knife.
Step 2. Pour about 1/3 cup of olive oil into a very small bowl and stir in a 1/4 teaspoon of garlic salt. Then brush both sides of each piece with the oil mixture.
Step 3. Sprinkle the tops with parmesan and toast on a rack at 400 until golden brown around the edges (about 8 min.).
Super Helpful Hint
What on earth are we going to have for dinner tonight? Isn’t that what we all think at some point just about every week? One of the best things that I have ever done is make a list of dinners that my family likes and of course 90% of the main dishes are 4 ingredients, so I don’t dread making them! After I made up this list I took a pic of it, so I would always have it with me. I also have enough meal ideas, so I don’t have to listen to my family saying, “Mom we had that last week”!
TRY IT YOU’LL THANK ME!
An Appetite for Appetizers?
Labor Day is coming up! Just about every holiday my husband's family gathers on Balboa Island to sit by the water and have appetizers (and maybe a bit of wine). One of the appetizers that we almost always have (which I swear is a Mimi Pickett creation) is sweet pickles and cheese on crackers. I like to add a tiny dab of stone ground mustard to the combo. Including mustard definitely bucks the Pickett family tradition, but I doubt they will disown me because I have been around for 27 years. (I was a child bride:)
Here's what you'll need:
Crackers (we like Triscuits, but almost any crackers will do)
Sharp cheddar cheese (Monterey Jack and Irish Cheddar are great also!)
Bread and Butter Pickles (sweet pickles)
Optional: a tiny dab of stone ground mustard (on top of the cheese)
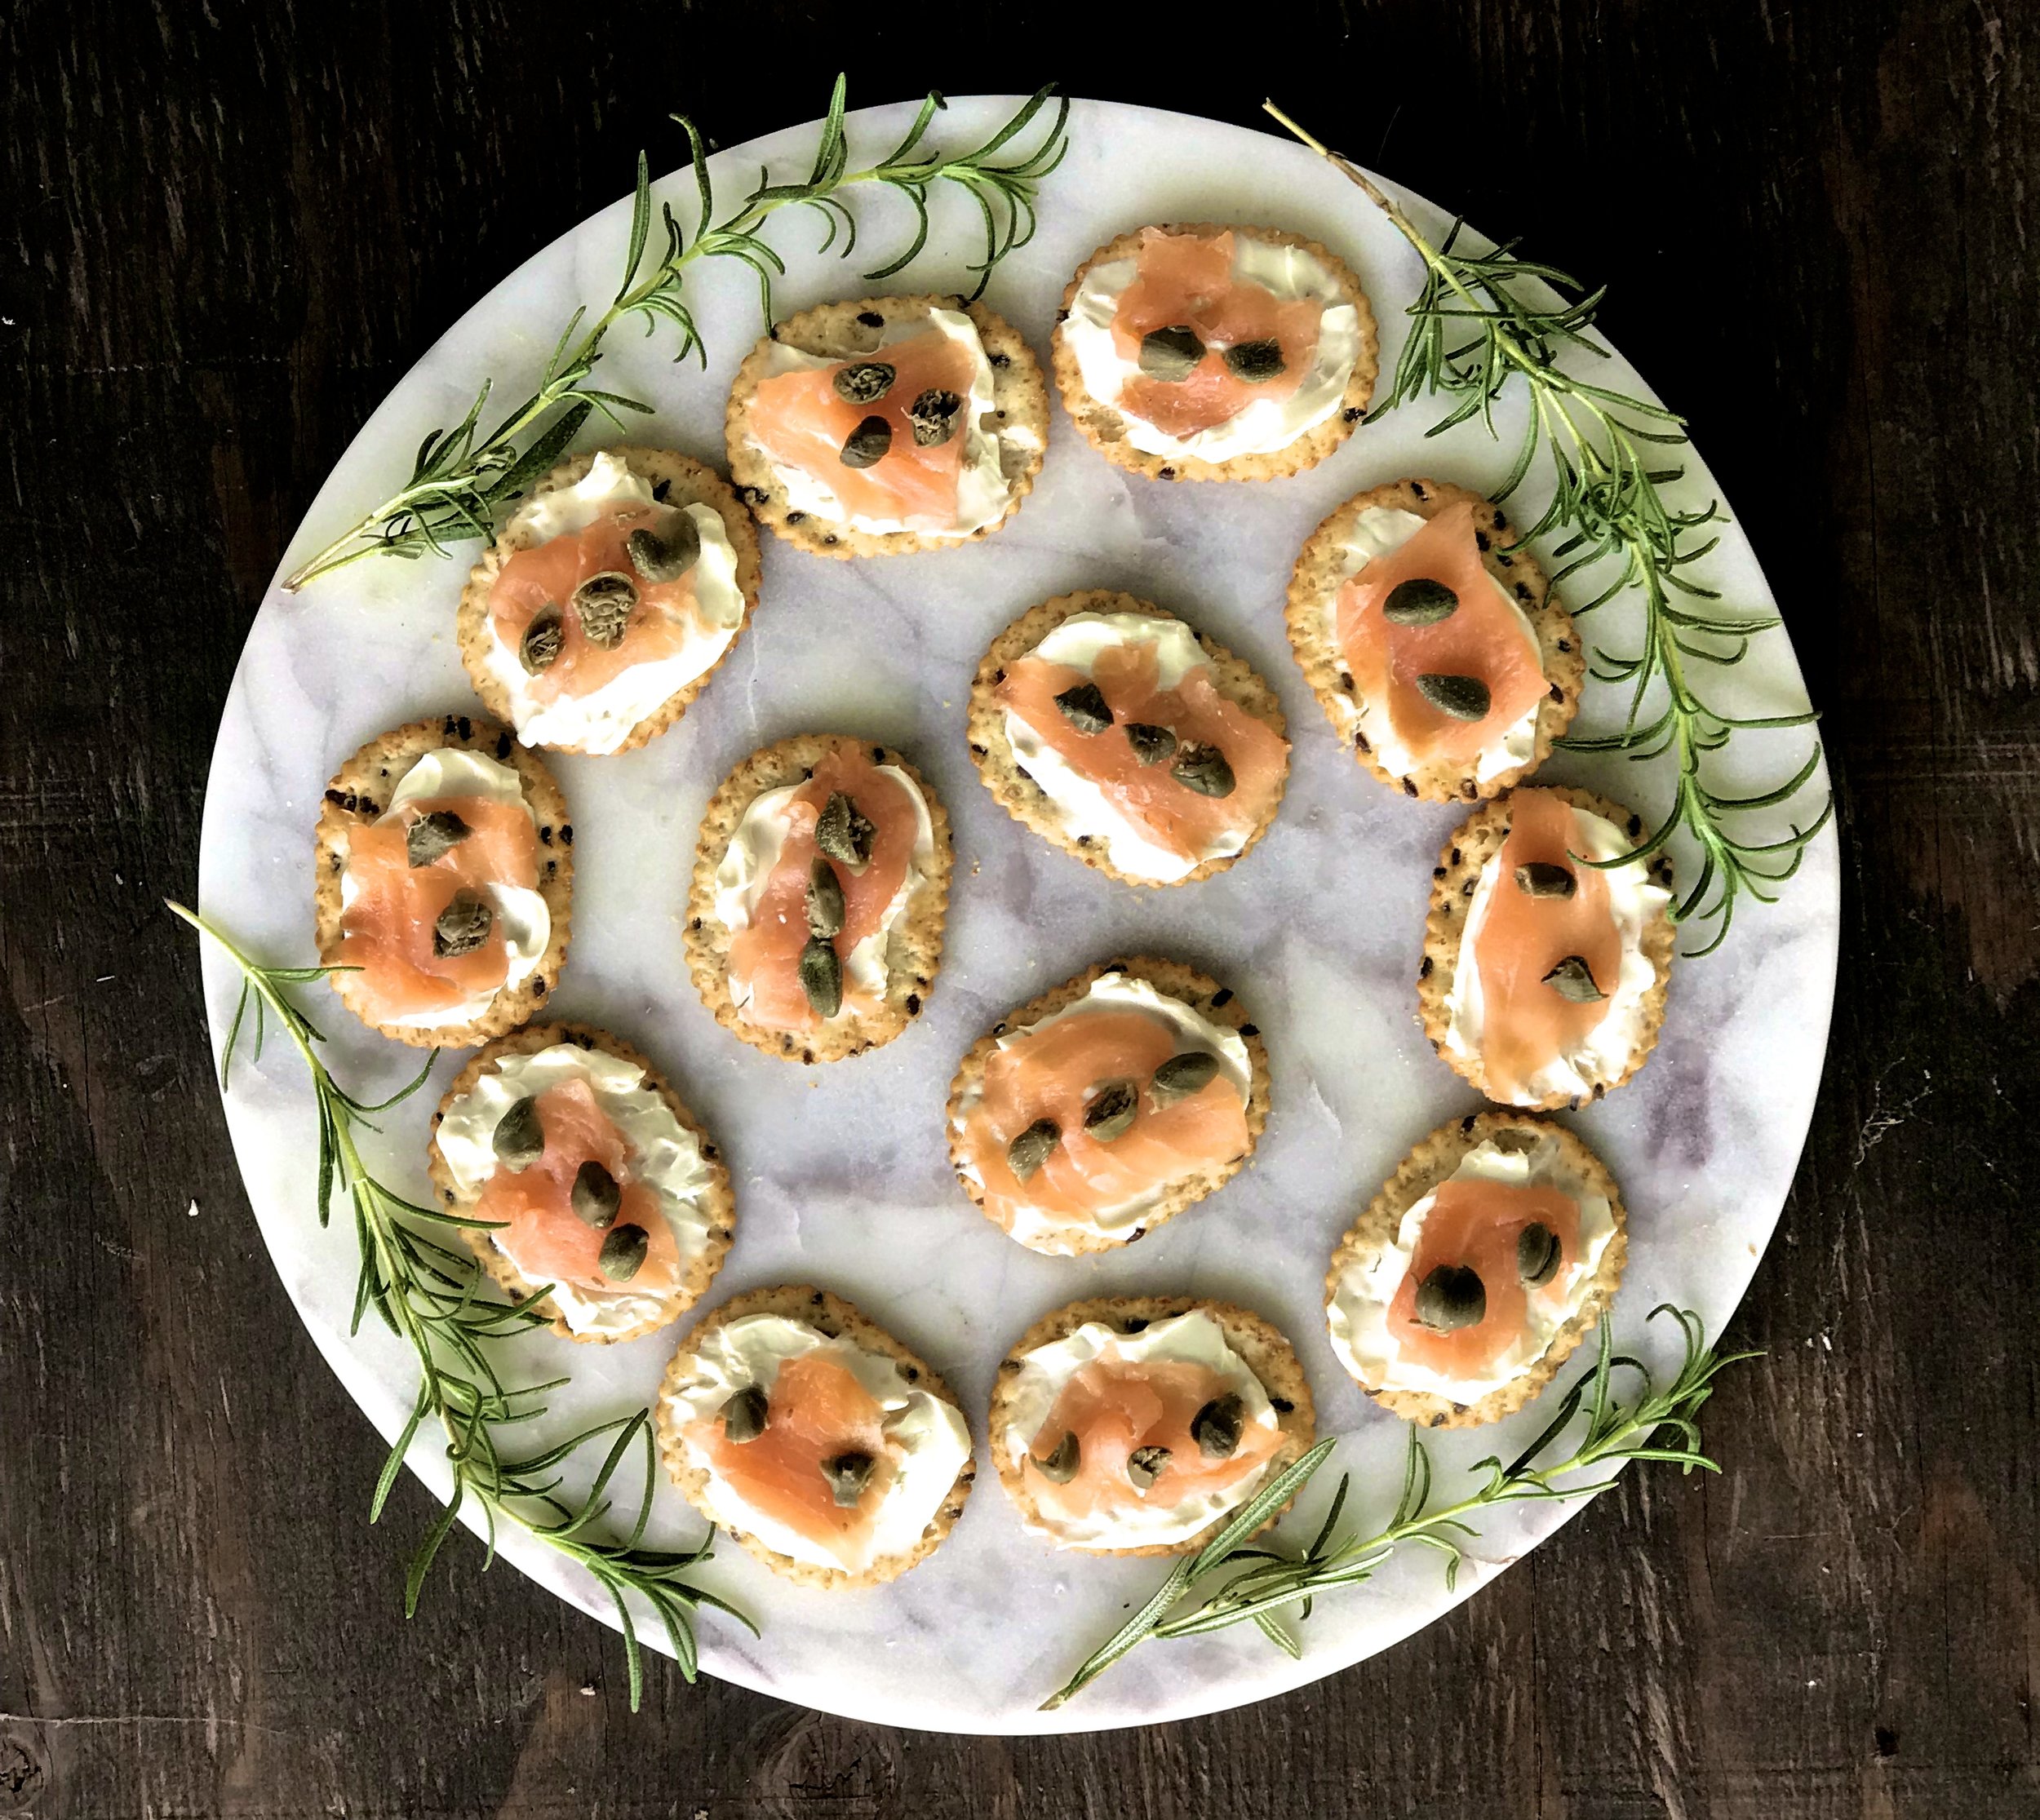
From what we can figure out, my sister-in-law, Kathy, was the one who introduced this divine smoked salmon appetizer to the family. Here's what you'll need:
Crackers ( I used stone ground wheat crackers, but lots of kinds will work great.)
Cream cheese (regular)
Smoked salmon (cut into small, thin slivers)
Capers (I halved them.)
Optional: finely chopped red onion and/or dill
Looking Back
Most appetizers seem to have cheese, so I thought we could look back to a (4 ingredient) humus recipe for all the dairy intolerant folks. (Bummer!) By the way, the Picketts are addicted to humus and vegetables as well. Check it out!
Powerful Products
Don't ask me why I get so excited when things really work, but I do and I can't help but share them. I'm surprised I haven't stopped someone on the street and said, "Have you heard about Clorox gel cleaners?" Anyway, these gel cleaners do the trick because they actually do cling to the sides of sinks, pottys and showers. You can't find them everywhere, but they're worth the search. And If you want a serious combo, use these gel cleaners and comet! TRY THEM YOU'LL LOVE 'EM!
Funny Saying
The other day I heard someone say, "I feel like there's an elephant sitting on my head." What a way to describe a headache! If an elephant is going to be hanging out, I would much rather it be in the room!
Bella Burrata!
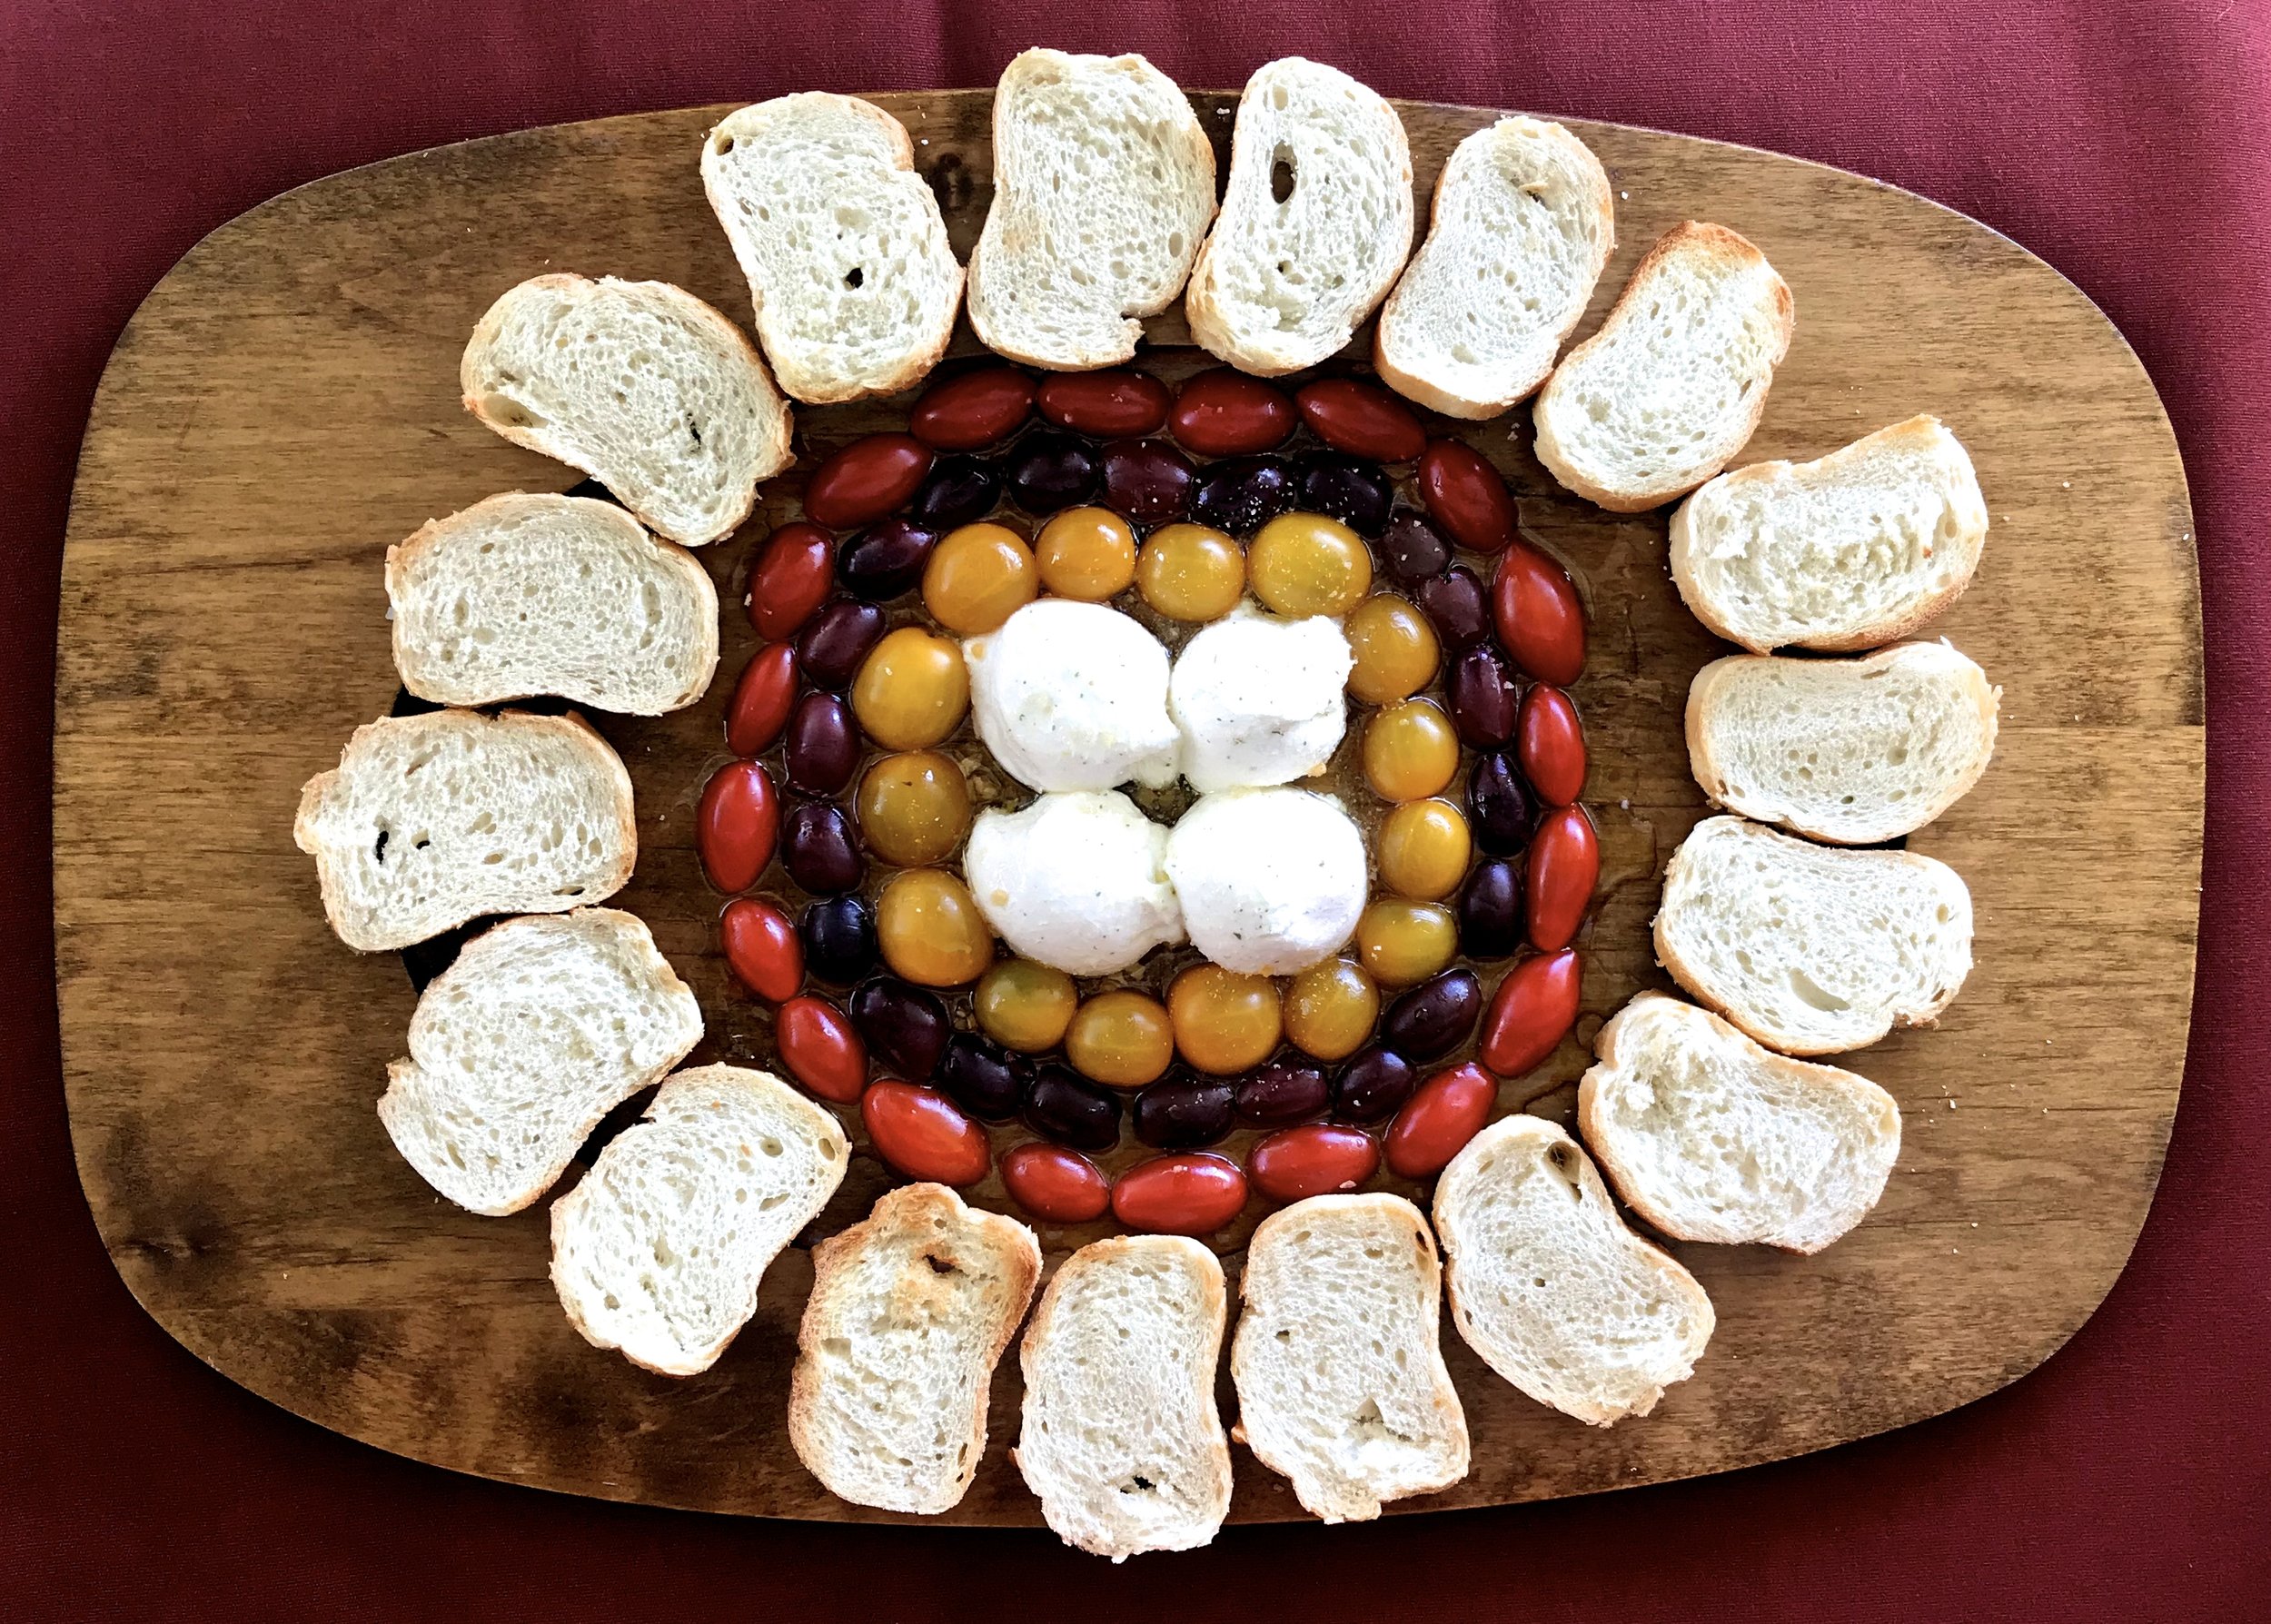
What in the world is Burrata? I had no idea until a few months ago when I was at an Italian restaurant with some friends. Now it seems that just about everyone I talk to has had it. You might be thinking, "Just spit it out Dottie. What is it?"
Well . . . Burrata is an Italian cheese made from fresh mozzarella and cream. The outer shell is solid mozzarella, while the inside contains another form of mozzarella mixed with real cream, giving it an unusual, soft texture and divine taste.
Here's what you'll need for this delightful (4 ingredient) appetizer:
A french baguette
Two balls of burrata cheese. (They come like regular fresh mozzarella - floating in liquid in a clear plastic container.)
Small (multi-colored) grape tomatoes
Seedless Greek (mediterranean) olives
Step 1. Slice the baguette into very thin slices (about 1/2 inch) and toast them in an oven at about 450 for about 5 minutes till they are very slightly browned. Set slices aside.
Step 2. Cover the center of a serving platter with olive oil.
Step 3. Very, very carefully cut each ball of Burrata in half using a sawing motion. (Making 4 halves.)
Step 4. Cover the bottom of each half ball of burrata with garlic salt. (Preferably very coarse garlic salt.) Next place the bottom of each half into the olive oil in the center of the serving platter.
Step 5. Slice the tomatoes and olives longwise and form any design that you want. Next pour more olive oil on top of the burrata and sprinkle generously with the garlic salt and a few cranks of coarse pepper. Serve with the toasted baguette slices. Unbelievably dee-lish!
TRY IT YOU'LL LOVE IT!
Looking Back
Last year, I got the the idea of doing an Italian appetizer called Caprese. (Of course you can't ever go wrong with anything Italian!) Caprese is very similar to our Burrata appetizer but, for whom it may concern, it is low carb. Check it out!
Fun Saying
One of the more funny sayings out there is: "I've got a frog in my throat." Of course if you actually had a frog in your throat you would have to use sign language to let someone know that they needed to do the Heimlich maneuver on you. Years ago someone had to do the Heimlich maneuver on me in the middle of a restaurant. Harv (that was really his name) had no idea what he was doing, but the rather large piece of carrot finally came flying out and the whole restaurant clapped. A moment later, a man walked up to Harv and said that he was a fireman and that Harv had done it the wrong way. At that point I said, "And where were you while I was on the brink of death--finishing your dessert?" Anyway, thankfully, I survived the ordeal, and it was just a piece of carrot that came out of my throat and not a frog!
Marvelous Margaritas
Skinny Margarita
My niece Kelsey is a Licensed Marriage and Family Therapist, but in another life she was a bartender. Consequently she knows a lot more about making good margaritas than I do. (This is more of a "Skinny Margarita" because it has less sugar, but it's every bit as good!)
Here's what you need:
1 & 1/2 oz. of Silver/Blanco Tequila
1 oz. of lime juice
1 teaspoon of light agave nectar
A couple of splashes of soda water
Start with a margarita glass, (or bar glass). If you like salt, run a bit of lime around the edge, then turn it over onto a saucer of coarse grained salt. (Kelsey and her husband, Chris, rave about coating the rim with a Mexican spice called Tijan.)
Next put all the ingredients in a shaker with lots of ice, shake it then pour it over ice. (We don't have a shaker, but the experts say that using one makes it ice cold and keeps the drink from getting diluted. Those of us who are novices just pour the ingredients over ice and stir.) Finally, you top off the drink with soda. Totally delicious and very few calories!
Classic Margarita
Scott Carpenter, a very good friend of ours from Newport Beach, is what I would call a "connoisseur" of food and drink. Here is his version of a great Margarita:
2 oz. of gold or silver tequilla (The more expensive the better of course.)
1.5 oz. of Triple Sec. or 1 &1/2 teaspoons of light agave nectar
1 oz of fresh lime juice
First, line the rim with lime and salt. Next, add the ingredients together in a shaker with lots of ice and shake, shake, shake. (Using a shaker is actually quite fun.) You then pour the mixture over ice and garnish it with lime.
Fun Fact: Did you know that the phrase, "Shaken not stirred" came from James Bond? It referred to how he liked his martinis.
Cuppa, Cuppa, Cuppa (What a fun name!)
Our friend, Karen Taulien, told me about this margarita recipe. It won a "Margarita Taste Test" with a rather large crowd. It's a cup of beer, a cup of tequila and a cup of limeade concentrate. Blend these three together with 4 cups of ice and you have a super fun party drink!
More about Tajin
Tajin is a spice made of chili peppers, lime and salt. It is used all over Mexico on everything. People love it so much around here that it is even available as a topping at my local yogurt shop. You can buy it almost anywhere in Southern California, but you can also order it on-line. Like I mentioned above, it is great around the rim of a margarita glass.
Fun Saying: When someone is drunk we say that they are "three sheets to the wind". When a sail is under control it's "sheeted" or tied down. So the saying literally means that not only is one sail flapping in the wind and out of control but three. The next time I'm around someone who is just a little bit tipsy I think I'll say, "There goes Sarah, she's one sheet to the wind."
Little Boats Full Of Yum
I don’t know about you, but I’m always having to come up with appetizer ideas. My husband’s family expects me to whip up something to die for every time we get together because I've hit a few out of the park. Good thing I like them! (Both the appetizers and the family.) Not long ago a family friend, Debbie Hogan, brought these little boats of yumminess over, and yes they are to die for! Here’s what you’ll need:
A dozen dates
A pkg. of crumbled blue cheese
A pkg. of pecan pieces
A dozen dried apricots
A pkg. of crumbled goat cheese
A bunch of pistachios de-shelled
Cut a small lengthwise slit in each date. You then pull back the edges of the dates and form a little boat. Next you fill each date with blue cheese crumbles. Finally top the filled dates with lots of pecan pieces.
Repeat steps with the apricots, goat cheese and pistachios (except instead of slitting the apricots open simply use your thumps to mold them into little boats).
Looking Back
Speaking of dates here is the Date/Goat Cheese /Bacon appetizer that we made last June. I've had these rich and sinful things at many weddings and parties but never quite knew how to make them. The good news is they are super easy to pull off!
Fun Saying
"I swanee". This saying actually came out of my mouth the other day, and of course my kids pointed it out. It means "I swear", but in a much more fun way. When people in the South used to say "I swear", it was looked down upon, so they basically came up with ways to say it without getting looks of disapproval. Wow times have changed! Haven't they! Next time you want to say I swear, say "I swanee" instead and see what kind of looks you get.
Super Bowl Snacks
The Patriots and the Eagles are about to duke it out and all of America and much of the world will be watching and munching. And if we are munching we might as well munch on something really good--like cheese balls and crackers. Who doesn't like cheese? (When she was little, my youngest daughter loved cheese so much she said, "I want to marry it!" Fortunately, her idea of marriage has matured.) In preparation for Super Bowl Sunday, we are going to make two scrumptious cheese balls: A Pesto-Pine Nut Cheese Ball and a Pineapple-Apricot Cheese Ball.
One of my favorite checkers at my neighborhood grocery store, Karen, told me about this cheese ball. I just had to try it! Here's what you'll need:
2/3 cup of pine nuts
1/3 cup of pesto
1/2 cup of shredded or parmesan
1 8 oz. pkg. of cream cheese
Step 1. In a frying pan using a wooden spoon stir-fry the pine nuts with a teaspoon of butter or oil. Generously salt the pine nuts as you stir continuously. (Trust me: pine nuts burn in a second, so don't turn your back on them.)
Step 2. Mix the pesto, pine nuts and parmesan in a bowl and set aside. (Don't you love the alliteration.)
Step 3. Take a small bowl and line it with plastic wrap, then line the inside of the bowl with the cream cheese making sure to hold back a couple of Tablespoons.
Step 4. Next take half the mixture and using a spoon (or your fingers) press the mixture deep into the entire inside of the dome. You then seal in the mixture with the rest of the cream cheese.
Step 5. You then put a serving plate over the bowl and flip. Next you remove the bowl and carefully peel off the plastic wrap.
Step 6. Finally, you cover the outside of the dome with the other half of the mixture, making sure to press it gently into the surface. (Serve with crackers.)
Here's what you'll need for the Pineapple-Apricot Cheese Ball:
1 8 oz. pkg of cream cheese
1/2 cup of dried and sweetened pineapple chunks
1/2 cup of dried apricots
1/2 cup of chopped pecans
Using kitchen scissors cut the pineapple and apricots into very small pieces and mix them in a bowl with the pecans. You then follow steps 3-6 above.
Try Them You'll Love Them!
Looking Back:
While we are on the subject of appetizers, the most popular Pickett's Pearls appetizer has been Margy Coleman's artichoke dip from our very first post. The thing that makes it so unbelievable is that it has mozzarella and parmesan cheese! Check it out!
Fun Saying
I was on an airplane one time and I was talking to Jimmy from Austin. I can't remember what we were talking about, but at one point he said, "That must have gone the way of the Do Do." Of course he meant the extinct, funny looking Do Do bird. What a priceless saying! I've tried to work it into a conversation ever since, but it hasn't quite happened yet. But I'm not giving up!
Shake It Up
I had a birthday recently and my husband, Todd, gave me a martini shaker because I've been known to enjoy a Lemon Drop every now and then. The problem now is that I make 100% more Lemon Drops than I ever have! I even took all my Lemon Drop making supplies and ingredients to a friend's Christmas party this year, and of course, I immediately became the most popular person at the there!
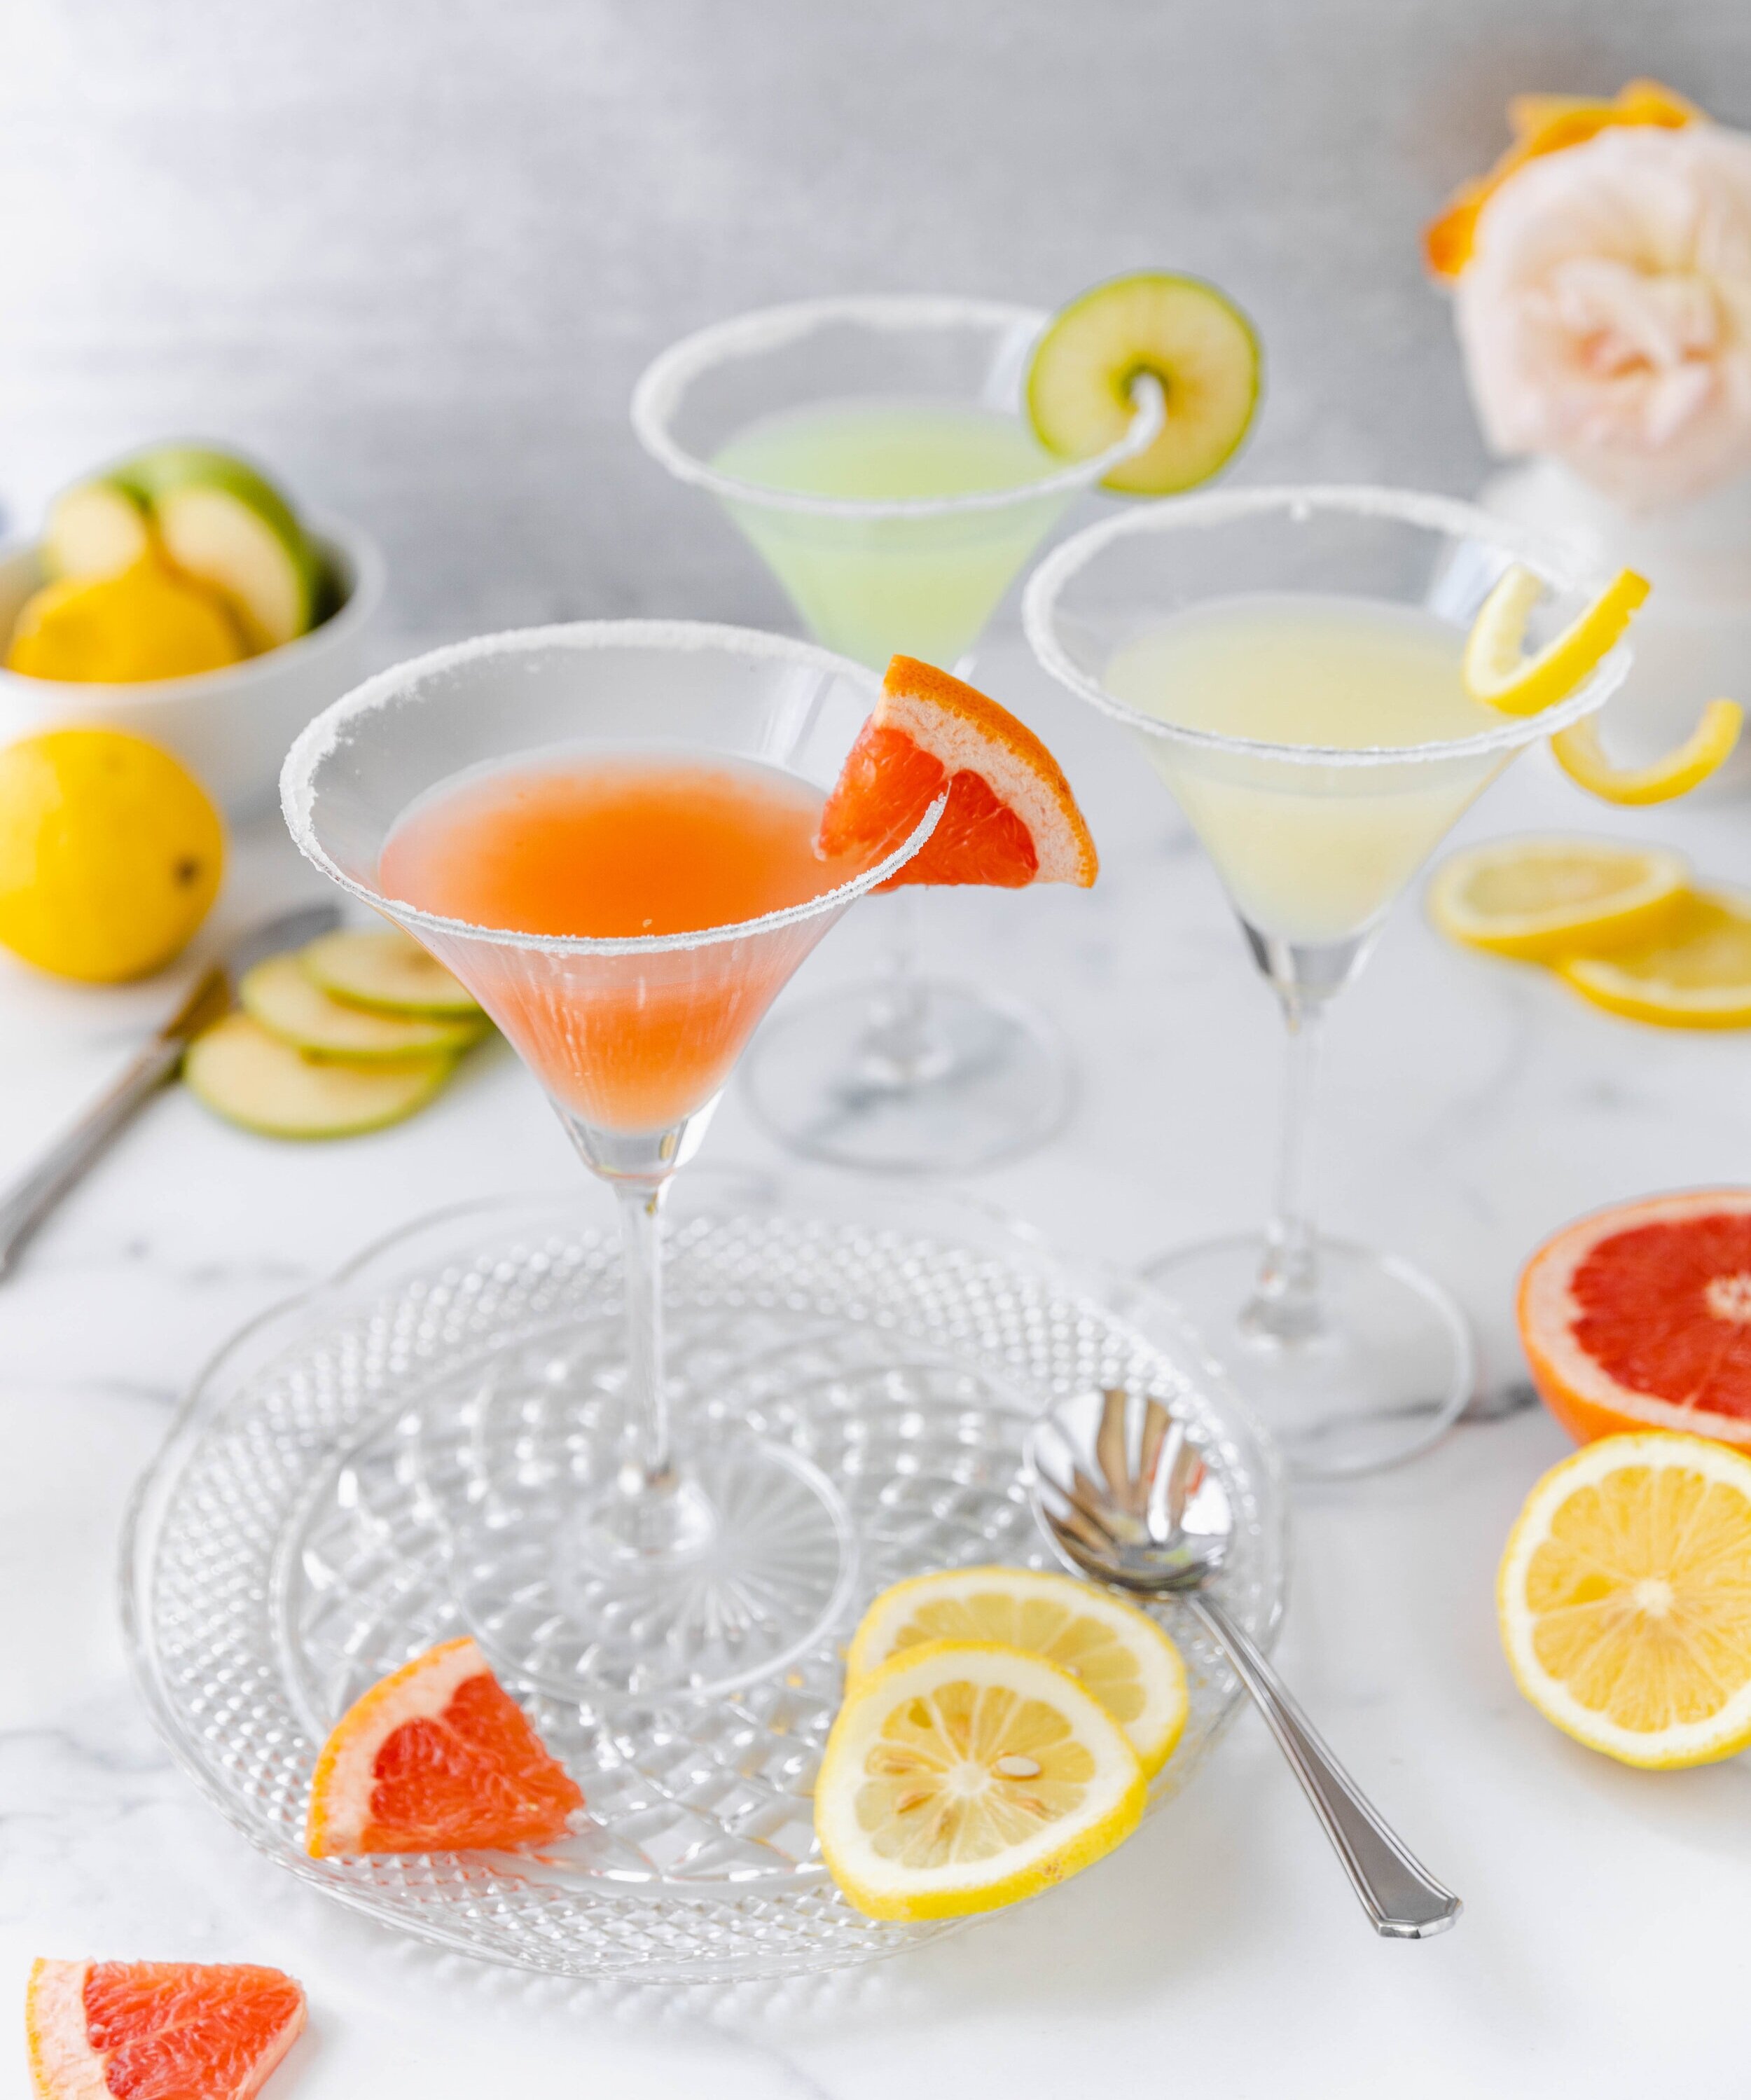
I thought since New Year's is coming up, I would concoct three different fun martinis to ring in the holiday with our friends. We have a Lemon Drop, an Appletini (what a fun name!), and a Grapefruit Martini. (My very dear friend Debbie Trammell of Newport Beach introduced me to this one!)
Here's what you'll need for each drink:
Lemon Drop:
2 & 1/2 oz. of vodka
1 & 1/2 oz. of simple syrup (You can buy simple syrup or make it just by combining equal parts of white sugar and water, warming it up in a pan and stirring. Also make sure you let the mixture cool before using it to make a martini.)
3/4 oz. of fresh lemon Juice
Appletini:
2 & 1/4 oz. of vodka
1 & 1/2 oz. of apple liqueur
2 teaspoons of fresh lemon juice
3/4 oz. of simple syrup (See Lemon Drop ingredients re: simple syrup)
Grapefruit Martini:
1 & 1/2 oz. of grapefruit infused vodka
1 & 1/2 oz. of elderberry liqueur (If you don't have this liqueur, you can add 3/4 oz. more of grapefruit vodka and 3/4 oz. of simple syrup - See Lemon Drop ingredients re: simple syrup)
3 oz.of grapefruit juice
(I have to jump off track a bit and ask: Did you grow up putting sugar on your grapefruit? We did. How weird! It actually tasted really good, and even weirder still we put salt on our cantaloupe! Those southerners . . .)
Directions for all Three Drinks
*You can use a jigger to measure the ounces, but the problem is that some shots or jiggers are 1 oz. and some are 1 & 1/2 oz. (Maybe the people deciding these things were too drunk to make a clear decision.)
**For all three of these drinks, pour all the ingredients in a martini shaker with ice and shake and keep shaking. Then pour the martini into a chilled glass and serve immediately.
*** For the Lemon Drop (or either of the other two) take a lemon wedge and run it along the rim of the glass, then turn it upside down onto a small plate covered with plain sugar and rotate the glass a bit. Voila! You have a beautiful sugared rim!
**** With any of these drinks you can play around with the measurements until you get the taste you want.
Looking Back
New Year's is the perfect time not only for fun drinks but special appetizers as well. Last June Pickett's Pearls featured Stuffed Dates Wrapped in Bacon! (To find the recipe all you have to do is go to the top of this page and choose "Appetizers", then when you see this picture choose it and you will be on the right post.) Sooo very, very delectable!
Glorious Gadgets
Pickett's Pearls is going to have a new thing pop up every now and then called "Glorious Gadgets". There are lots of things that are really cool and make life easier. Not all will be "gadgets" per say, I just like the alliteration! The first one I want to feature is a lemon squeezer. With this gadget you get a ton more juice and you don't have to deal with the slippery seeds! I use it for ice tea and of course, Lemon Drops. I got mine at my regular grocery store for $8. Glorious!
Fun Saying
I want to "pick your brain". Is anyone else entirely grossed out by this saying? Funny thing is that people use it all the time!
Yet Another Taste Test
I can't help it. I have to do another taste test. I'm addicted. The first taste test I hosted was in my 20s when I worked at Diedrich Coffee. I invited a bunch of my friends over and did a blind coffee taste test. Sumatra won, by the way.
Well this time it's hummus. Who doesn't like hummus? I decided to do a hummus taste test featuring the classic Trader Joe's hummus, the classic Costco/Ralph's grocery store hummus and my 4-ingredient Pickett's Pearls hummus. My goal was to try to see which store brand was better and then make a "better than the store" hummus using just 4 ingredients. The first four batches didn't amount to much (except a lot of dirty dishes).
However, I was NOT giving up. Finally on my last try it all came together. In a blind taste test, my family picked my hummus first before (2nd) Costco's/Ralphs brand (Sabra) and (3rd) Trader Joe's!!!!!
My efforts had paid off and it was time to take things on the road. Even with a larger group the results were the same. So, you wanna make really good 4-ingredient hummus? Here's what you'll need:
1 can of garbanzo beans well drained - liquid set aside
1/3 cup of tahini unstirred so you can get some of the oil. (My family boycotts any humus I make unless it is Trader Joe's. Other tahinis, even Joyva, have a bitter aftertaste.)
1/4 cup of fresh lemon juice + 1 Tablespoon
3 garlic cloves crushed (the easiest form of garlic are those little frozen cubes from Trader Joe's or crushed garlic in a jar.)
Using a food processor, add the tahini, lemon juice, garlic, a level 1/2 teaspoon of salt and 5 cranks of cracked pepper, then blend well (30 secs. or so). Then add 1/2 the garbanzo beans and again blend well. Next add the second 1/2 half of the beans and 3 tablespoons of the garbanzo liquid and again blend well. Finally, add 3 tablespoons of water then blend until ultra smooth (two minutes or more.) Use this time to clean-up because you have just made a bit of a mess.
*Check out my friend Nanette's blog post on Mediterranean Nachos. Her blog is called "At Home with the Loverbees": The sweet, real, and fun life of a family enjoying food, faith, homeschooling, crafting, and country living.
**This homemade humus would go marvelously with Middle Eastern Turkey/Zucchini Meatballs! See the Pickett's Pearls blog post "A Taste of Jerusalem" from last February.
Jewels Beautiful Jewels
I've been making jewelry so long that I can't even remember where I learned how. Right off the bat I got a small pair of round needle nose pliers, a small wire cutter and a small pair of regular needle nose pliers and those are all the tools I've ever needed. Jewelry making has been an awesome creative outlet for me. Everyone in my family drew and painted like Leonardo DaVinci, so for me to be good at something creative felt awesome. Not surprisingly, I would love to share some jewelry making skills with you.
The first skill we will be focusing on is shortening or lengthening pieces that we already have. (The jewelry we already have is one of our best resources when it comes to jewelry making.)
For instance, below is a pair of earrings that I have never worn because they are too long for me. So I’m going to take my two pairs of pliers and open the jump ring or connector ring at it’s natural break, and twist the pliers in opposite directions. Once I remove the bottom diamonds and connector rings I will have a pair of earrings I’ll actually wear!
Next I’m going to take a long necklace, which I’ve never worn and turn it into a bracelet. First I wrap it around my wrist and then measure (count) how many beads I need to remove. Then I remove the section of beads I don't need by using my two pliers to open the connector rings on each end of the section.
Next I take one part of a clasp and add it to one end again using my pliers. Then I add the second part on the clasp to the other end. Finally, I wrap it back around my wrist, clasp it and voila! I have a fun dangly bracelet.
Finally I’m going to take a beautiful long necklace that I don’t wear much anymore and shorten it. After I have figured out how much chain to remove, I use my two pairs of pliers to shorten the necklace by opening one of the jump rings.
After I have removed the extra chain, I close the jump ring. (You will probably have to work with it a little to close it tight.) This necklace already has a clasp, so there is no need to add one. Now I have a beautiful short necklace. (I always keep any left over parts of jewelry that I remove, so if I want to add them back or make something else out of them I can.)
In the following weeks we will focus on : making elastic bracelets, making earrings and using crush beads and wire to make bracelets and necklaces.
*New Pickett's Pearls posts are now every other Wednesday. Subscribe below so you will know when a new post is out!
Party Time
Parties aren't complete without appetizers, and a total crowd pleaser is anything wrapped in bacon! The wildest one I've had is banana wrapped in bacon and, believe or not, it was quite good. But in my book, bacon wrapped dates filled with goat cheese are the ones to die for. Here's what you'll need:
- Regular bacon
- Dates
- Goat Cheese
- Toothpicks
First preheat oven to 350. Then cut each piece of bacon into thirds. (Most recipes call for 1/2 a piece which I think makes them too greasy.) Next take a date and set it up straight then cut it lengthwise. Fill one half with goat cheese and put the two halves together.
Next wrap the dates in the bacon and keep them together with toothpicks. Place them on a cookie sheet that has a lip and cook them on each side for 8 minutes. (Longer if needed.) Remove from oven, dab with a paper towel and serve warm.
Parties On A Budget
I love parties and have thrown lots and lots. Many of them have been for my daughters' birthdays. (If I wasn't a therapist, I would probably be a party planner.) Here's some simple ideas and money saving tips that I've learned along the way when giving a more formal or semi-formal party. (Looking at Pinterest is intimating for most of us. These ideas are super doable.)
The first thing is picking a color scheme. (I like to use two different colors, at least.) I suggest buying white tablecloths because it costs just as much to rent them as it does to buy them. Purchasing tables versus renting them is also something to think about because renting a table is about $15 and buying one is about $30.
If you want to bring color into your set up, you can lay cloth napkins under the centerpieces. Renting cloth napkins are only about $1 each and they really add a lot. TJ Maxx and World Market also have very inexpensive cloth napkins.
Table runners are of course an option and they are only about $4 to rent. Another thing to consider is buying white plates which again you can use over and over. You can get them a TJ Maxx or World Market for around $2 each.
Flowers are a must, of course, (See Put A Little Drama in Your Life for a simple yet elegant way to make centerpieces). Hydrangeas are the easiest and you don't even need oasis. Finally make sure that your arrangement is low enough for your guests to see each other.
Another thing to think about regarding flowers is purchasing square glass flower containers. You will use them again and again and they are only about $10 each. I tie a ribbon around each base to make the table look more elegant.
Special napkin folds are a great way to make a table more attractive. (See Creative/Helpful Ideas for 3 super easy ones.) To rent cloth napkins it is about $1 each and they really add a lot. Also TJ Maxx and World Market have very inexpensive cloth napkins. Finally one thing that really adds to a table set up is to use chair bows. (I love chair bows!)
Fun Saying:
"You've got a bee in your bonnet." That's kinda scary cause if there's a bee in your bonnet, it's gonna sting the heck out of you. Funny enough the original saying was, "There are bees in your head". That's a funny way of saying that someone is in a tizzy. Now isn't it?
Sweet and Blue
My very close friend Debbie Trammel, Newport Beach, taught me how to make this easy and delicious salad. All you need Is:
A bag of spinach or any other lettuce
1/3 cup of gorgonzola cheese (Goat cheese can be used instead.)
1/3 cup of dried cranberries
1/3 cup of chopped pecans or sliced almonds
Opt. Chicken and/or Avocados
Cooking Tidbit: Have you ever wondered what the difference is between Gorgonzola and blue Cheese? I looked it up and found that Gorgonzola is a type of Blue Cheese!
Here's how you make the salad: Place the nuts in a small frying pan along with 1/2 teaspoon of butter and 1/2 teaspoon of sugar. Stir over medium heat until golden brown and set aside to cool. (You can also buy already candied nuts at Trader Joe's or just use un-cooked nuts.) You then toss all ingredients along with a sweet balsamic dressing. (This can be found just about anywhere, but I like throwing one together on my own.)
Classic Balsamic Dressing
Debbie also taught me how to make this Balsamic dressing. Using a container with a lid, put in 1/2 cup of olive oil, 1/3 cup of balsamic vinegar, 1 teaspoon of dijon mustard and 1/2 teaspoon of sugar. Season it with garlic salt and pepper, then shake vigorously. (With the lid on of course.)
Fun Saying
The random saying for this week is: "Cat got your tongue?"Ow! Ow! Ow! What an image. Whoever came up with that one had a bit of a masochistic mind. Wouldn't you say?
You Can't Go Wrong
One last suggestion for Easter Eats. This is an appetizer idea that I got from my friend, Gina Carpenter, Newport Beach. It has gone over like gangbusters with family and friends and it is super easy! Of course, you can never go wrong with anything on a baguette. Here's what you'll need:
A French Baguette
A 4 oz. can of chopped olives
1/3 cup of crumbled feta
2 tablespoons of pesto (Trader Joe's has great fresh pesto.)
Combine the chopped black olive, crumbled feta, and pesto in a small mixing bowl. (My favorite mixing tool is a single beater from my electric hand mixer.) Just before serving, bake slices (about 1/2 inch thick) of baguette at 350 for a few mins. until they are golden brown around the edges. Once slices are toasted, spread them on top with a thin layer of olive mixture and serve. Super yummy!
Cooking Tidbit:
Have you ever wondered what the difference is between feta and goat cheese? Feta is made in a specific region of Greece. It is mostly made from goat's milk with a little sheep's milk thrown in. Goat cheese is just as it sounds. (Both animals make one of my favorite sounds: Baaaa) My daughter, Carly, was in New Zealand last year and she actually hugged a sheep. I wish I had been there to see that!
Great Guac.
I got the idea for this guacamole from my sisters's chef. We call her Chef Jen. The recipe is really simple, but that's the beauty of it: the taste of the avocado isn't smothered.
Here's what you'll need:
3 medium sized, ripe avocados (or the equivalent)
1 Tablespoon of lime
1/2 teaspoon of garlic salt
(Opt. ) My secret ingredient: 1/2 teaspoon of homemade Hidden Valley Ranch Dressing
Scoop the avocados into a mixing bowl. Using a fork mash the avocado, making sure that you leave lots of chunks. Next lightly mix in lime, garlic salt (and ranch.) Sample the guacamole with chips, so you know how it will really taste. Serve with tortilla chips. (Serves 4 -6 depending how hungry people are.)
Fun fact: We celebrate Cinco de Mayo in the States on May 5th (the day that Mexico won a battle against France). The real independence day for Mexico is September 16th which is the day they won their independence from Spain 50 years earlier.) People from Mexico actually laugh that we make such a big deal about "Cinco de Mayo", but hey it's a good excuse to have fun!


