Easy Peasy Pub Cheesy

pub final 1.jpg

Do you know what puts the “Pub” in Pub Cheese? It’s beer (of course)! The Pickett family version was called “Tub Cheese”, and we purchased it regularly from Hershey’s Market on Balboa Island. We used to joke about the weird fact that it didn’t need to be refrigerated. We didn’t ask any questions, though; we just devoured it. You’ll be relieved to know that the four ingredient recipe below does need to be refrigerated. And here’s what you’ll need:

3 cups of sharp cheddar cheese

1/4 cup of beer (We used Corona Light so the beer taste wouldn’t be too strong.)

2 level teaspoons of worcestershire sauce (or as they say in the south, “wooster”)

2 level teaspoons of Rachel Ray’s Balsamic Reduction. (Traditionally Pub Cheese has mustard in it, but my taste testers weren’t feeling it, so what the heck, I threw in some balsamic reduction instead and they couldn’t have been happier!)

Put all ingredients in a food processor along with 1/4 to 1/2 level teaspoon of garlic salt and 5 cranks of ground pepper. Blend until cheese sauce is velvety smooth and creamy. (This will take quite a bit of time and some stopping and stirring.) Serve with crackers or toasted baguette slices. (We like thin toasted baguette slices better. Who wouldn’t?)

More Baguette Magic

Recently I was serving the “Pickett’s Pearls Curry Chicken Salad” to some friends and I thought parmesan crisps would go great with it! The problem was that I couldn’t find them. Thankfully I discovered that they were super easy to make and even better than store bought! Here’s what you you’ll need:

parm final 2.jpg

A Baguette

1/3 cup of Olive Oil

1/4 teaspoon of Garlic Salt

Shredded Parmesan Cheese

Preheat oven to 400

Step 1. Cut the baguette in very thin diagonal slices (with a sawing motion) using a serrated knife.

Step 2. Pour about 1/3 cup of olive oil into a very small bowl and stir in a 1/4 teaspoon of garlic salt. Then brush both sides of each piece with the oil mixture.

Step 3. Sprinkle the tops with parmesan and toast on a rack at 400 until golden brown around the edges (about 8 min.).

meals final.jpg

Super Helpful Hint

What on earth are we going to have for dinner tonight? Isn’t that what we all think at some point just about every week? One of the best things that I have ever done is make a list of dinners that my family likes and of course 90% of the main dishes are 4 ingredients, so I don’t dread making them! After I made up this list I took a pic of it, so I would always have it with me. I also have enough meal ideas, so I don’t have to listen to my family saying, “Mom we had that last week”!

TRY IT YOU’LL THANK ME!

Fantastic Fajitas

My family loves fajitas (who doesn’t?) so I make this 4-ingredient version all the time. (As I’ve confessed before, I’m a wee bit lazy, so me and the whole 4 ingredient thing are a match made in heaven.) Here's what you'll need for these fantastic fajitas!

fajita split finished.JPG

1 to 1 & 1/2 lbs. of chicken breasts or flank/ skirt steak

2 peppers (red, yellow and/or orange)

1 red onion (Red onion is sweeter, adds color and saves some tears.)

1 pkg of fajita mix (We like Frontera Skillet Sauce - If you want you're sauce spicier just add a bit of chili powder.)

Step 1. Wash, completely dry and cut the chicken or steak into large bite sized chunks.

Step 2. (Opt.) Put the meat chunks in a  zip lock with a little of the fajita sauce and marinate in the frig. for 30 minutes to 3 hours.

Step 3. Chop the red onion and peppers into large bite sized pieces.

Step 4. You then saute the onion and peppers in a skillet covered lightly with a thin film oil.  Once they are cooked (but still firm), set aside and cover tightly with foil.  

Step 5. Remove only the meat from the bag and discard the bag with sauce in it. You then saute chicken/steak on medium high in a skillet covered with a thin film of oil.  Once meat is done add the vegetables and the fajita sauce. Once entire dish is warmed up, turn heat down to low and serve. (Serves 4 to 6)

guac split2.JPG

You can serve the fajitas by themselves, over rice  or with flour tortillas. We always eat ours with an awesome and very simple guacamole recipe (that my sister's chef makes) and sour cream or greek yogurt.

Hilarious Story

My oldest just returned from visiting Ireland. Her trip reminded me of a story my husband heard when he was living there. His Irish friends were hosting some visiting nuns from America.  After the sisters had landed in Dublin, they said, “We’re so glad to get off that plane; our fannies are killing us!”  Do I need to tell you that what we Americans refer to as our ‘fannies’ is for the Irish a nearby but totally different body part?!  Todd’s Irish friends could not stop laughing, and Todd and I are still laughing. 

An Appetite for Appetizers?

Labor Day is coming up!  Just about every holiday my husband's family gathers on Balboa Island to sit by the water and have appetizers (and maybe a bit of wine). One of the appetizers that we almost always have (which I swear is a Mimi Pickett creation) is sweet pickles and cheese on crackers. I like to add a tiny dab of stone ground mustard to the combo. Including mustard definitely bucks the Pickett family tradition, but I doubt they will disown me because I have been around for 27 years. (I was a child bride:) 

pickle plattter finished b.JPG

Here's what you'll need:

Crackers (we like Triscuits, but almost any crackers will do) 

Sharp cheddar cheese (Monterey Jack and Irish Cheddar are great also!)

Bread and Butter Pickles (sweet pickles)

Optional: a tiny dab of stone ground mustard (on top of the cheese)

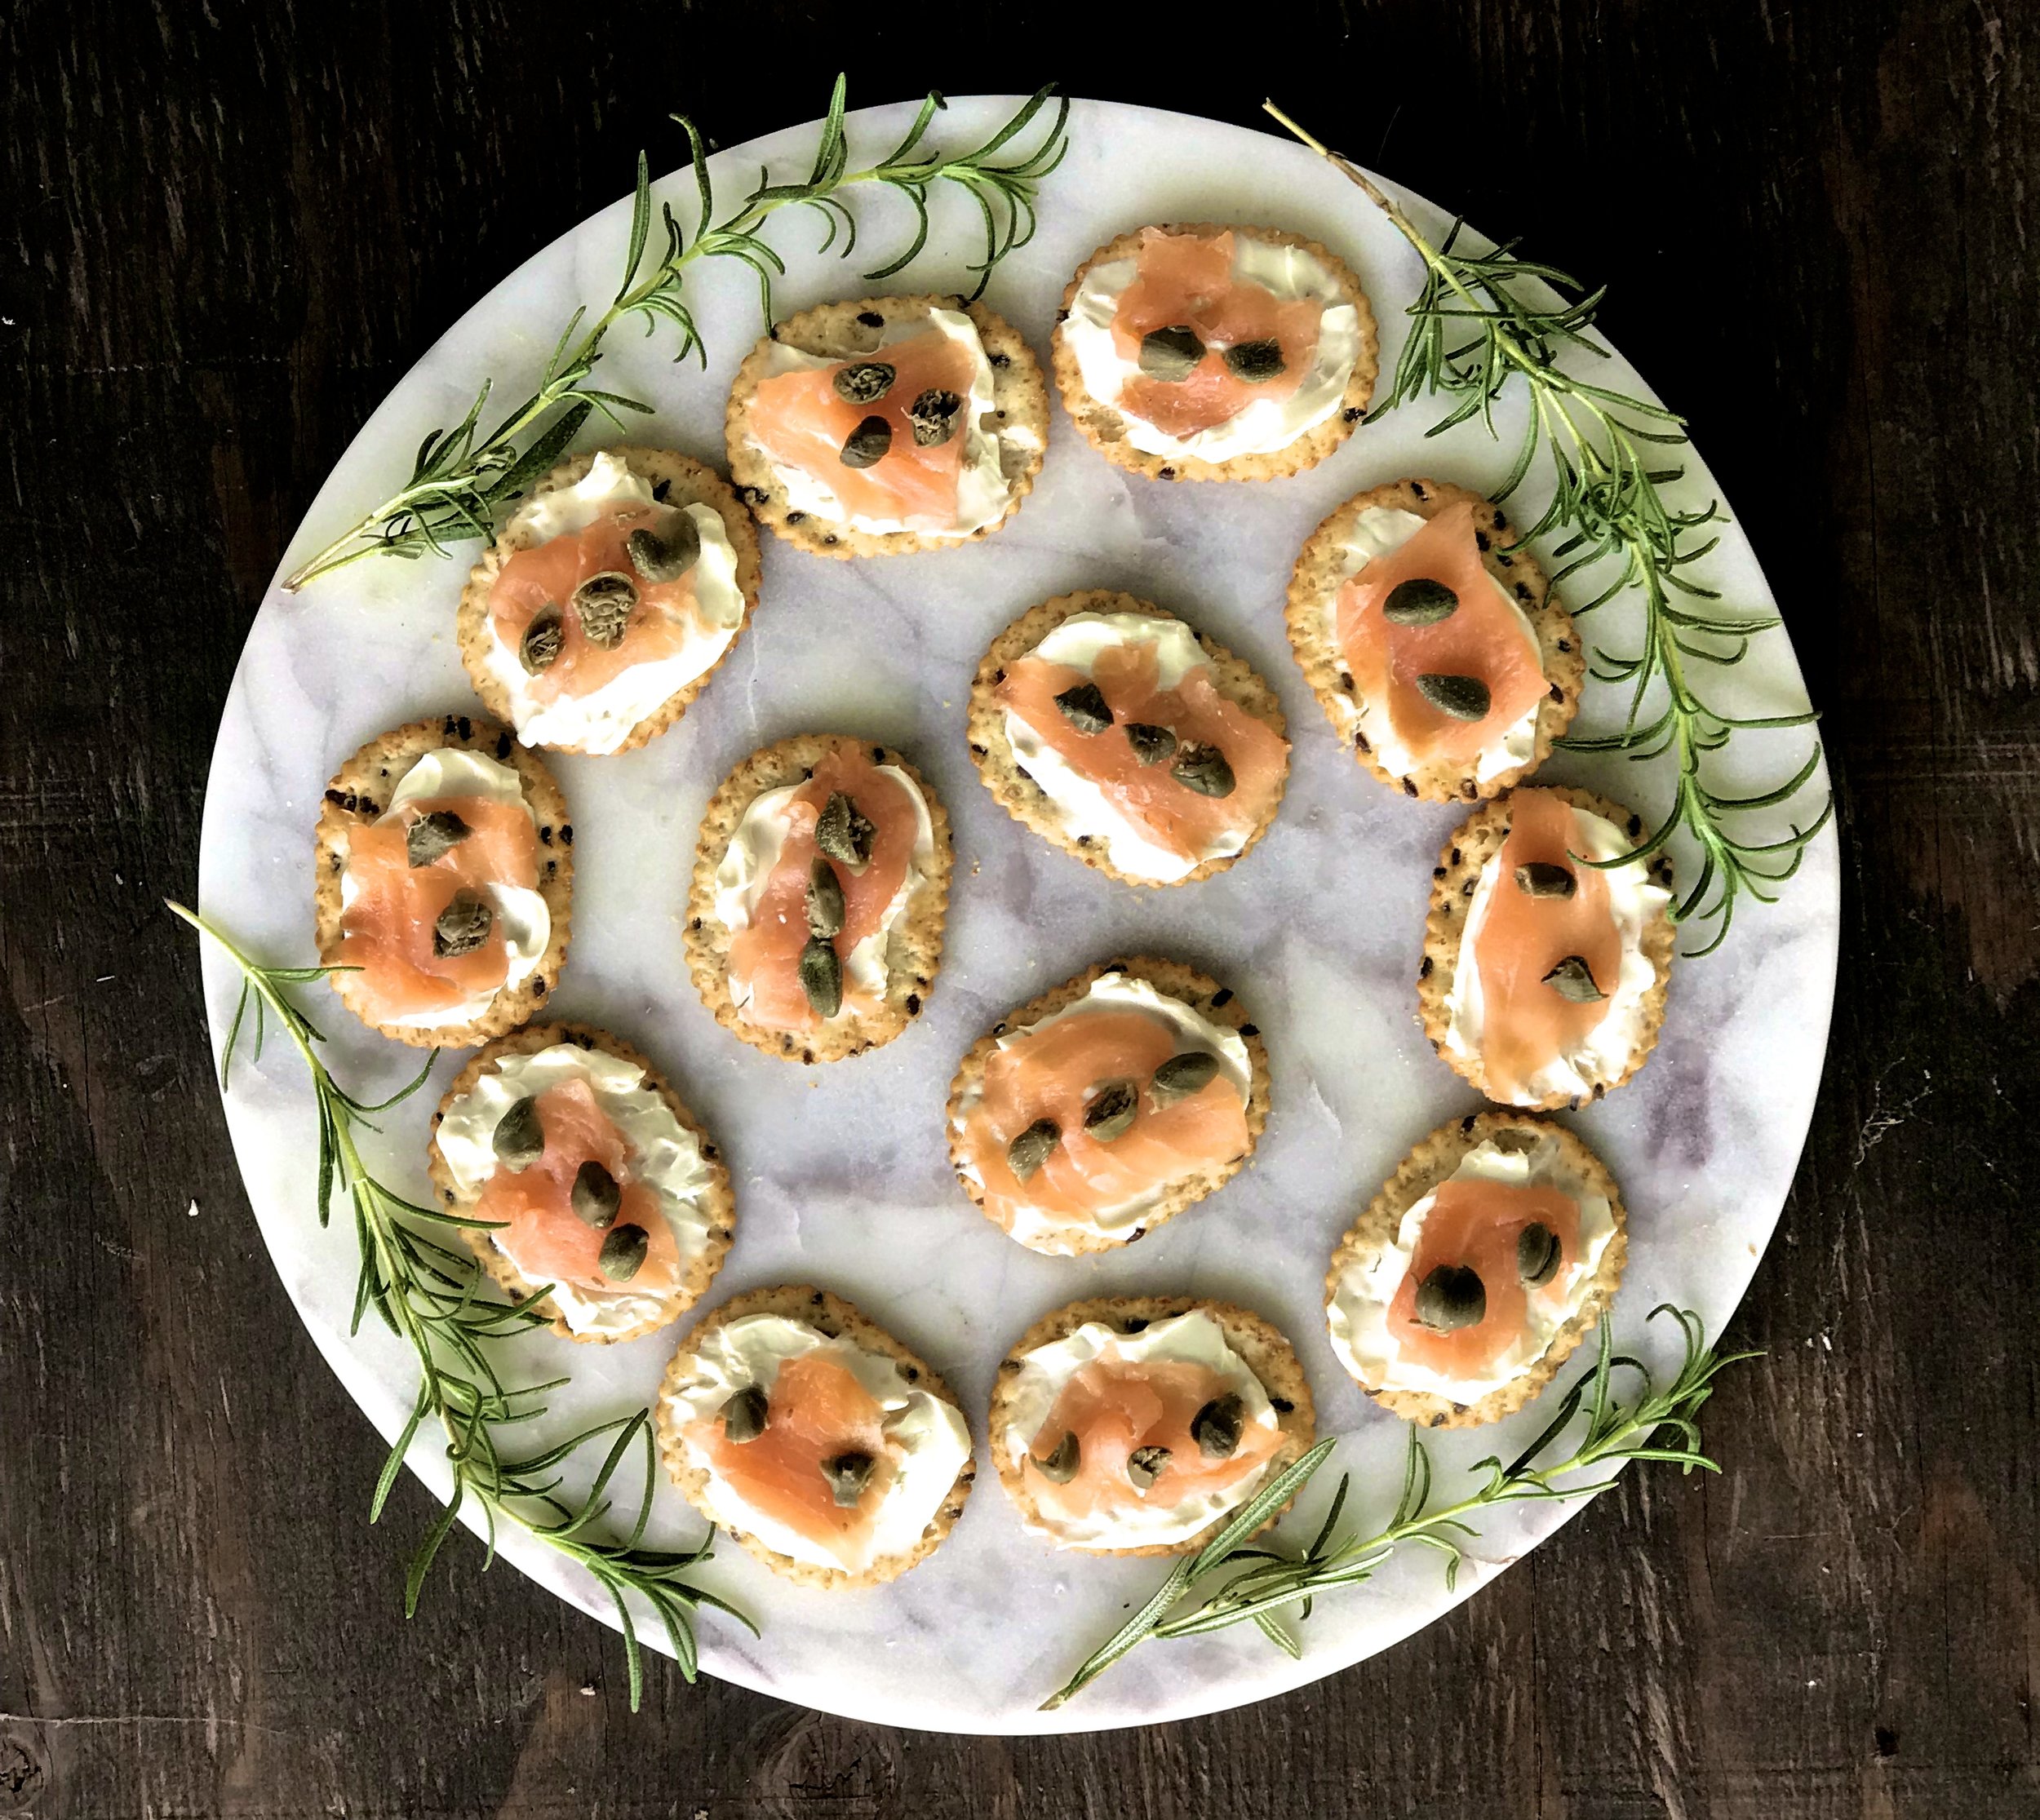
salmon round color corrected.JPG

From what we can figure out, my sister-in-law, Kathy, was the one who introduced this divine smoked salmon appetizer to the family. Here's what you'll need:

Crackers ( I used stone ground wheat crackers,  but lots of kinds will work great.)

Cream cheese (regular)

Smoked salmon (cut into small, thin slivers)

Capers (I halved them.)

Optional: finely chopped red onion and/or dill

Looking Back

Most appetizers seem to have cheese, so I thought we could look back to a (4 ingredient) humus recipe for all the dairy intolerant folks. (Bummer!) By the way, the Picketts are addicted to humus and vegetables as well. Check it out!

humus 3.jpg

Powerful Products

toiletgel.png
clorox gel.png

Don't ask me why I get so excited when things really work, but I do and I can't help but share them. I'm surprised I haven't stopped someone on the street and said, "Have you heard about Clorox gel cleaners?" Anyway, these gel cleaners do the trick because they actually do cling to the sides of sinks, pottys and showers. You can't find them everywhere, but they're worth the search. And If you want a serious combo, use these gel cleaners and comet! TRY THEM YOU'LL LOVE 'EM!

Funny Saying

The other day I heard someone say, "I feel like there's an elephant sitting on my head."  What a way to describe a headache! If an elephant is going to be hanging out, I would much rather it be in the room!

Smothered Salmon

The Pickett family looooves salmon, so I'm constantly on the look out for new ideas. Here's a 4-ingredient recipe that has batted a 1000 lately. This is the way a friend of mine makes salmon, which actually only started with 3 ingredients. I added the chopped tomatoes for extra taste and color (and because I get to use 4 ingredients!).  My family assured me that the tomato addition was a great one. Yours truly doesn't actually eat anything that swims. (Probably because when I was growing up the scent of my mother's oil packed tuna was always wafting through the house.) Anyway, for you salmon lovers, this is what you'll need:

SalmonFinal.jpg

2 pounds of fresh salmon

Mediterranean  Garlic Marinade by Scott's (pesto works as well.) 1/2 cup +1/4 cup

1/4 cup of Balsamic Glaze by Trader Grotto's (Rachel Ray's Balsamic Reduction works also.)

2/3  cup of chopped grape or cherry tomatoes

marinade.png
glaze 2.jpg

Step 1. Cut the salmon in 1/2 lb. pieces, put them in a baking dish or large plastic bag and cover the pieces with about 1/2 cup of the marinade. (Ideally you would marinate the salmon for a few hours.)

Step 2. You then cut the tomatoes into small pieces and mix them with 1/4 cup of balsamic glaze and 1/4 cup of marinade. (This mixture will be spooned onto salmon later.)

Screen Shot 2018-07-15 at 11.03.26 PM.png

Step 3. Preheat grill on medium high. With foil, create 2 rectangular "trays"  folding up the foil to create sides. These "boats" will prevent liquid from seeping out. Or better yet, line a grill basket (that has a handle) with foil. These grill baskets are one of Pickett's Pearls Glorious Gadgets. They are great for barbecuing shrimp, veggies etc. as well as salmon.

Step 4. You then spray inside of the foil with cooking spray. Next place salmon covered with marinade into foil trays or foil-lined basket then generously spoon tomato mixture on top.

Step 5. Place salmon on the grill. Cook for about 10-12 minutes (depending on thickness) until it flakes easily with a fork.  (No need to turn it.) You can serve salmon with its skin on, which will be nicely charred underneath. If you don't like the skin, the filets lift easily off it with a spatula.

easter salmon.JPG

Looking Back

A couple of Easters ago Pickett's Pearls featured Salmon with Lemon and Dill, the go-to salmon recipe for the Pickett family. Check it out!

Funny Encounter

Not too long ago, I was at a gas station about to pump gas when I got a phone call. I took the call and because I'm a hideous multi-tasker, I forgot to start the pump.  A biker who looked about 75 complete with long gray beard, leather jacket and tattoos rolled right up to me and started revving his huge motorcycle. He said to me, "Lady are you gonna fish or cut bait?" I said "fish" and got to pumping. Normally I hate when people are irritated with me, but this time it was just plain funny. At least he didn't say, "Lady, if you aren't gonna to p. . . then get off the p. . . !"

Bella Burrata!

What in the world is Burrata? I had no idea until a few months ago when I was at an Italian restaurant with some friends. Now it seems that just about everyone I talk to has had it. You might be thinking, "Just spit it out Dottie. What is it?"

Well . . . Burrata is an Italian cheese made from fresh mozzarella and cream. The outer shell is solid mozzarella, while the inside contains another form of mozzarella mixed with real cream, giving it an unusual, soft texture and divine taste.

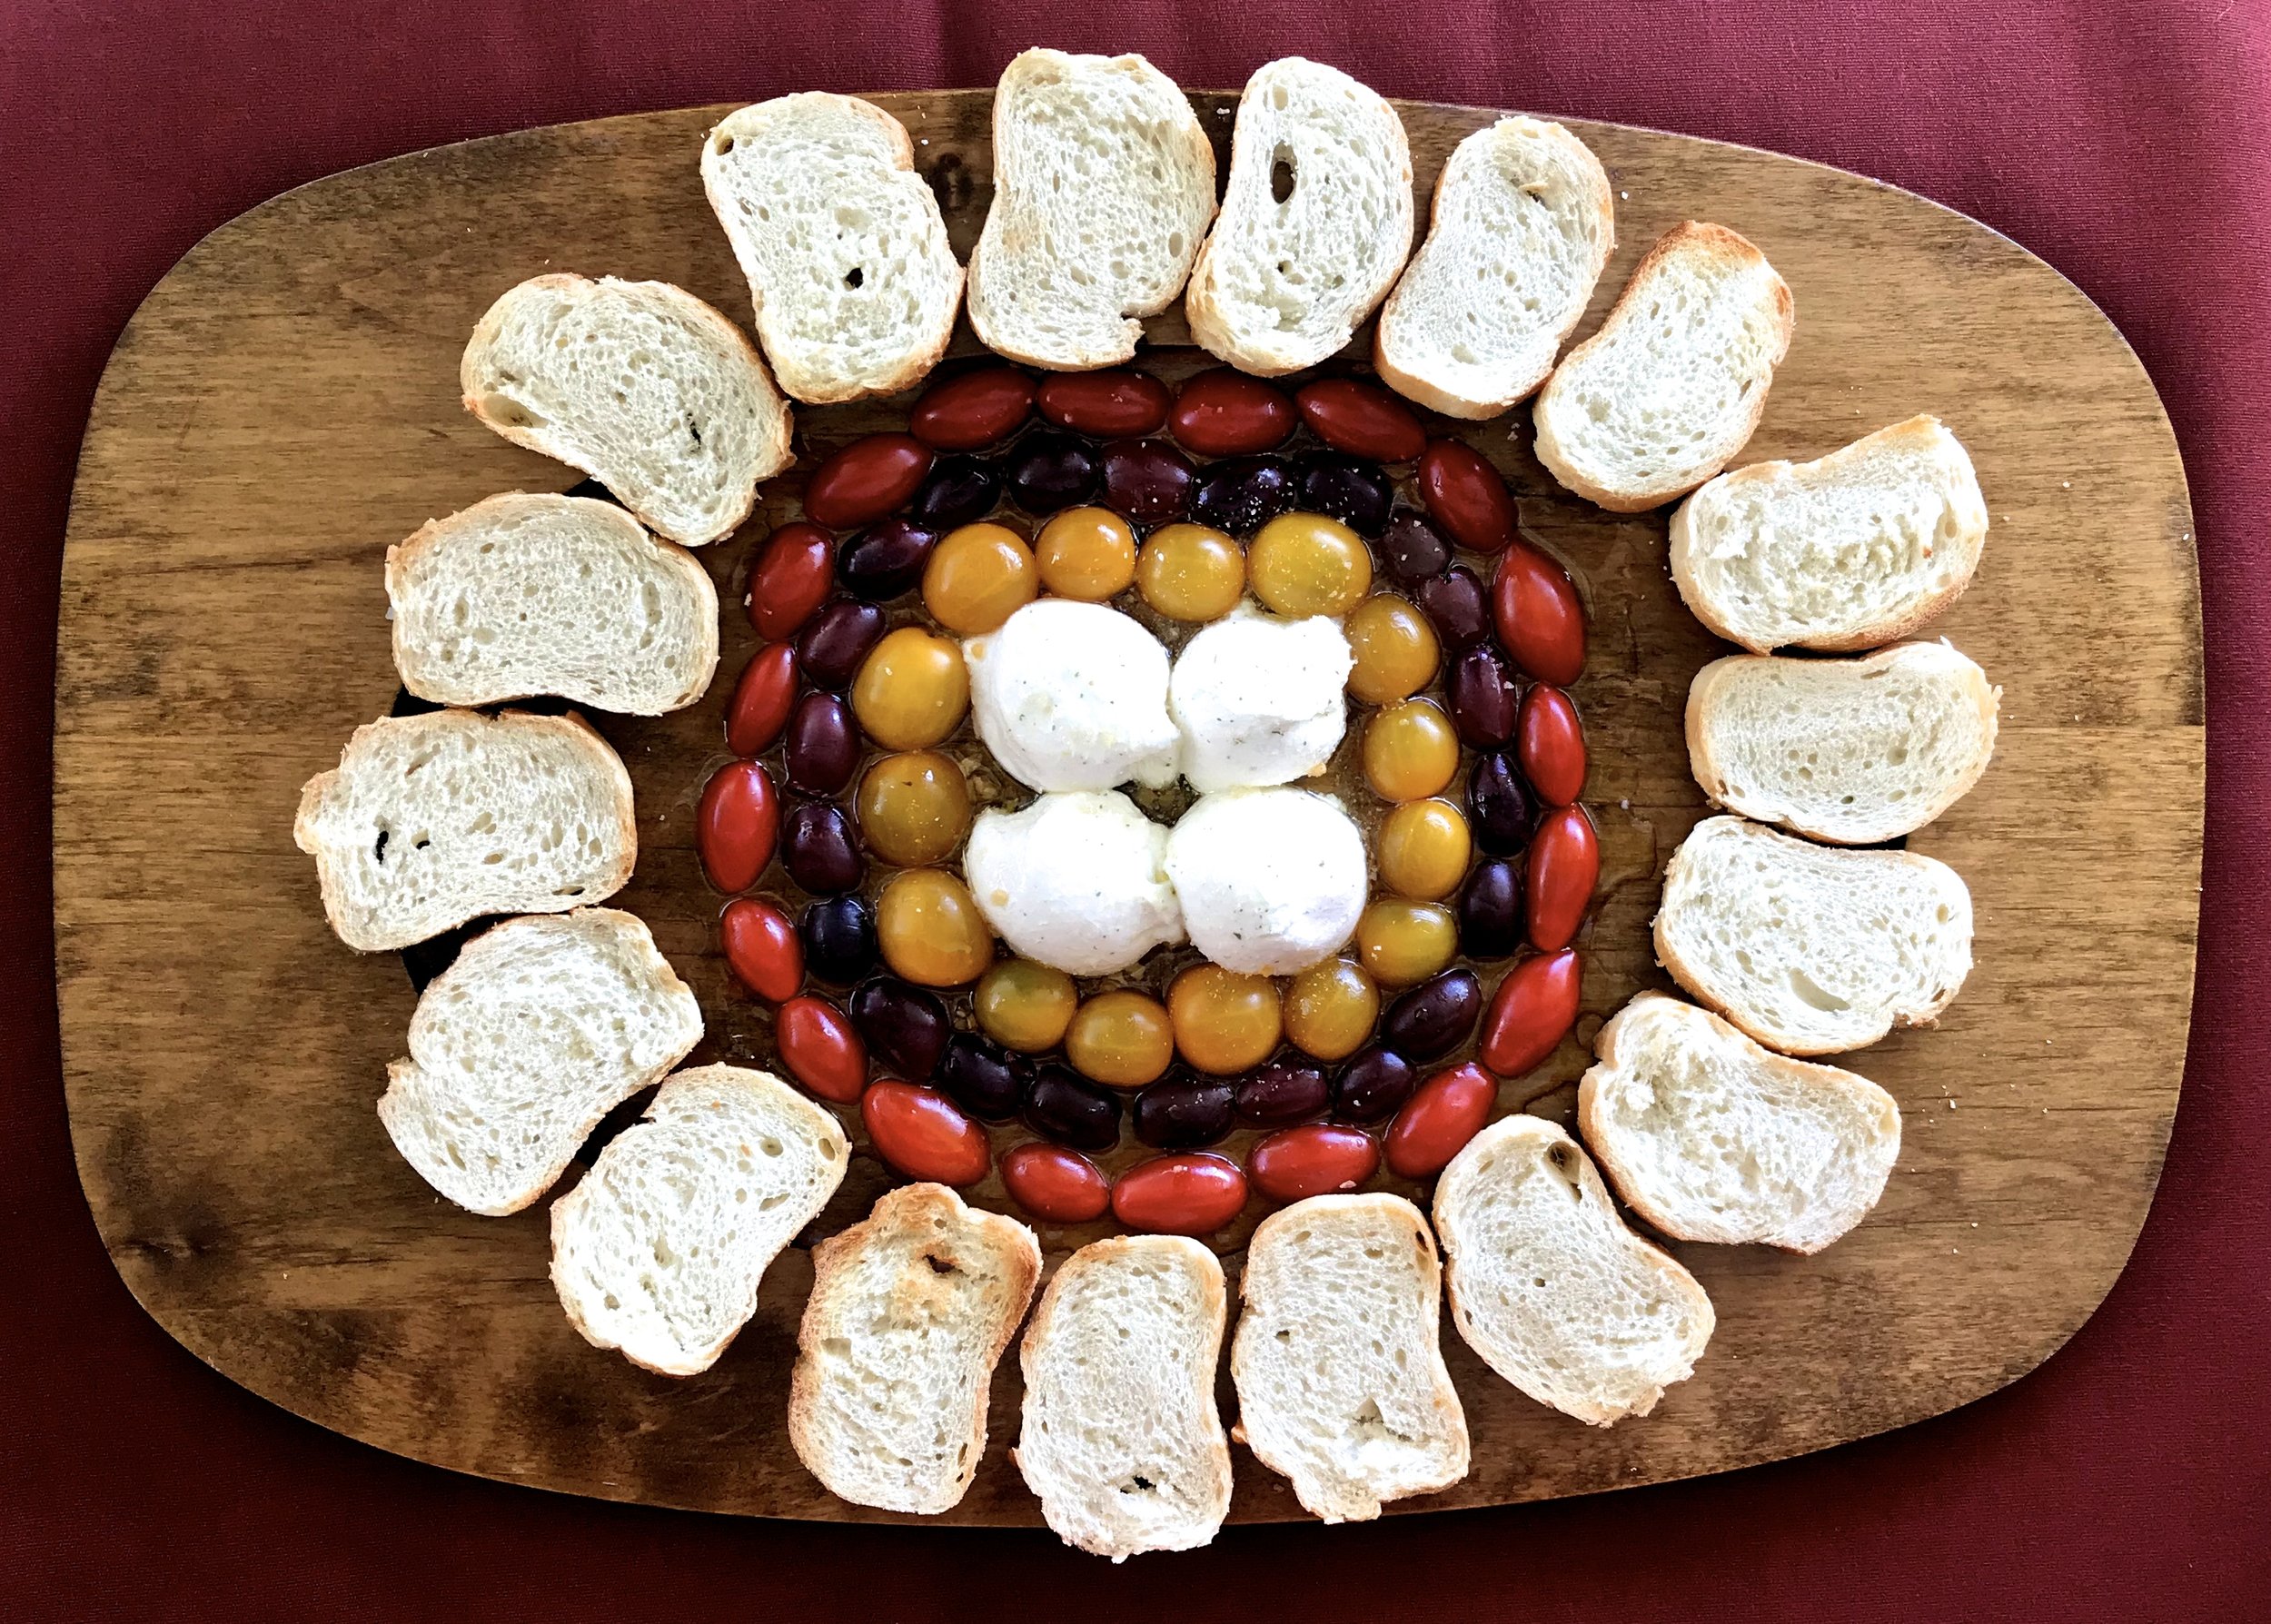
burrata.jpg

Here's what you'll need for this delightful (4 ingredient) appetizer:

A french baguette

Two balls of burrata cheese. (They come like regular fresh mozzarella - floating in liquid in a clear plastic container.)

Small (multi-colored) grape tomatoes

Seedless Greek (mediterranean) olives

Step 1. Slice the baguette into very thin slices (about 1/2 inch) and toast them in an oven at about 450 for about 5 minutes till they are very slightly browned. Set slices aside.

Step 2. Cover the center of a serving platter with olive oil. 

Step 3. Very, very carefully cut each ball of Burrata in half using a sawing motion. (Making 4 halves.)

Step 4. Cover the bottom of each half ball of burrata with garlic salt. (Preferably very coarse garlic salt.) Next place the bottom of each half into the olive oil in the center of the serving platter.

Step 5. Slice the tomatoes and olives longwise and form any design that you want. Next pour more olive oil on top of the burrata and sprinkle generously with the garlic salt and a few cranks of coarse pepper. Serve with the toasted baguette slices. Unbelievably dee-lish!

TRY IT YOU'LL LOVE IT!

Looking Back

caprese.JPG

Last year, I got the the idea of doing an Italian appetizer called Caprese.  (Of course you can't ever go wrong with anything Italian!) Caprese is very similar  to our Burrata appetizer but, for whom it may concern, it is low carb. Check it out!

Fun Saying

One of the more funny sayings out there is: "I've got a frog in my throat."  Of course if you actually had a frog in your throat you would have to use sign language to let someone know that they needed to do the Heimlich maneuver on you. Years ago someone had to do the Heimlich maneuver on me in the middle of a restaurant. Harv (that was really his name) had no idea what he was doing, but the rather large piece of carrot finally came flying out and the whole restaurant clapped. A moment later, a man walked up to Harv and said that he was a fireman and that Harv had done it the wrong way. At that point I said, "And where were you while I was on the brink of death--finishing your dessert?" Anyway, thankfully, I survived the ordeal, and it was just a piece of carrot that came out of my throat and not a frog!

Savory and Succulent

Chicken and Garlic Croutons! We recently had this heavenly chicken dish for Easter, then we had  to have it for Mother's Day. We just can't get enough of it. Talk about finger lickin' good! Here's what you'll need:

chicken and croutons.JPG
  • 1 french baguette
  • 1 medium to large sized roasting chicken
  • 1 navel orange, halved
  • 4 garlic cloves, minced

Step 1: Preheat oven to 450°.

Step 2: Cut baguette into 1 inch slices and then cut in half forming big chunks.  Place bread pieces on a baking sheet. Bake at 450° for 5 minutes and set aside.

croutons.jpg

Step 3: Remove giblets and neck from chicken then rinse and pat dry. Trim excess fat, place on a baking sheet with sides and sprinkle with salt and pepper. 

Step 4.  Squeeze orange juice into a pitcher or measuring cup. Next pour the juice into the cavity then place an orange half in the mouth of the cavity.

Step 5. Insert meat thermometer into meaty part of thigh, making sure not to touch bone. Bake chicken at 450° for 50 minutes or until thermometer registers 180.

Step 6. Remove chicken from the pan and put it on a platter careful to preserve juices including orange juice from inside the chicken in the original pan. Next cover chicken with foil and let stand 10 minutes.

Step 7: Pour the drippings from the pan into a pitcher or measuring cup then stir in the minced garlic. Arrange croutons back in the pan and drizzle drippings and garlic over croutons, stirring to coat. Bake at 450° for 5 more minutes. Remove and arrange croutons on the edge of the platter around the chicken and serve. 

(Serves 4)

Looking back

One of the first Pickett's Pearls posts was about Apricot-Pesto Chicken. It is a totally mouth-watering dish and you won't regret it if  you give it a try.


Fun Saying

Lots of fun sayings have to do with cats and dogs like this one:"You're the cat's pajamas". What an odd way to say you're cool. It's hard to picture a cat in pajamas. A dog maybe, but not a cat.

Vegetables All Dressed Up

vegetables c 2.jpg

It's definitely time for a blog about vegetables! The past few Pickett's Pearls posts have been about goat cheese/apricots appetizers, chicken tacos and Key Lime pie. I will admit that I don't love vegetables, (please don't tell my mother) and so the dishes I've chosen have some other yummy ingredients such as bacon. Oops!

Cauliflower with Irish Cheddar Sauce

cauliflower a.jpg


Ingredients:

A large head of cauliflower. ( I used purple 'cause it's a fun color!)

1+2 tablespoons of butter. (I'm a salt fiend, so I always go with salted.)

1/2 cup of half & half.  (You could probably use whole milk for less calories.)

1/2 cup of Irish Cheddar (like "Dubliner"--we are addicted) or other cheddar.  (See how to shred the cheese below.)

  1. Preheat oven to 400F.
  2. Cut the cauliflower into small pieces.
  3. Toss with 1 tablespoon of melted butter. (I clump it together and toss it right on the cookie sheet.)
  4. Roast the cauliflower for about 20 to 25 minutes.
  5. While cauliflower roasts, make the cheese sauce.
  6. Shred a 1/2 cup of the cheese on the next to finest setting. (This helps the cheese melt.)
  7. Melt 2 tablespoons of butter in a small sauce pan on medium low, then whisk in a 1/2 cup of half & half. Once  the mixture is hot, slowly whisk in the 1/2 cup of finely shredded cheese until melted and well blended.
  8. Set sauce aside to let it thicken.
  9. Remove the roasted cauliflower from the oven and place in a small casserole dish, then spoon the cheddar sauce on top.
  10. Put it into your already hot 400F oven until it is heated through and golden brown on top — about 5-7 minutes. (Serves 4)

Asparagus Wrapped in Bacon

Ingredients:

asparagus A.jpg

A bunch of asparagus (thick stalks work much better).

10 to 12 strips of CENTER CUT bacon (which has more meat and less grease)

Opt: Caesar dressing for dipping

1. Wash the asparagus and cut about 1 & 1/2 inches off the bottom of each stalk.

2. Cut each strip of bacon up the middle. You now have a long thin strip for each stalk.

3. Wrap the bacon around the stalks in a candy cane pattern. (Start wrapping at the bottom of each stalk with the widest end of each bacon strip.)

4. Place each wrapped stalk on a cookie sheet, put the pan in the oven, and turn it to 400. (Starting with a cold oven helps the bacon holds its shape.) Bake for 25 to 30 mins. or until bacon is cooked, but not too crispy.  (Serves 4 to 6)

Acorn Squash with Brown Sugar Syrup

squash a.jpg

 2 Acorn squash

 2 tablespoons of salted butter

 4 tablespoons of brown sugar

 1/4 level teaspoon of cinnamon

Preheat the oven to 400°F. 

  1. Stand each squash on its end with the stem down and cut the squash vertically using a sawing motion. When you get close to the stem, just crack the squash in half. 
  2. Scrape out seeds and stringy bits – I use an ice cream scoop.
  3. Stab holes inside the bowl of each squash half using a fork, and move the fork back and forth to create bigger holes.
  4. Place butter in a very small dish and soften (not melt) for about 10 secs. in a microwave. Mix the brown sugar and cinnamon in with the butter and spoon 1/4 of this mixture into the inside of each squash. (Take the back of a spoon and mush the yummy mixture into the holes you've made.)
  5. Place in oven on a cookie sheet and roast for 40 to 50 minutes or until a fork can be inserted easily. (Serves 4)

Looking Back

In the past Pickett's Pearls has posted 4 ingredient recipes for other superb vegetable dishes:  mashed cauliflower,  stir fry asparagus and spaghetti squash. Check 'em out!

mashed cauliflower.jpg
spaghetti squash.JPG

Fun Saying

Now that we are on the subject of vegetables, I thought I'd share my very favorite saying: "I didn't just fall off the turnip truck." What a fun way to say that I'm not naive! I can just see someone rolling off a turnip truck as it keeps going down the road. So the next time someone is insinuating that you are gullible, just say with indignation: "Wait just a minute,  I didn't just fall off a turnip truck ya know!"

Marvelous Margaritas

Skinny Margarita

My niece Kelsey is a Licensed Marriage and Family Therapist, but in another life she was a bartender. Consequently she knows a lot more about making good margaritas than I do. (This is more of a "Skinny Margarita" because it has less sugar, but it's every bit as good!)

CU2A2385.jpg

Here's what you need:

1 & 1/2 oz. of Silver/Blanco Tequila 

1 oz. of lime juice

1  teaspoon of light agave nectar 

A couple of splashes of soda water

Start with a margarita glass, (or bar glass). If you like salt, run a bit of lime around the edge, then turn it over onto a saucer of coarse grained salt. (Kelsey and her husband, Chris, rave about coating the rim with a Mexican spice called Tijan.)

Next put all the ingredients in a shaker with lots of ice, shake it then pour it over ice. (We don't have a shaker, but the experts say that using one makes it ice cold and keeps the drink from getting diluted. Those of us who are novices just pour the ingredients over ice and stir.) Finally, you top off the drink with soda.  Totally delicious and very few calories!

Classic Margarita

Scott Carpenter, a very good friend of ours from Newport Beach, is what I would call a "connoisseur" of food and drink. Here is his version of a great Margarita:

2 oz. of gold or silver tequilla (The more expensive the better of course.)

1.5 oz. of Triple Sec. or 1 &1/2 teaspoons of light agave nectar

1 oz of fresh lime juice

First, line the rim with lime and salt. Next, add the ingredients together in a shaker with lots of ice and shake, shake, shake.  (Using a shaker is actually quite fun.) You then pour the mixture over ice and garnish it with lime.

Fun Fact: Did you know that the phrase, "Shaken not stirred" came from James Bond? It referred to how he liked his martinis.

CU2A2381.jpg

Cuppa, Cuppa, Cuppa  (What a fun name!) 

Our friend, Karen Taulien, told me about this margarita recipe. It won a "Margarita Taste Test" with a rather large crowd.  It's a cup of beer, a cup of tequila and a cup of limeade concentrate. Blend these three together with 4 cups of ice and you have a super fun party drink! 

More about Tajin

Tajin is a spice made of chili peppers, lime and salt. It is used all over Mexico on everything. People love it so much around here that it is even available as a topping at my local yogurt shop. You can buy it almost anywhere in Southern California, but you can also order it on-line. Like I mentioned above, it is great around the rim of a margarita glass.

Fun Saying: When someone is drunk we say that they are "three sheets to the wind".  When a sail is under control it's "sheeted" or tied down. So the saying literally means that not only is one sail flapping in the wind and out of control but three. The next time I'm around someone who is just a little bit tipsy I think I'll say, "There goes Sarah, she's one sheet to the wind."

Cinco De Mayo

Wow! Cinco de Mayo is right around the corner, so it’s time to celebrate with all kinds of Mexican food and, of course, margaritas! My friend Lindsay Murad suggested that I make SLOW COOKER CHICKEN TACOS because the chicken turns out, oh so tender. I can’t even think of a time I've made tacos at home. Maybe that’s because being from Alabama, I'm definitely not a Mexican food connoisseur!

Slow Cooker Chicken Tacos

taco vertical b.jpg

My family loved these 4 ingredient chicken tacos. They didn’t even mind eating them 3 nights in a row while I experimented with different recipes. Here’s what you’ll need:

3 chicken breasts

1/2 a package of McCormick Chicken Taco Seasoning or McCormick Slow Cooker Chicken Taco Seasoning. (What I like about McCormick’s is that it has chili pepper and cumin in it!)

Corn Tortillas (We like white)

Guacamole or salsa (Any kind such as classic or mango)

Opt. Mexican cheese blend or cotija cheese

First cut up chicken breasts into small chunks and put into a crock pot on high. Mix a 1/2 package of the taco seasoning with a 1/2 cup of warm water and add to crock pot. Slow cook for 3 to 3 & 1/2 hours. When done shred chicken with 2 forks. Turn pot off and re-cover until ready to serve.

Warm the tortillas in tin foil in an oven or in a skillet on each side with a bit of olive oil or a pat of butter.  Scoop shredded chicken into warm tortillas and top with ready made guacamole or salsa. If you want to go the homemade route, last summer, Pickett's Pearls posted (4 ingredient) recipes for totally yummy mango salsa, classic salsa and guacamole.

TRY 'EM YOU'LL LOVE 'EM!

mango salsa.jpg
salsa and guac shortened.JPG
margarita 7.jpg

And let's not forget the margaritas! Check out these three "Marvelous Margaritas" from last Cinco de Mayo's post!

Funny Mexican Sayings

Every country has it's colorful sayings. I thought it would be fun to look at some Mexican ones.

Instead of saying : You're really blind . They say: Si no ves tres en un burro. (You can't see three men on a donkey!) 

Instead of saying: His memory stinks! They say: Él tiene la memoria de un pez. (He has the memory of a fish!)

Instead of saying: She certainly doesn't mince words! They say: Ella habla sin secador en la lengua !  (She has no hair on her tongue.)

Pears Without the Partridge

pears.JPG

Pears often get overlooked, the ugly step-sister in the fruit family next to the more elegant apple and colorful orange. My main memory of pears growing up was my grandmother serving us canned pears and cottage cheese. Yum . . . Not! I also remember that the canned peaches were totally slimy, but I was overjoyed when I got the the fruit cocktail with the little cherries. The Powers-that-be said that this was "fruit," so sadly we went along with it.  Anyway, back to pears.

Fresh pears are a whole 'nother animal. Cynthia Page from Newport Beach gave me an unbelievable recipe for "Pears Baked in Cream". Your guests will think you're a gourmet cook when in reality this dessert is super easy.

pears blue.JPG

Here's what you'll need:

2 Tablespoons of butter
2 Tablespoons of sugar
3  Anjou or Bosc pears, unpeeled, halved and cored
1/2 cup of heavy cream
 

Preheat oven to 400 degrees. Butter a shallow baking dish with 1 T. of butter and sprinkle 1 T. sugar over the bottom. Put the pears cut side down in the dish. Sprinkle with remaining sugar and dot with butter. Bake for 10 minutes. Pour the cream over the pears and return to the oven for 20 minutes more. Serve warm with a scoop of vanilla ice cream.  Serves 6 heavenly!


Double The Beauty

Recently I was at a party in Dallas for my nephew C.T. who was getting married. I saw the arrangement below and was totally struck by how beautiful and unique it was. I couldn't wait to get home and try it. Mine didn't turn out as good as the florist's, but hey I'm not a florist.

All you do is pick out a low container and cut soft some oasis to fit it. You then throughly wet the oasis. Next cut 5 to 7 roses so that the stems are all about 6 inches. Stick them into the center of the oasis and surround them with hydrangeas.

I think the arrangement turns out better when there isn't too much of a contrast in color. Below you will see how the floral designer used dark hydrangeas with some red in them along with red roses. I in turn used cream hydrangeas and pink and cream roses. (I guess you could use two other types of flowers. You would just need lots of flowers for the outside.)

roses dallas 1.jpg
rose 4b.jpg
roses 2.jpg

Fun Saying

"I'm tickled pink". This is a southern expression (maybe western as well) that I absolutely love. An image really doesn't come to mind (no one I knew turned pink), but even now I'm tickled (pink) by the memory of the cute women who would say it. And, it's just plain fun to say. 

Cloudy With A Chance of Meatballs

Meatballs are good anytime of year especially in the winter months when they can bring warmth to our tables. Here's a recipe that you can use over and over and, of course, it has 4 ingredients! Here's what you'll need: 

meatballs lighter.jpg

A pound of ground turkey or beef (Our family prefers turkey.)

1/4 cup of finely chopped onion.

1&1/2 teaspoons of Italian herbs

Marinara Pasta Sauce

(Opt. 1/8 of a teaspoon of red pepper flakes)

Preheat oven to 400. Mix all the ingredients in a bowl with 3/4 teaspoon of garlic salt. Cover the bottom of a skillet with a thin layer of cooking oil and heat on medium.  Shape mixture into 1 & 1/2 inch balls then place them in the hot skillet and brown them on both sides. You then place the meatballs on a cookie sheet and bake them. (Beef meatballs can be cooked for 5 to 7 min. and turkey meatballs need to be cooked for longer--7 to 9 min.--to make sure they are cooked all the way through.)  Add meatballs to warmed Marinara Sauce and serve over pasta or spaghetti squash.

TRY ‘EM YOU'LL LOVE IT!

The Scoop on Marinara

“Mariner’s” sauce originated in Naples; nobody’s sure how it got its name but one theory is that it was invented by mariners returning from the Americas with a newly discovered fruit, the tomato, in the 1700s. Funny thing is that even though a tomato is technically a fruit because of it's seed structure just like zucchini, in 1893 the Supreme Court ruled tomatoes as vegetables. Now I'm all mixed up in the tomato department!

Eenie Meenie Miney Mo? (Yes, this is how you spell that.)

pasta sauce 1.jpg

How do we know what Marinara sauce to use? The Chicago Tribune did a blind taste test with 12 marinara sauces. Two of the sauces pictured tested in the top 3. Rao's was #1 and Riserva was #3. (Both can be found at Target and Walmart who by the way seem to carry everything!) There is also pictured "Farmer's Market" by Prego which wasn't one of the ones tested I just like farmer's markets.

We recently had our good friends Lara and Skip Lanfried (Newport Beach) over and, of course, I made us all taste test the three marinara sauces pictured. Two of us chose the Riserva, two of us chose "Farmer's Market" and no one chose the Rao's. (Of course, our palettes may be lacking just a bit.) I do think it's interesting that the Rao's costs $10 which is more than double the cost of the others. You can buy a shirt for that!

Looking Back            Middle-Eastern Meatballs

turkey zucchini meatballs 3.JPG

Middle-Eastern Meatballs

Last May Pickett's Pearls had a post on Turkey and Zucchini Meatballs. A major favorite around the Pickett home!!! They are superb! You should check 'em out if you haven't already.

Strawberries and cream

When Valentine’s Day rolls around, while many of us think of romance, all of us think of decadent sweets! I ran across this darling VALENTINE’S HEART PASTRY on Always Autumn, and I just had to put my own 4-ingredient spin on it. It’s perfect for Valentine’s breakfast or really anytime of the day. Here’s what you’ll need:

azaleas final.jpg

1 pkg. of Puffed Pastry (comes in 2 sheets.)

1 regular basket of strawberries

1/2 + 1/2 cup of packed powdered sugar

1 8 oz. pkg of cream cheese

*3/4 cup of Nutella Spread can be substituted for cream cheese and 2nd 1/2 cup of powdered sugar.

Step 1. First, pre-heat oven to 400. Then, place each frozen pastry sheet on their own pieces of parchment paper for about 10 min. to thaw.

Step 2. Soften cream cheese in the microwave, stir in 1/2 cup of powdered sugar and return to refrigerator.

Step 3. Lightly pulse 2 cups of strawberry halves in a food processor, drain well in a colander then combine with 1/2 cup of powdered sugar.

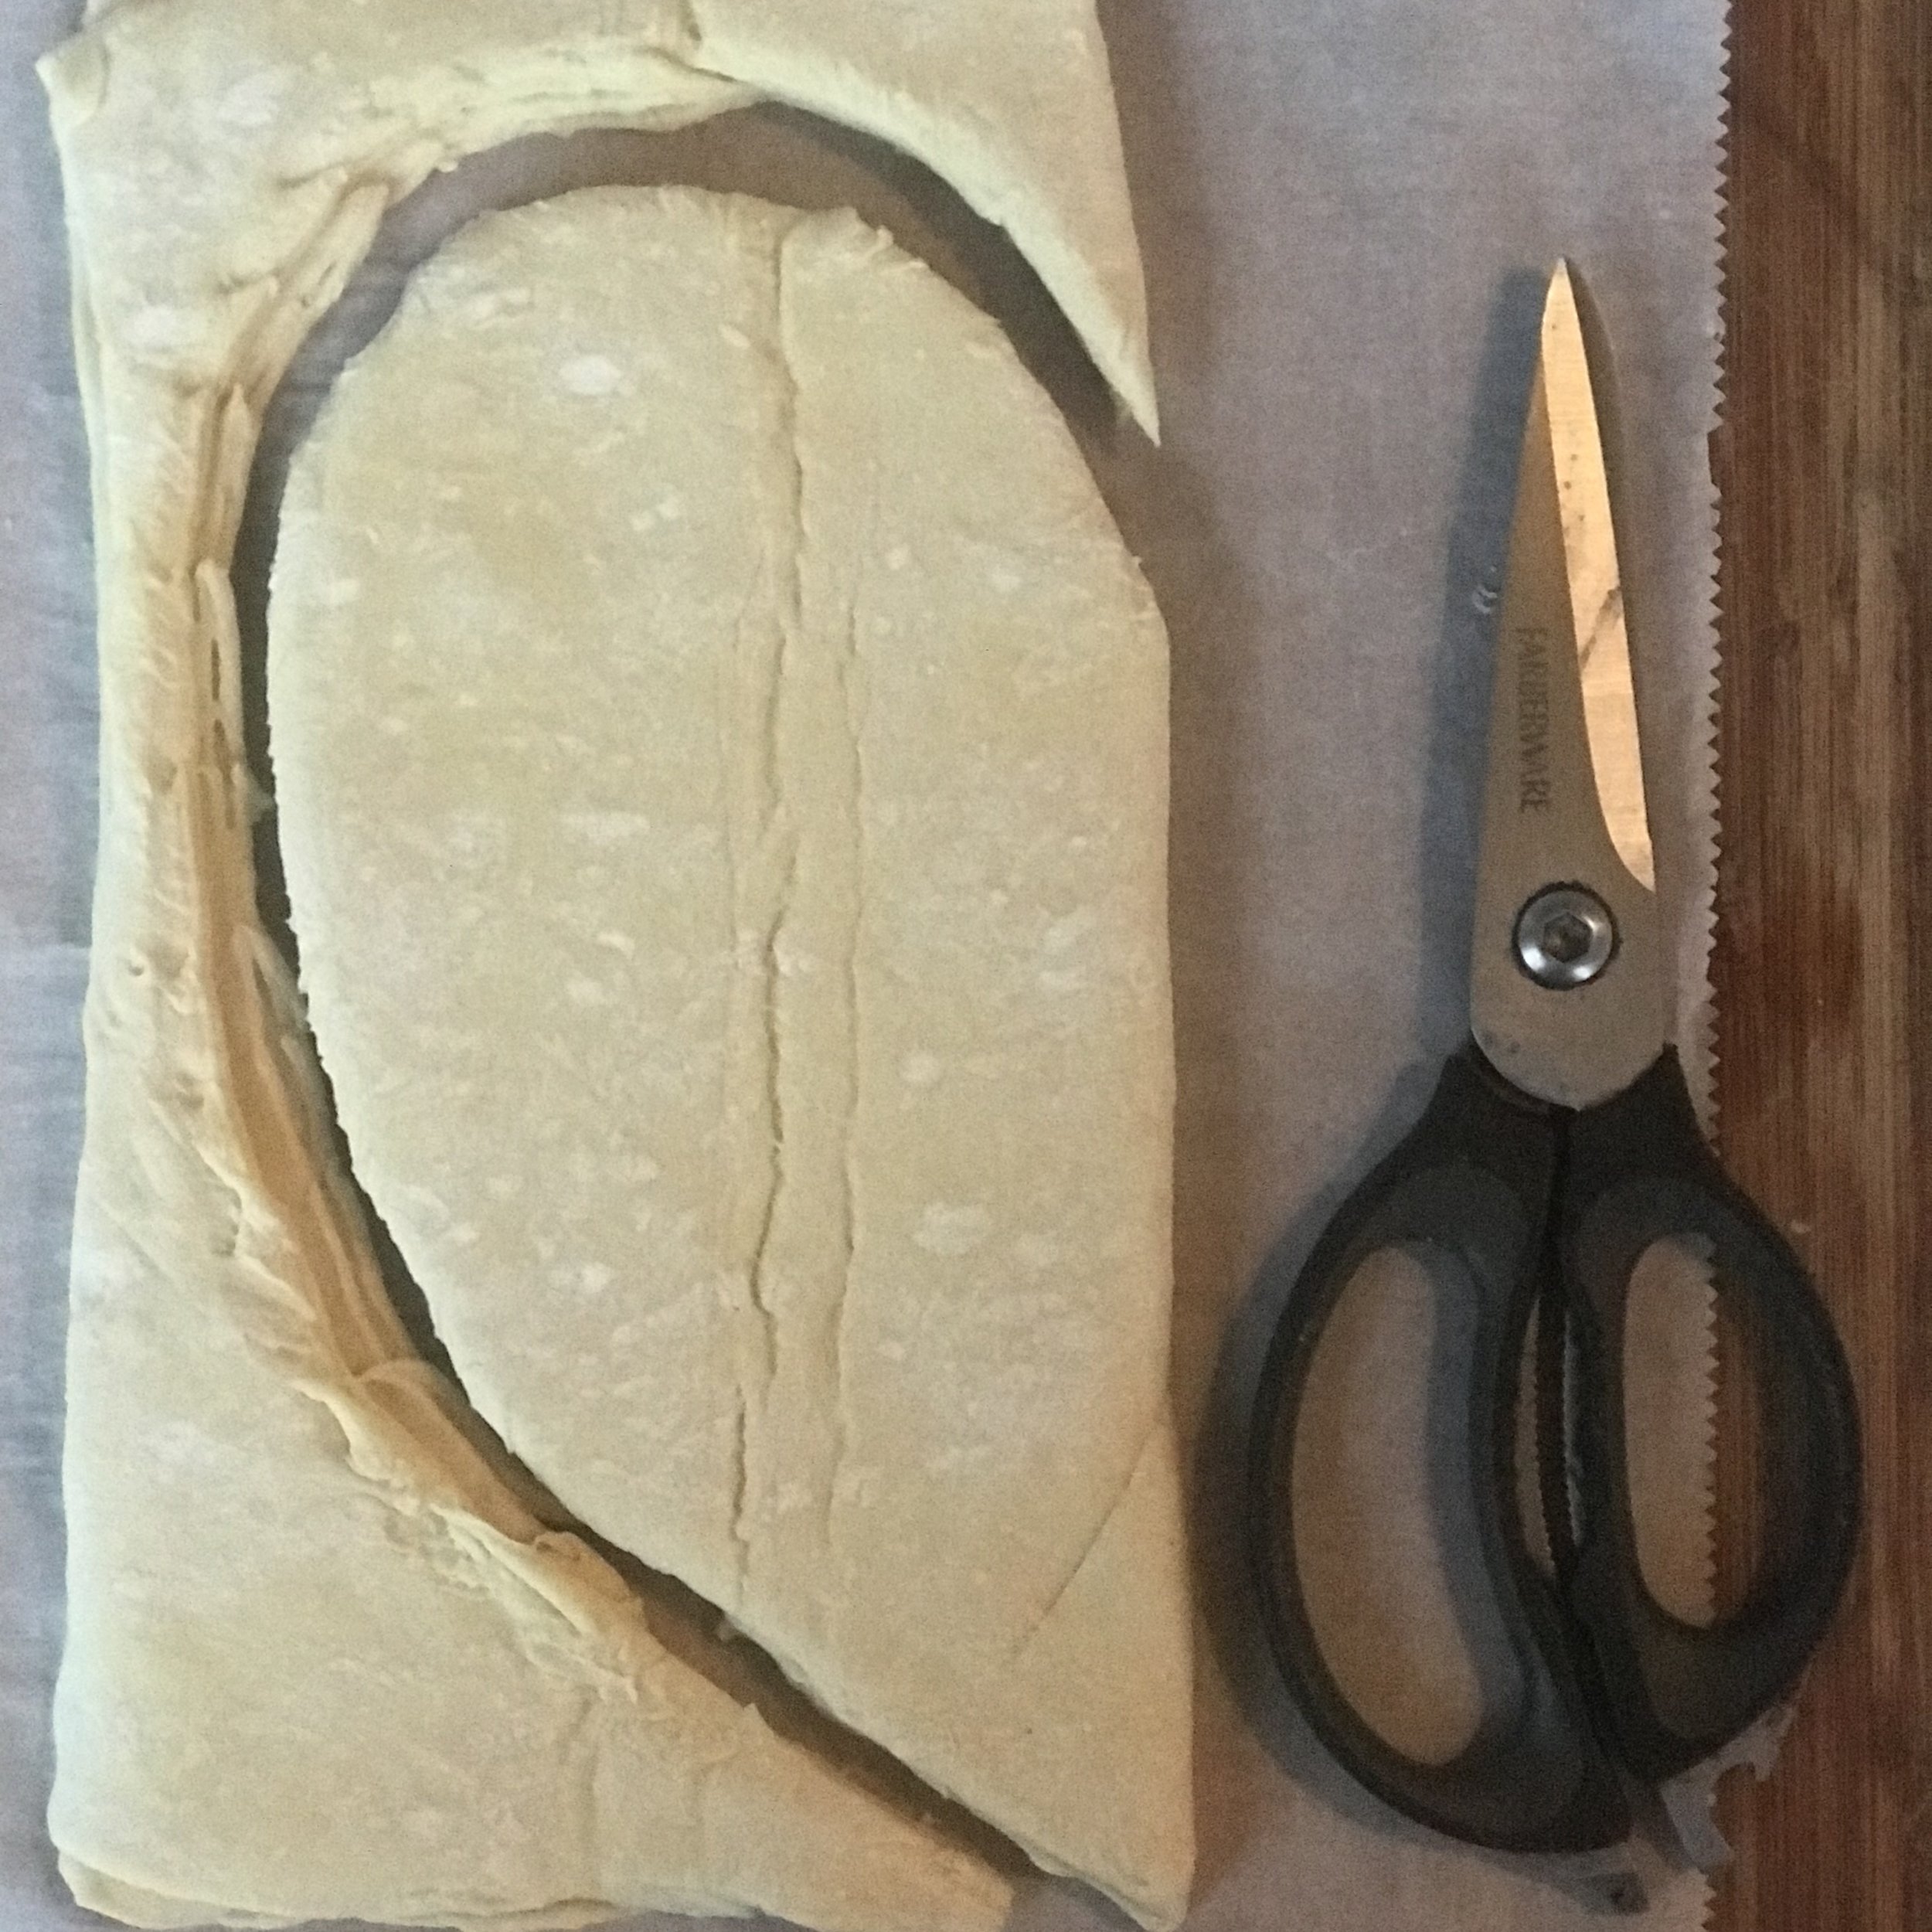
Step 4. Unfold each sheet of pastry dough and roll it out so that it measures about 12 x 12 inches. Fold each sheet of pastry in half and stack them on top of each other (see below). Using the tip of a potato peeler trace half of a heart then cut through both layers with kitchen scissors. (Just like elementary school:)

Step 5 . Lay each heart flat on parchment paper. Spread the cream cheese mixture (or Nutella) on top of one of the hearts then add a layer of strawberry mixture (see below).

Step 6. Place the second heart on top of the first and pinch edges together. Make an X in the center of the top heart. Using a pizza wheel, start at the bottom point and slice almost to the center mark but not through it. Continue making slices all the way around the heart about 1 inch apart. Carefully lift each section and twist it 3 or 4 times. Twist the right half to the right and the left half to the left. (If you start twisting and the dough is too gooey, return the heart to the freezer for a bit.)

Step 7. Move the parchment paper to a cookie sheet, re-shape the heart and cover the edges of the pastry with foil (so they don’t cook too fast). Bake for 15 min., remove foil and bake for another 10 min. (or so) until entire heart is golden brown and cooked through. Using a spatula carefully slide heart onto a platter or cutting board and serve hot.

cut out finished.jpg

Step 4

layer finished.jpg

Step 5

twist finished.jpg

Step 6

*At some point you may need to return pastry dough to the freezer. You will want it to be very firm before you begin twisting.

The Spread Has Spread

Over 10 years ago when Todd and I were in Florence, we noticed everyone was spreading Nutella on everything just like we would butter or peanut butter. We had never seen such a thing! Now we see this decadent chocolate hazelnut spread everywhere we turn!

Looking Back

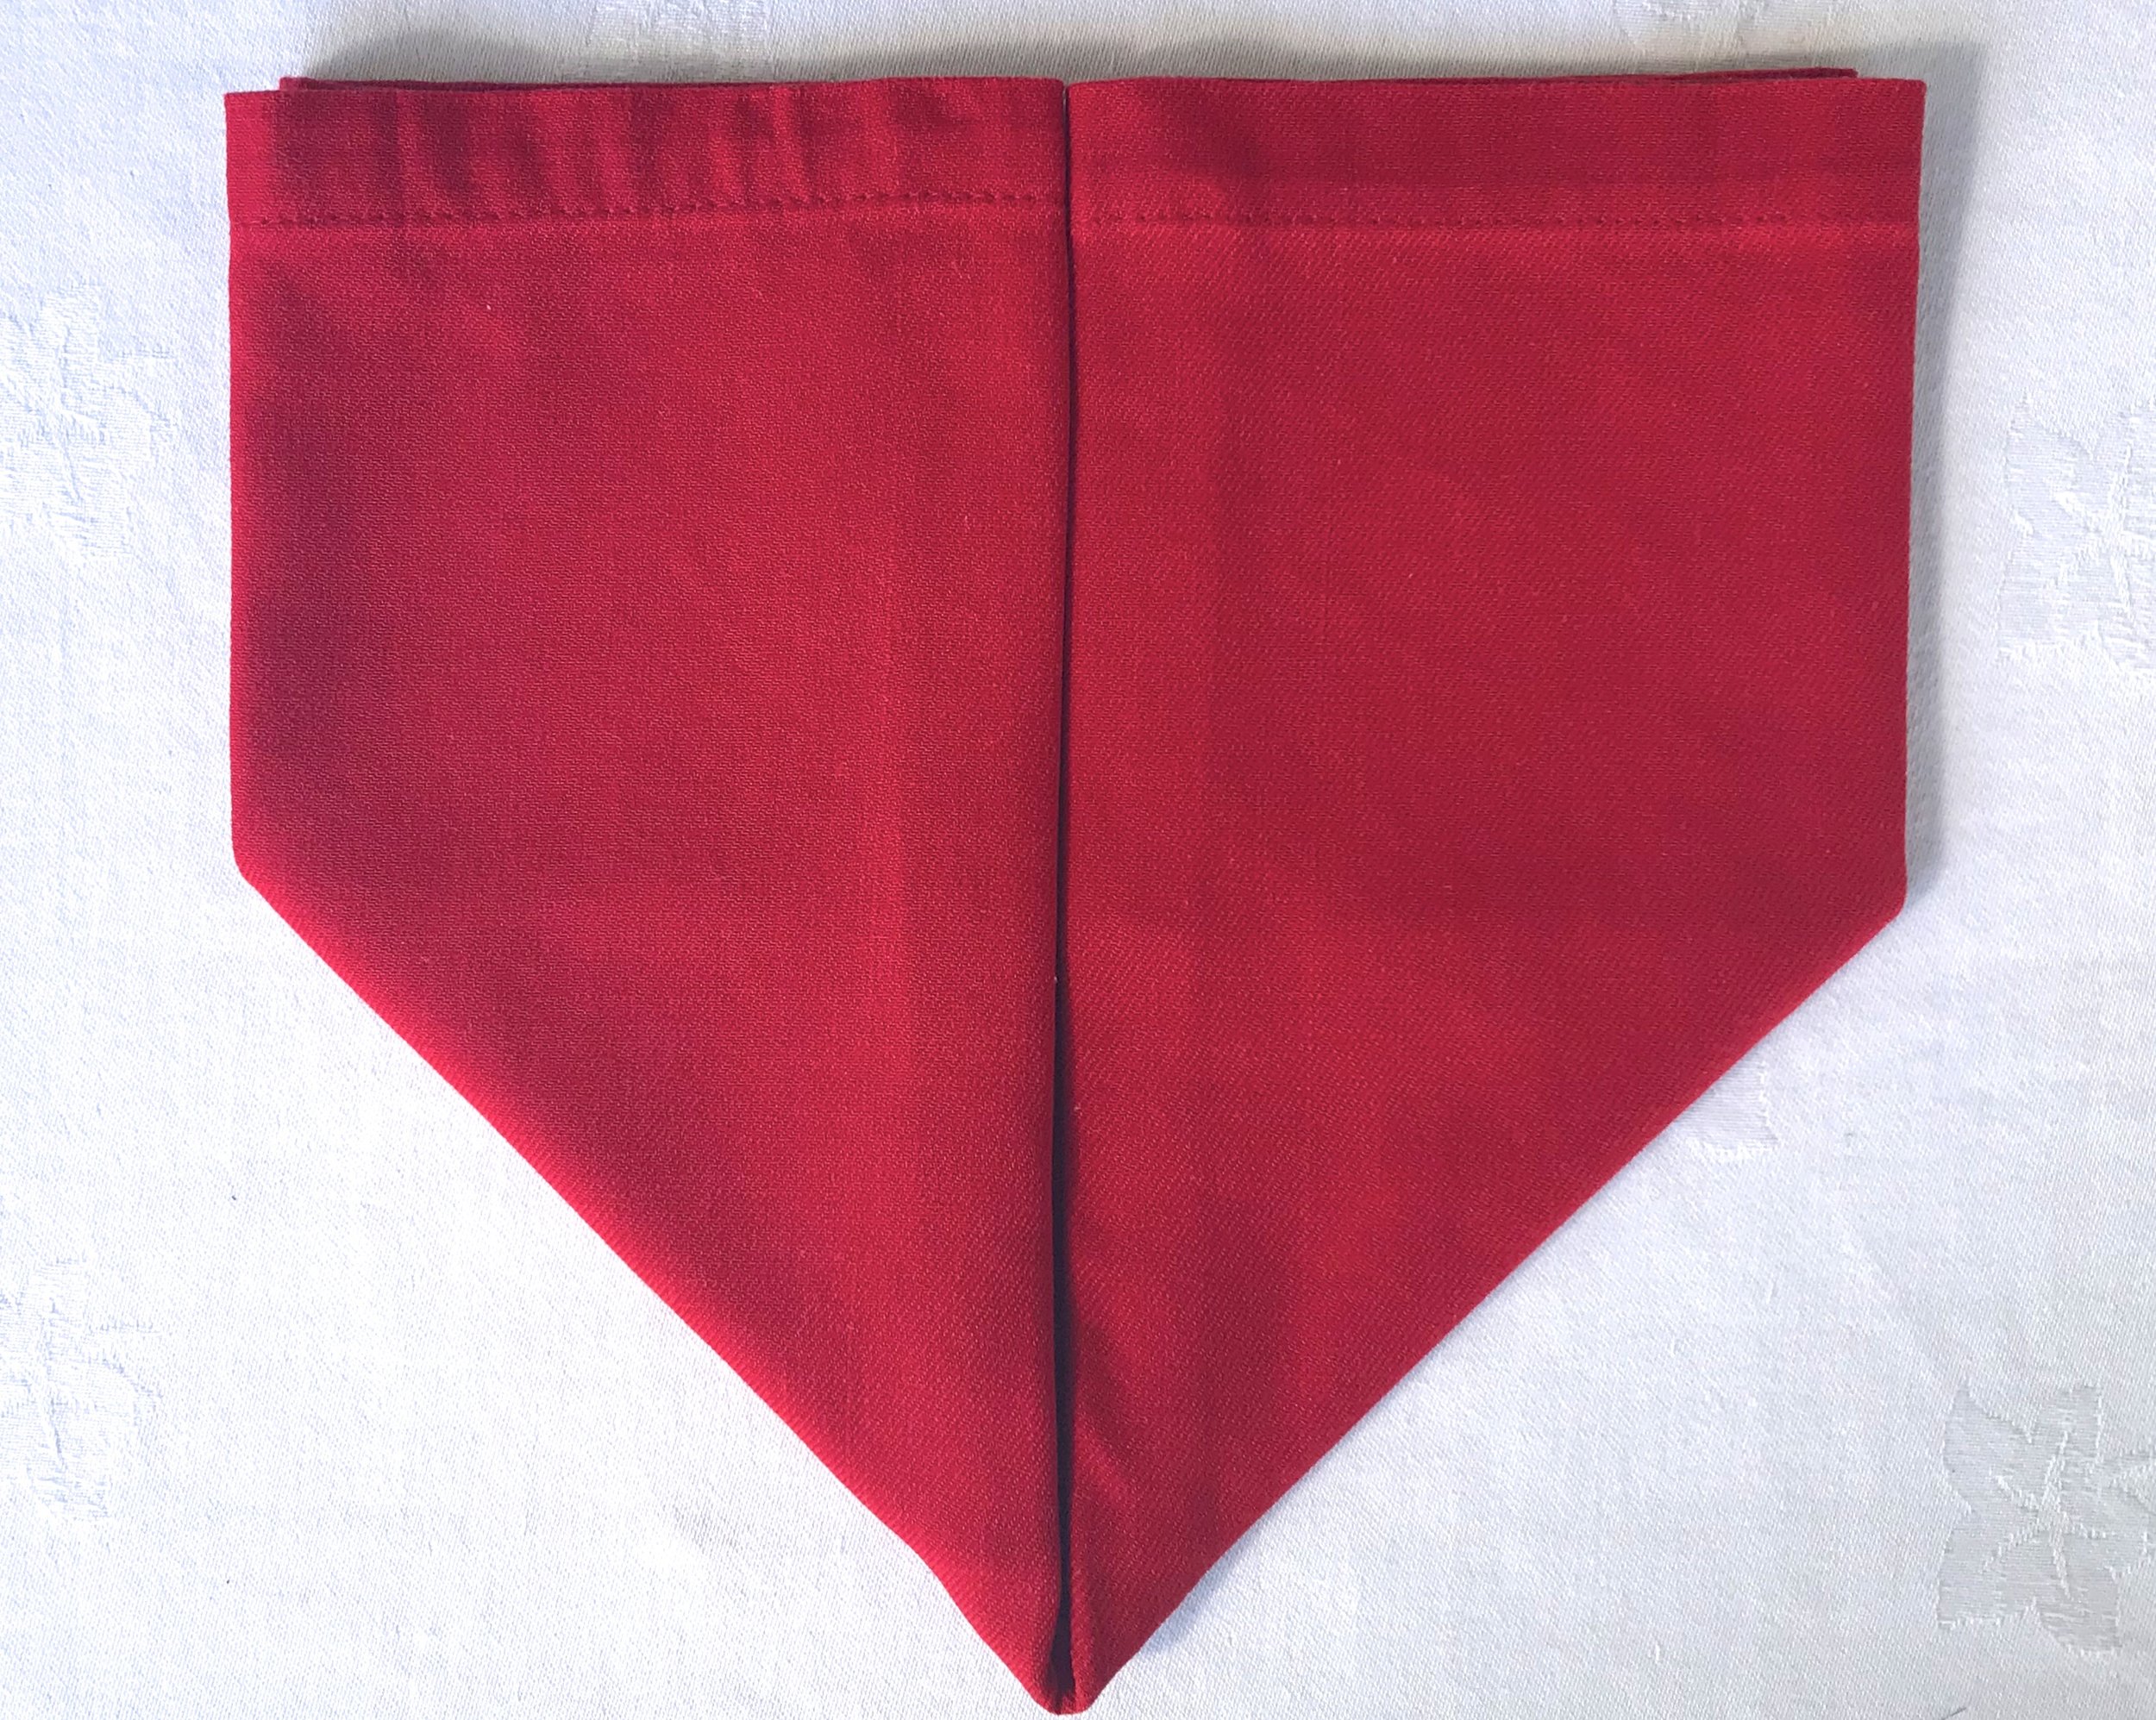
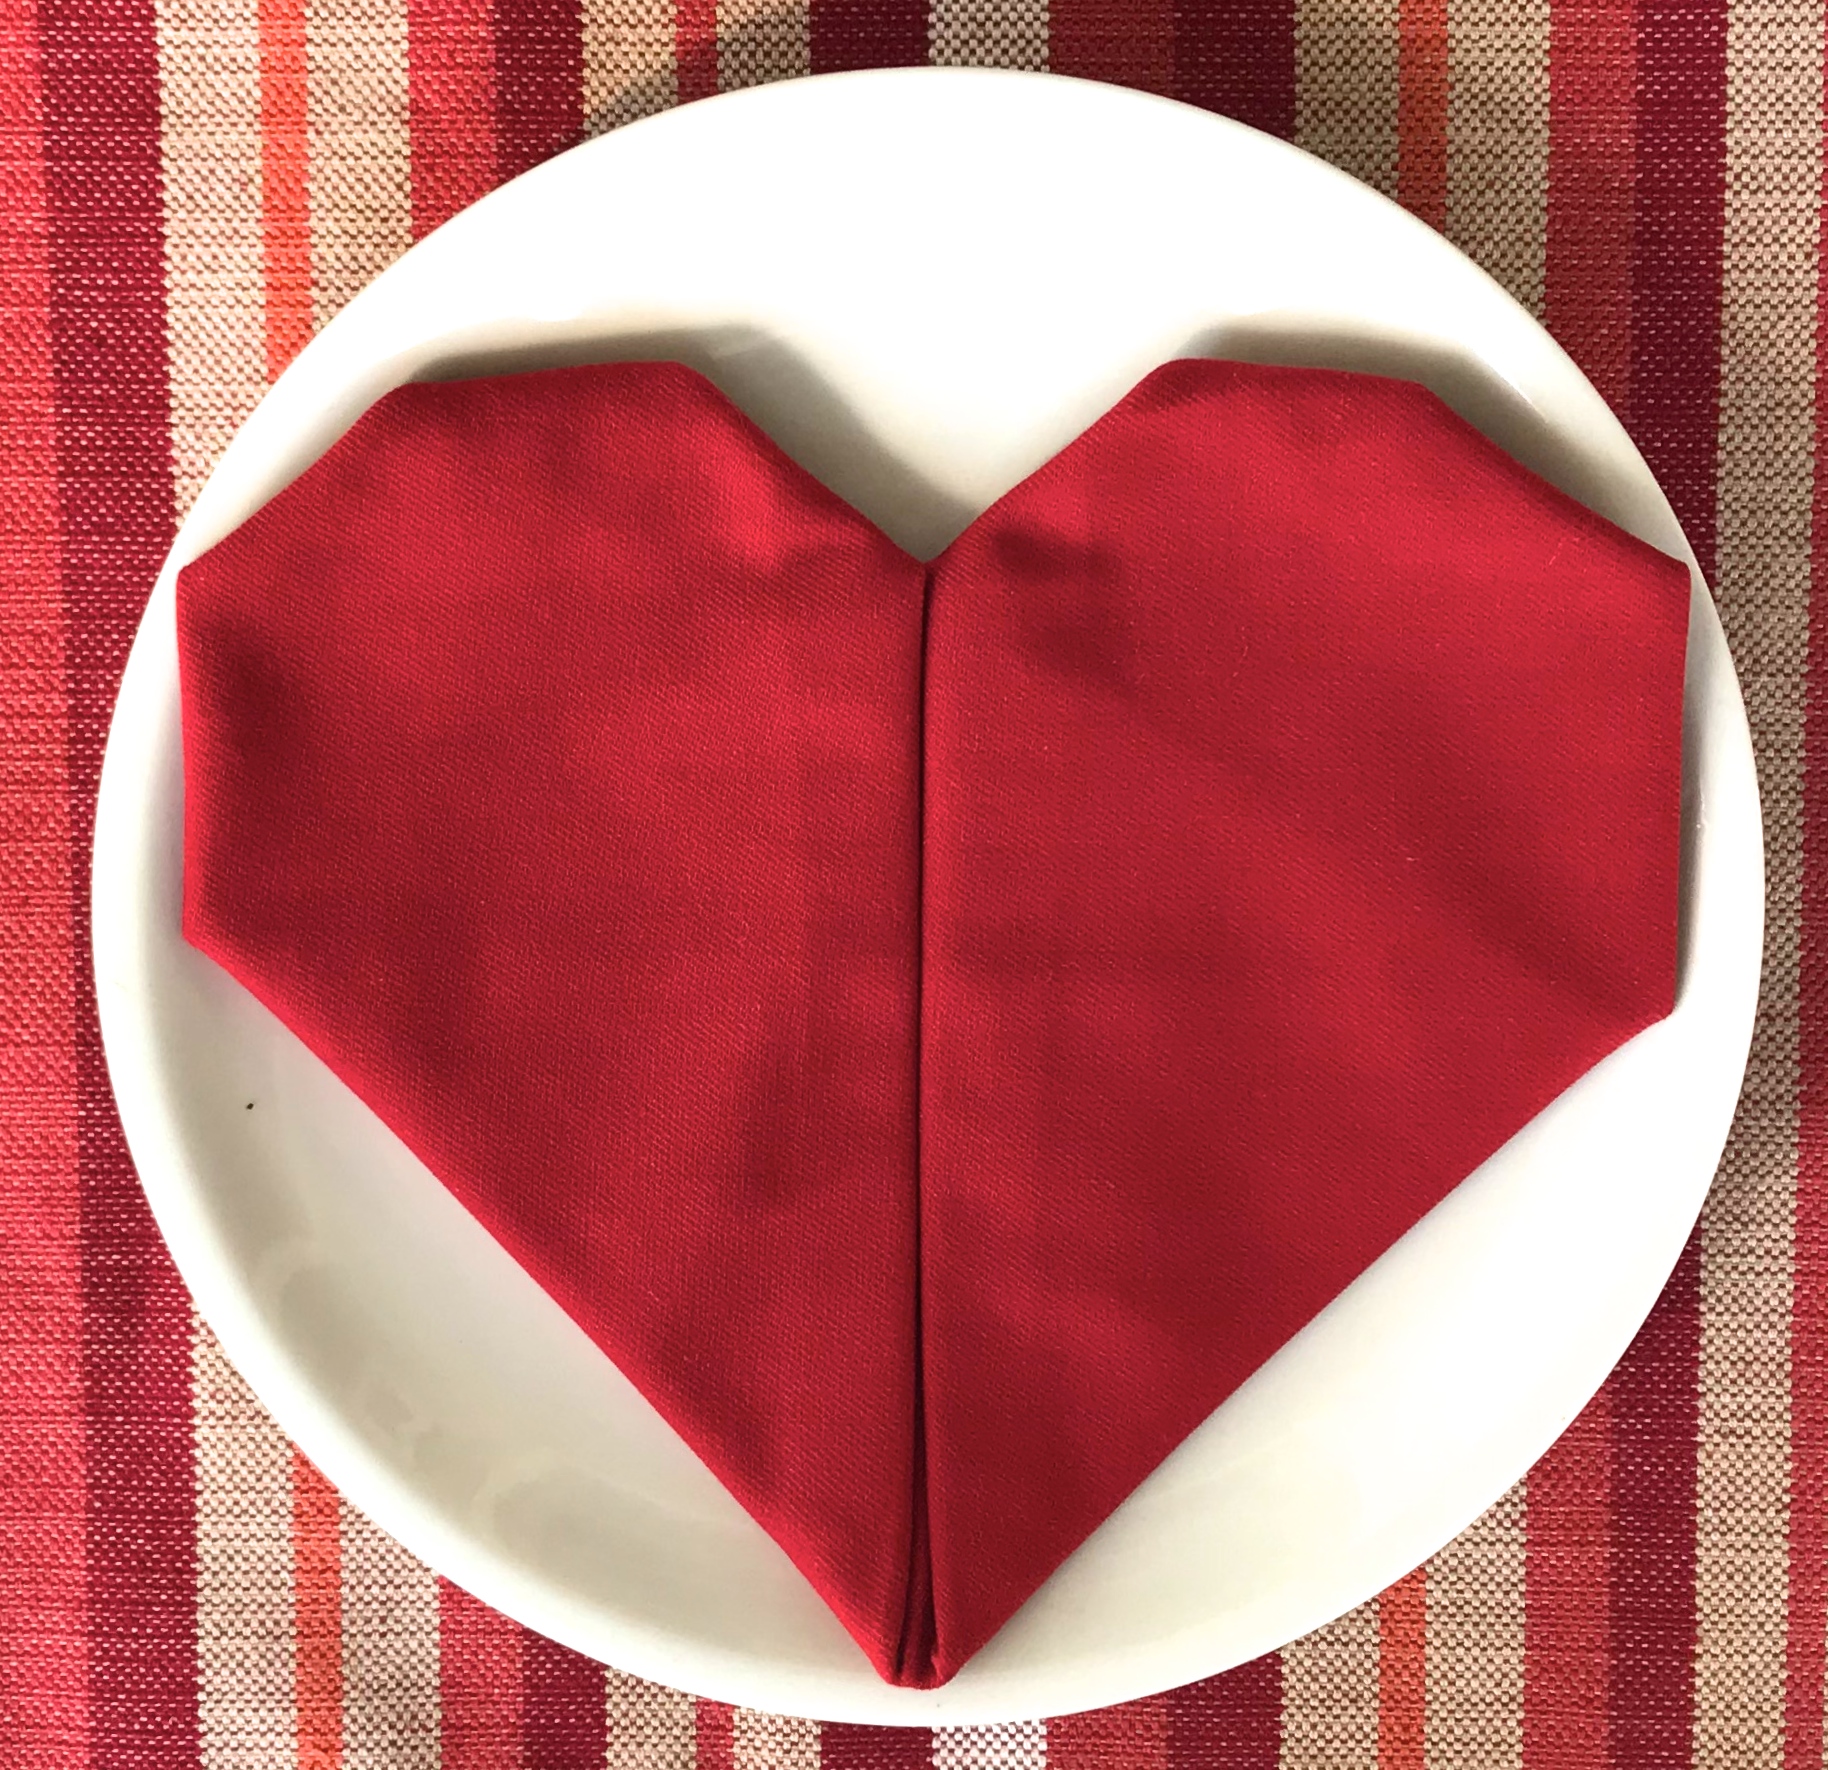
A couple of years ago Pickett’s Pearls featured this very fun Valentine’s Cake and last year we learned how to do this precious Heart Napkin Fold. Check ‘em out!

thumbnail+heart.jpg
V napkins.JPG

Fun Saying

Some people are just born funny and Ann Oliver, my friend Bradley’s mother, is one of those. A lot of it is her colorful Southern sayings. She literally says things like, “I gotta girdle up, I gotta doll up and I gotta gussy up!” So girls, this Valentine’s Day you know what to do!

Happy Valentine’s!

All You Need is Love......

I remember Valentines Day when I was in Elementary school? We would bring 24 or so little cards and pass them out to everyone. The funny thing is that we would all be so excited. (When my kids were little there was an upgrade. We attached candy to each card.)  Here are some valentines cards from my day that I found:

Some were totally sexist

Some were just plain gross

Some were extreme!

Some went straight to the point

I don't really give my family Valentines cards anymore, but this year I'm making them a Valentines cake! The idea for this cake was given to me by Suzy Wolitarski Roberts. I'm excited about it because it's a 4 ingredient recipe and a creative project! Here's what you'll need:

A Betty Crocker Cake Mix (Duncan Hines comes out spongy.)

1/2 cup of Cooking oil

3 Eggs

Water (Doesn't count as an ingredient in my book.)

2 cans of Pink icing (strawberry or white icing dyed pink.) 

You will also need to find a huge cookie sheet or cutting board and cover it with foil. (I used our broiler pan from under our stove.) 

First follow the directions on the back of the cake box. Don't make the mistake that I made and not follow them. (Often it makes things better when I change things a bit, but not this time. Just  say, we now have a couple of valentines cakes hanging around the house.) Next pour 1/2 the batter into a very well greased square pan and the other 1/2 into a greased round cake pan. 

Once the cakes are done let them cool until they are about room temperature. Then put them in the freezer for at least 15 min. You can even put them in the frig. over night. (Making the cakes cold helps the cake not fall apart and minimizes the crumb problem.) 

Next run a butter knife around the edge of each pan a few times. You then dump the square part onto a very large and flat cookie sheet or pan. Make sure the bottom of the diamond is facing you and is down at the bottom of the cookie sheet or pan. Then dump the round one onto a separate cookie sheet. Next using a large knife cut the round one in half.

You then transfer each half to the larger pan using a spatula. Next connect each round half to each side of the diamond. (You may have to shave off part of the semi-circle ones so everything fits together.) Lastly ice the heart cake with frosting and decorate it however you want. If there are cracks or gullies in the cake don't worry, icing covers a multitude of sins.

*This recipe can be made with gluten free cake mix and icing 

Happy Valentines!

All Things Flourless

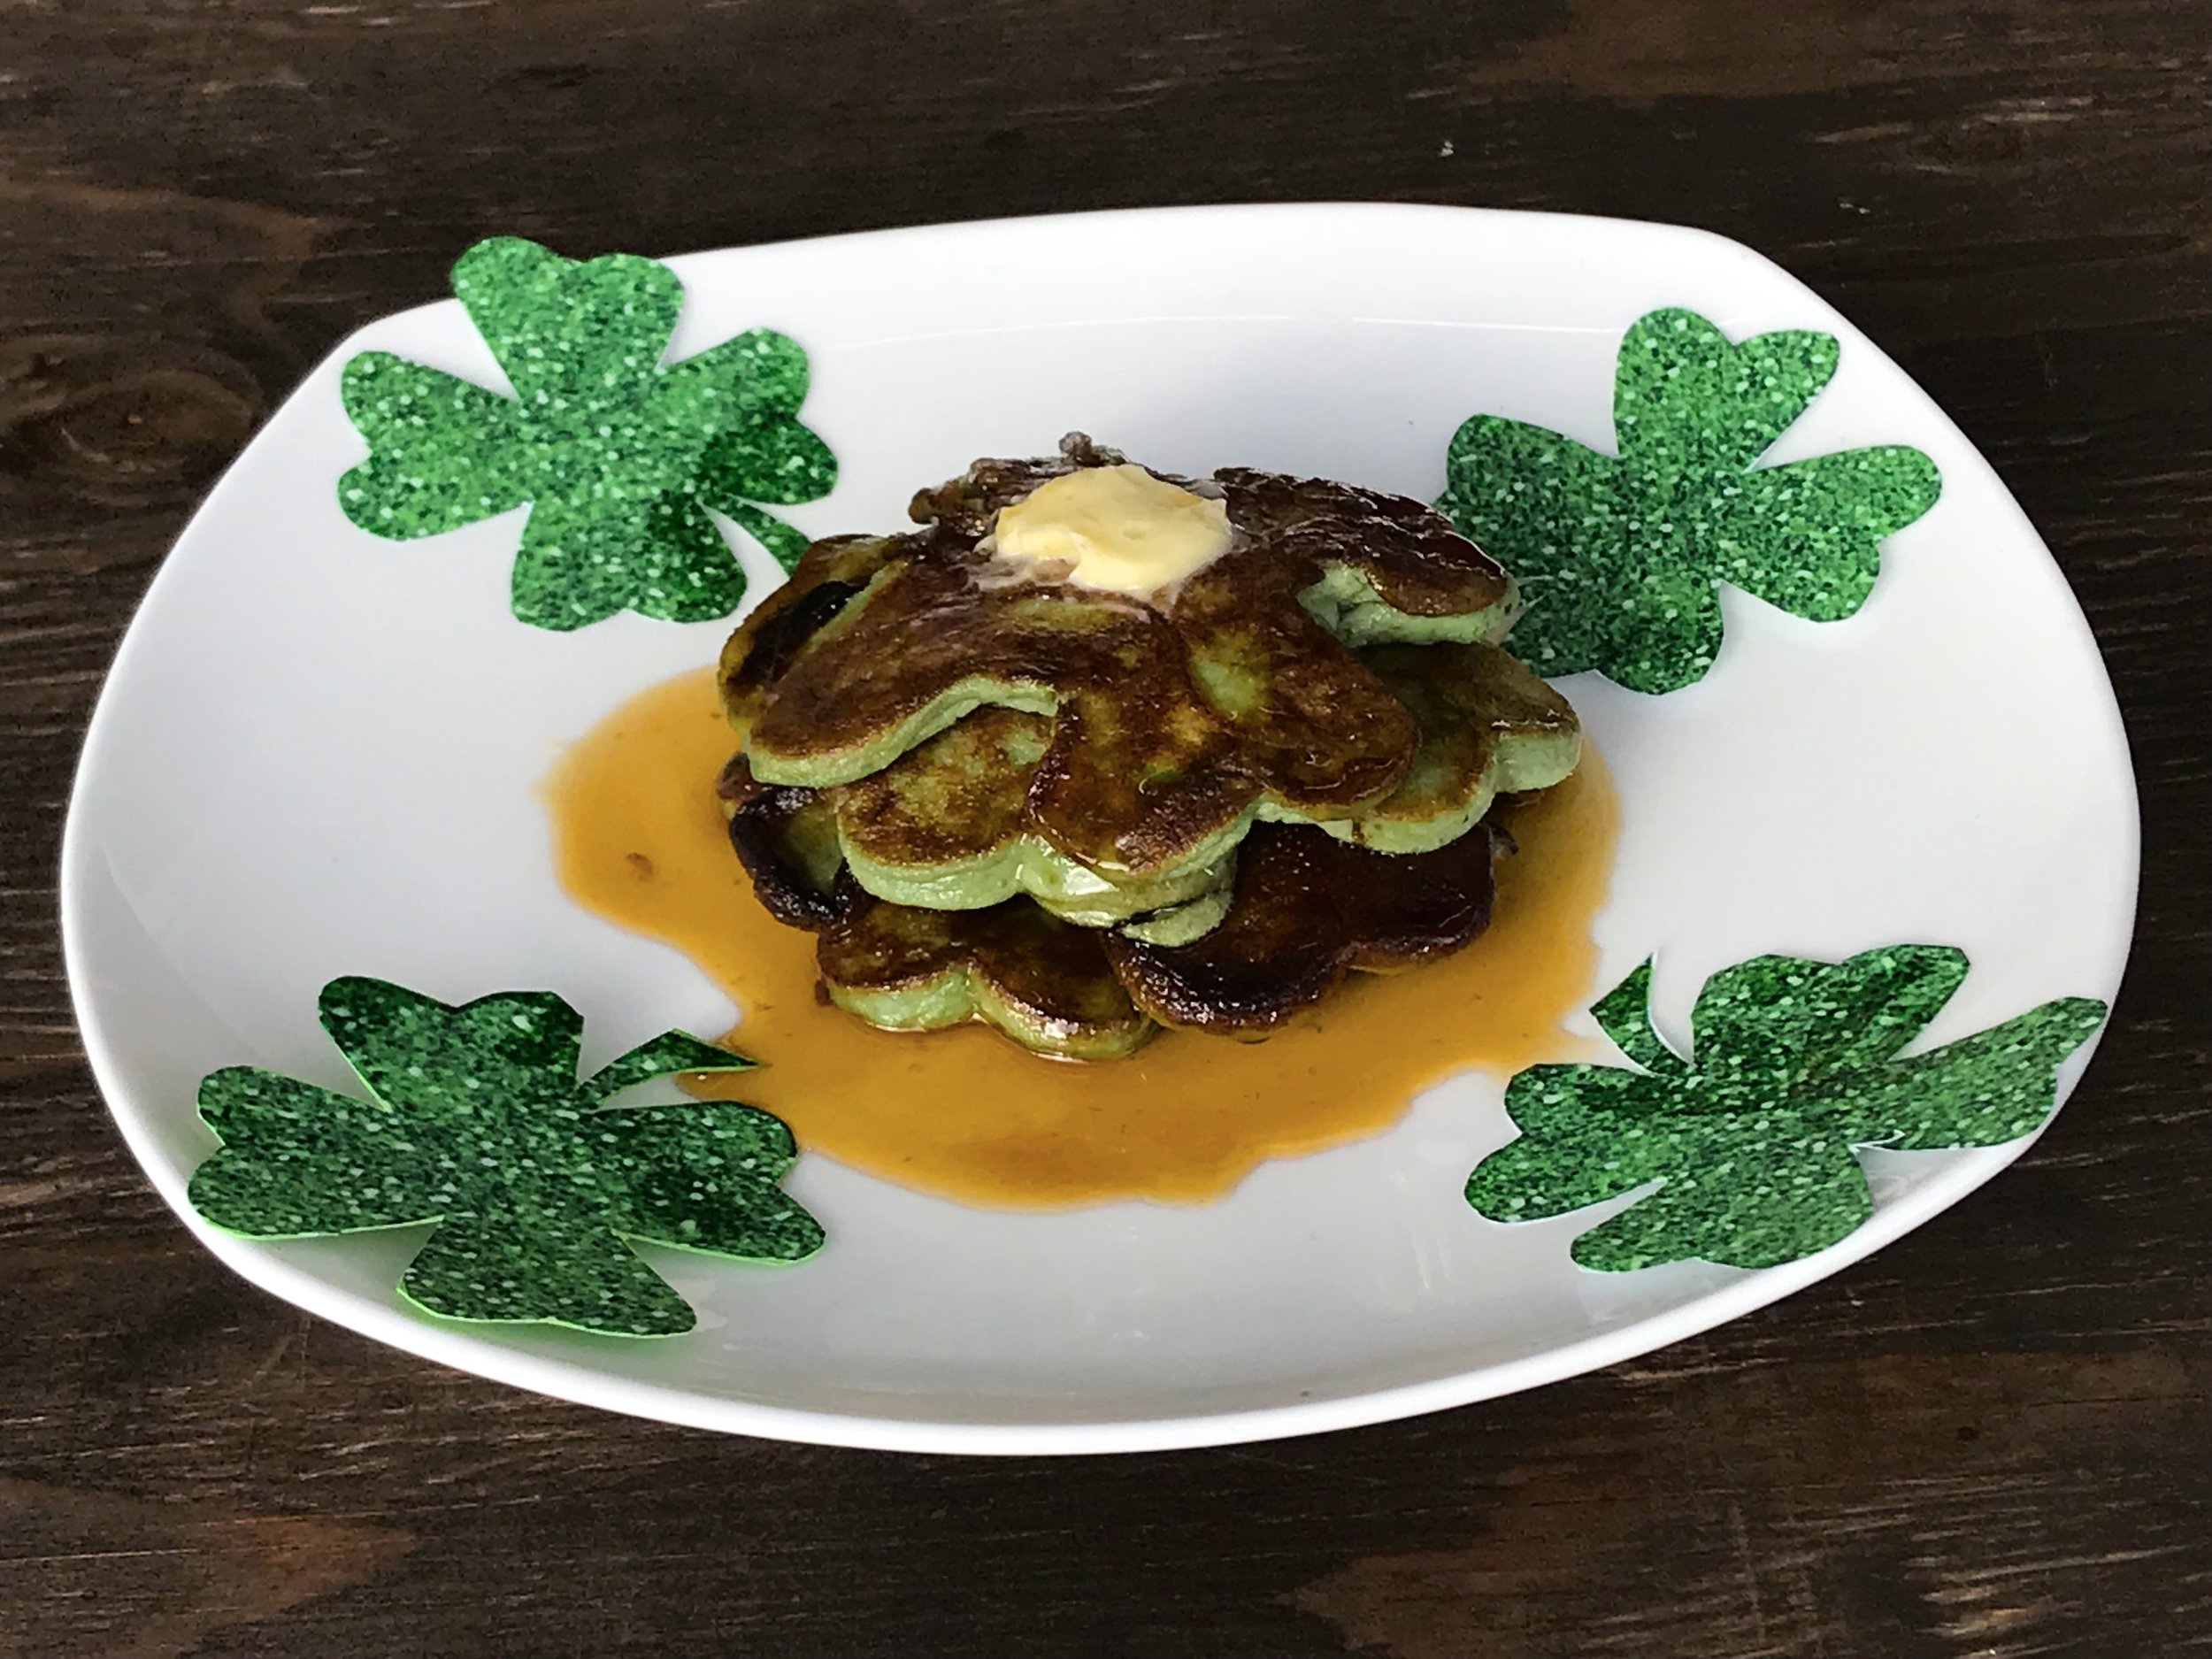
So many of us try to eat low carb (when we aren't busy chowing down on Girl Scout cookies that is), so I thought we could try another FLOURLESS pancake recipe. My daughter, Carly, loves this recipe from the book, The Vertue Method, and of course it has only four ingredients! With St. Patrick's Day coming up,  I thought it would be fun to make the pancakes green and in the shape of 4 leaf clovers! (They make green eggs and ham, and green beer so why not green pancakes?) Here’s how you make them:

pancakes.JPG

4 egg whites

2 large bananas

2 rounded scoops of vanilla protein powder

2 level teaspoons of cinnamon

Turn a stove eye on medium, put a skillet on the eye and cover the bottom with a thin film of oil. Next put all ingredients in a bullet or blender and blend well. You then make the pancakes as you would any pancakes.

I like to use a 1/4 measuring cup and pour batter into the skillet slowly so they make a nice uniform shape. I also turn the heat down to medium low after the first set of pancakes are made. In addition, a big metal spatula seems to make flipping the pancakes easier. They are good with butter and syrup, or just butter. (Recipe makes about 8 medium sized pancakes.)

A Word About Green Dye And Four Leaf Clovers

If you want to make your pancakes actually green,  you will need to add 6 or more drops of green dye to the batter. (Take it from me: if you are going to work with food dye cover your hands with something. I still have green dye under my finger nails from a week ago! ) To make the four leaf clover shapes I used a large cookie cutter from Amazon. (Amazon Prime is super convenient! Maybe too convenient!)

heart plate close-up final 2.JPG

Looking Back

Want an additional FLOURLESS (4 ingredient) pancake recipe? Check out last Spring's yummy Banana-Almond Butter Pancakes. Flourless never tasted so good!

Helpful Hints For the Home (Powerful Products)

A while back I mentioned that I would regularly throw out a 'Helpful Hint For the Home', and occasionally I run across a "Powerful Product" that I want to jump up and down about. One such product is the "Mr. Clean Magic Eraser". Remember that giant in white with one earring? He is now touting the "Magic Eraser". It gets scuff marks off your doors and walls when nothing else will. Just try it for yourself. I'm telling you it's "magic"!

Magic revised.JPG
mr. Clean 2.jpg
magic e 3.jpg

Funny Irish Story

My husband, Todd, lived in Ireland for 2 years while he was getting his M.A. in Classics. One St. Patrick's Day, he asked his landlady about how she planned to celebrate (assuming it was a big deal in Ireland). She said, "Yes--so excited--I'm going to watch the St. Patrick 's Day Parade from New York on the 'telly"!

shamrock pics.png

Happy St. Patrick's Day!

The Sweet and The Sacred

The Sweet

bunny square.jpg

As I write this, I’m in a coffee house called “The Hive”at Roehampton University in London. (My husband brought me along on a work trip:) Traveling in the U K. is easy because there’s no real language barrier but there are things I’m still figuring out I think I just tipped the gal behind the barrista the equivalent of $5, oops!) Anyway, back in “The States,” I ran across these bunny ear cupcakes on a website called “Your Cup of Cake” and had to put my 4 ingredient spin on them!

bunny final.jpg

Cupcakes:

A boxed cake mix (carrot, white or lemon is good - strawberry looks cute but tastes artificial)

regular cream cheese

eggs

Icing:

1 and 3/4 pkgs. of regular cream cheese

1 & 3/4 cup of powered sugar

Bunny Ears:

Regular sized marshmellos (They now make pink ones as well:)

Pink sprinkles

Preheat oven to 350

Step 1: Follow the box directions for making cupcakes except substitute softened cream cheese (microwaved about 20 secs. in a bowl) in place of the oil/butter required. (Michael’s has precious paper cupcake holders!) Note: Whenever baking anything, always slowly open your oven so that your creations don’t cave in. Another past oops!

Step 2. For the icing, soften the cream cheese just slightly (15 to 20 secs for the whole block) in a mixing bowl then blend in the powdered sugar using a hand mixer until smooth.

Step 3. After the cupcakes have cooled, ice by hand or better yet use a pastry bag and tip - so fun! (You can find these inexpensively at Michael’s or your regular grocery store. You can also cut the tip off of a plastic bag and use that.)

Step 4. For the bunny ears, cut chilled marshmellos diagonally (see 4.a below) then dip each one sticky side down into sprinkles. (4.b below) and place them on top of each iced cupcake.

marshmellow cut.jpg

Step 4. a

marshmellow dip.jpg

Step 4. b

The Sacred

cross sideways.jpg
cross supplies.jpg

All the bunny rabbit stuff is super fun, but Jesus got there first. My good friend Debbie Hunter got one of these succulent crosses for her B’day, and I thought it would be great to make them to celebrate Easter and the rssurection! Here’s what you will need:

A moss covered cross. (You can get these for $6.50 on-line at the Wreath Shop or on Amazon (brown moss) for $11.00 - They both take about 1 week to arrive so you best get ordering:)

Lots and lots of small succulents (Walmart has really good prices - I ordered mine on-line.) You will want around 30 succulents cuttings (like the ones in the picture opposite).

Scissors

Old fashioned hair pins (not bobby). These seem to work better than the silver floral pins.

Opt. glue gun and sticks

Step 1. Clip a bunch of succulents leaving a half inch or so if possible of stem. When needed you can remove some of the leaves at the base of the clippings to create more of a clean stem. (if you are working with small individual succulents and can get some of their roots, that is even better.)

Step 2. Use scissors to punch holes in the moss to make a place for each succulent stem.

Step 3. Secure each succulent with a hair pin doing your best to go around the leaves without puncturing them. The smaller clippings only need one hairpin.

Step. 4 You can layer the succulents. For example, it looks really cool when you use mini succulent buds in the center of a larger succulent. You can use hair pins on top succulents or a glue gun to secure them. Glue guns also work great to reattach leaves that have come off.

*You can hang your cross by simply punching a hole in the back of it and putting it on a nail.

** The cross will last longer if you keep it outside in indirect sunlight (or even just at nigh)t and lightly spray water all over it at least once a week.

*** If the moss turns brown and you don’t like that look, just cover all the brown with more succulents.

Cross+regular.jpg

Looking Back

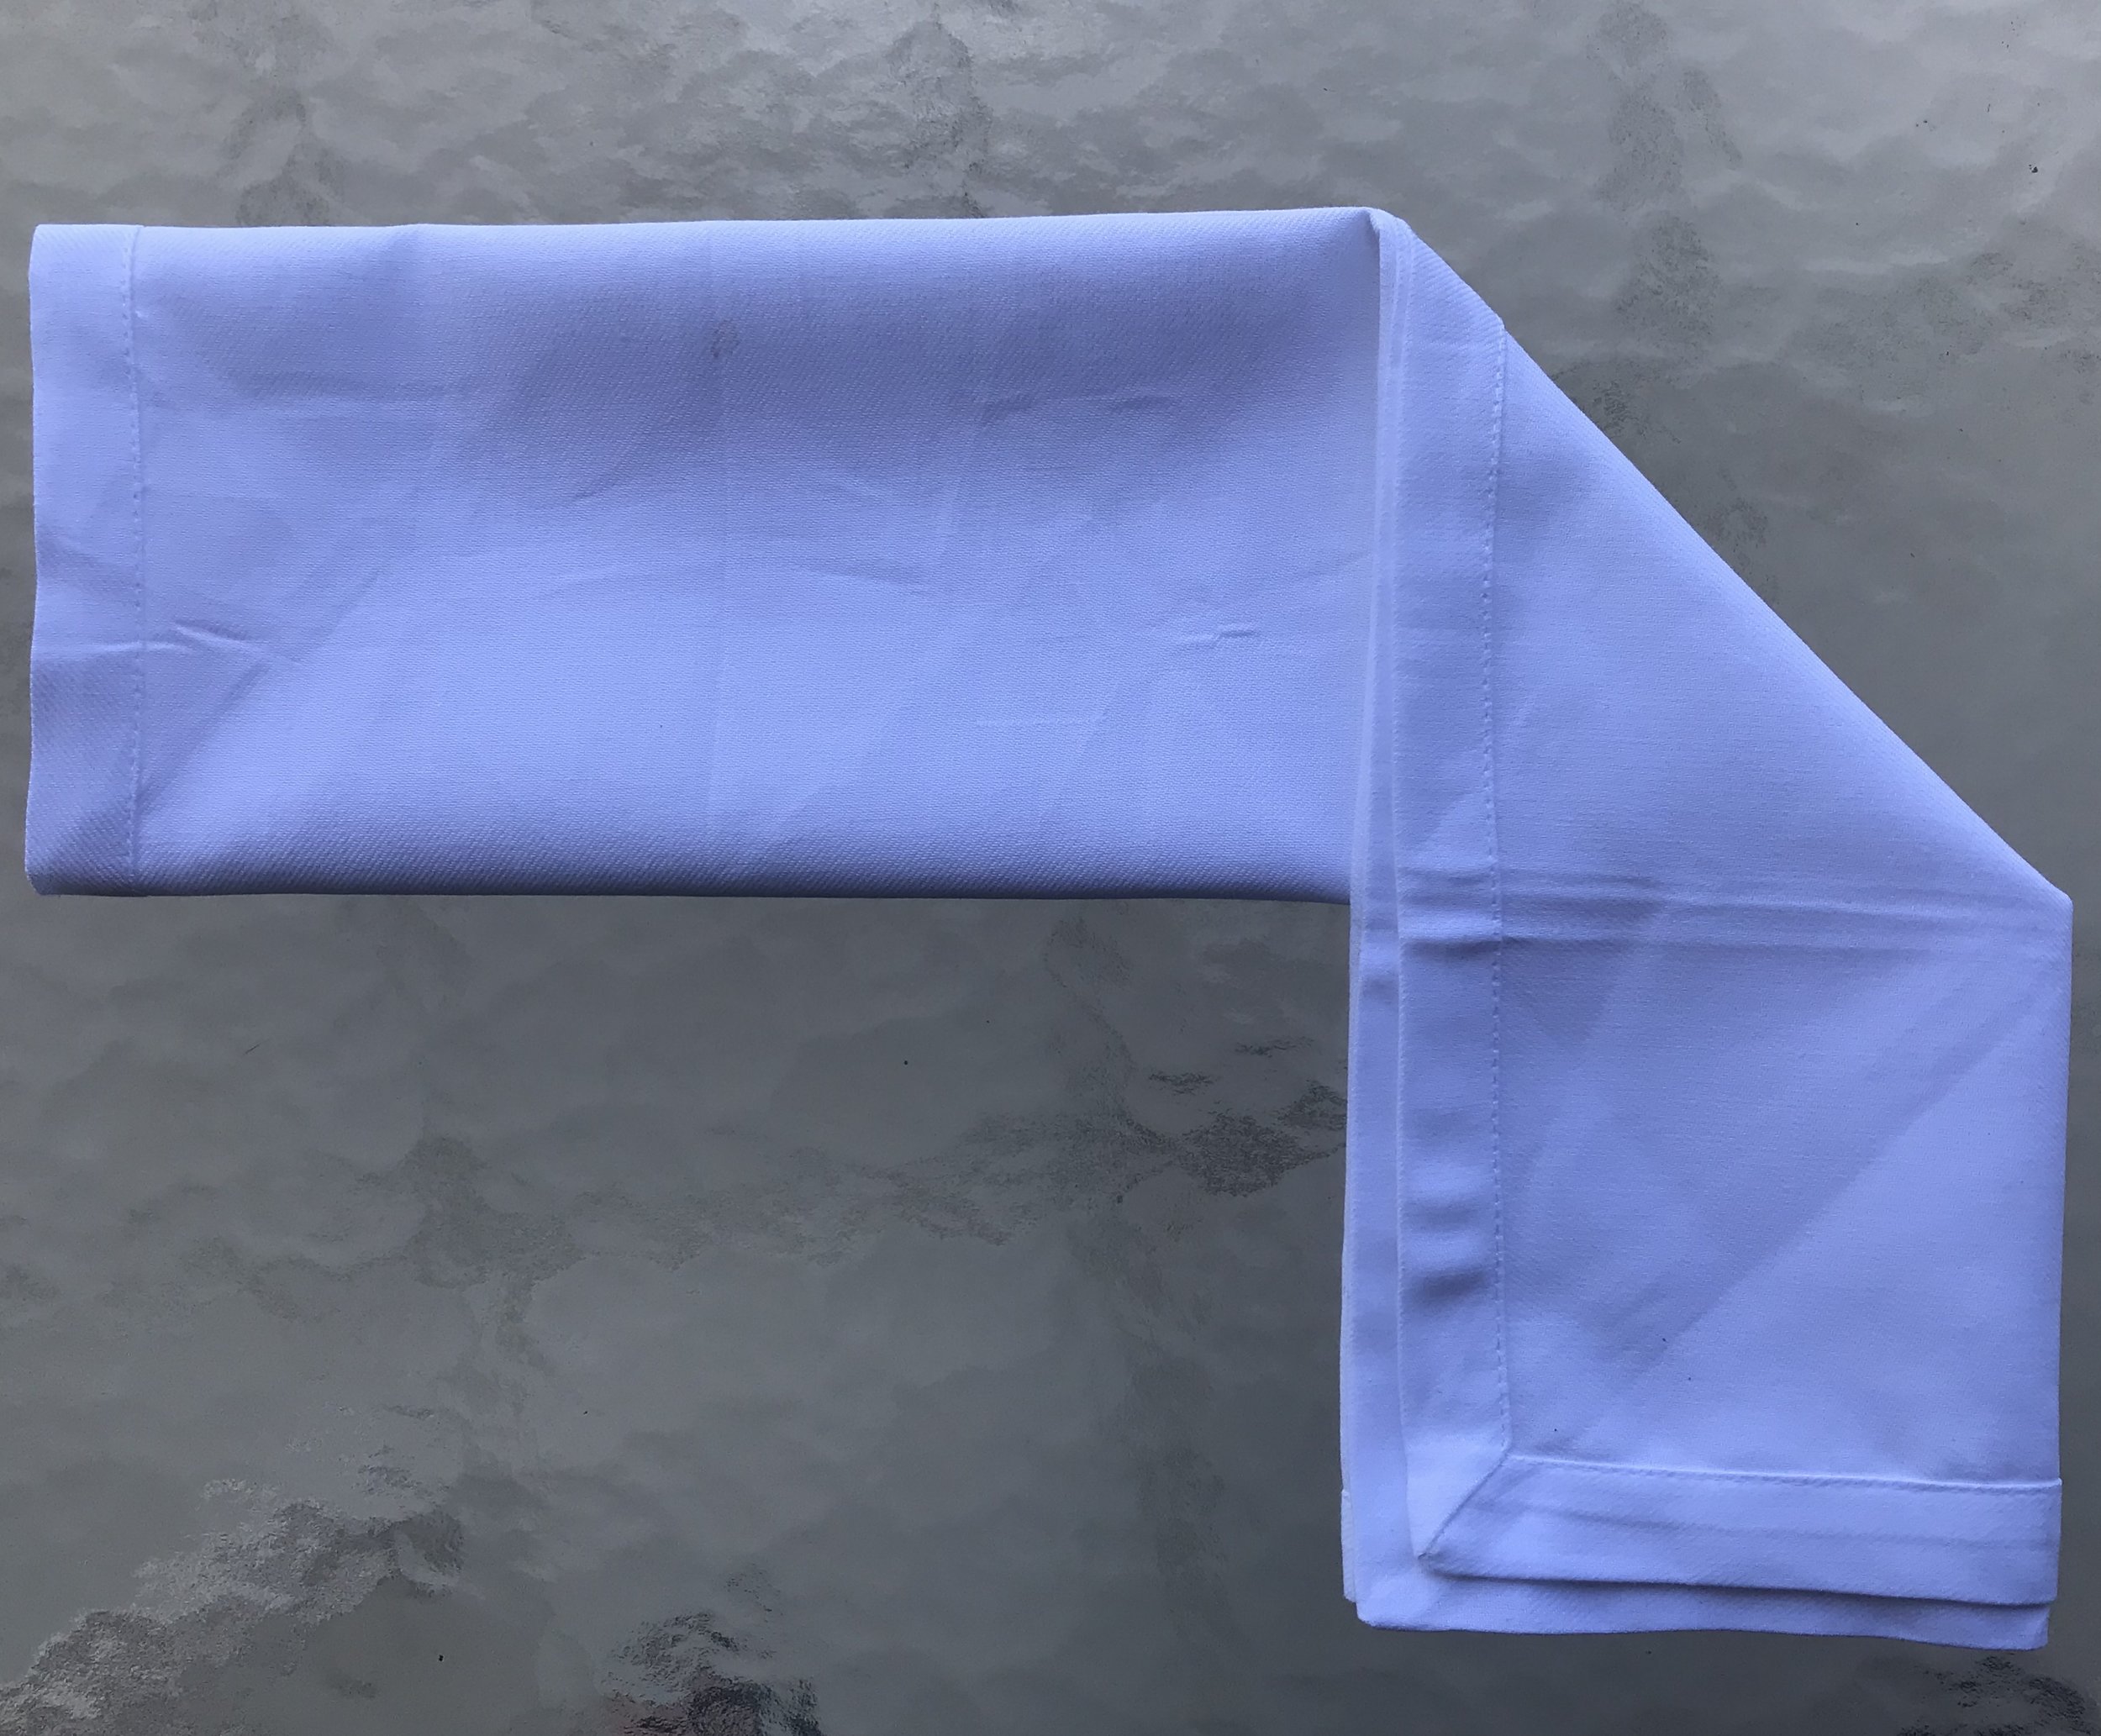
Last year we did these precious Bunny Napkin Folds - Total crowd pleasers and easy to do!

3 bunnies pic final.jpg